
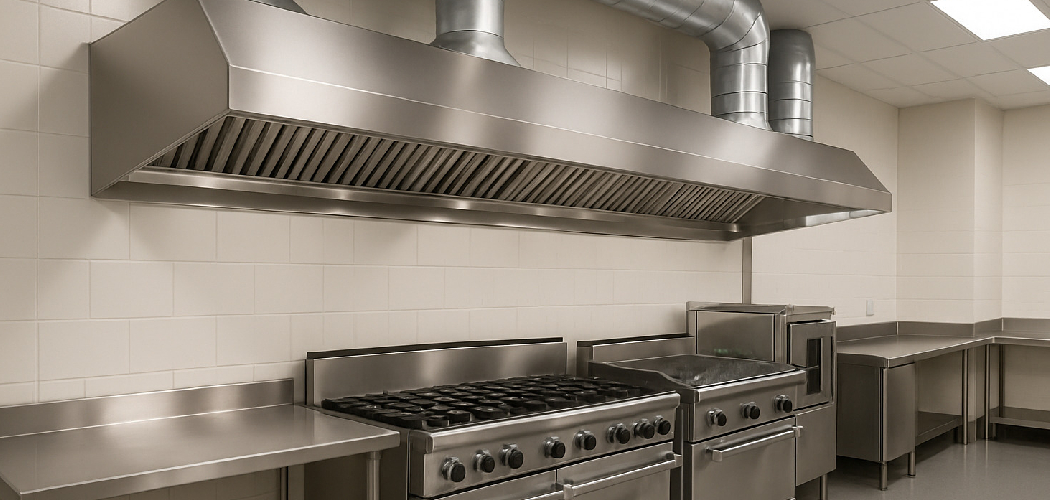

A kitchen hood that vents outdoors does more than clear smoke. It helps remove grease, heat, steam, and cooking odors before they spread through your home. If you cook often, especially with high heat, a proper ducted range hood can make your kitchen feel cleaner, cooler, and easier to maintain. It can also protect cabinets, walls, and ceilings from moisture and sticky buildup over time.
If you are new to home projects, learning how to vent kitchen hood outside may sound technical at first. The process becomes much easier when you break it into clear steps, choose the right duct path, and follow basic safety rules. This guide will show you what to plan, what tools to gather, and how to complete the job with confidence.
Why Venting Matters
Venting a kitchen hood to the outside improves both comfort and air quality. When you fry, boil, or sear food, your kitchen fills with heat, moisture, airborne grease, and lingering smells. A recirculating hood can trap some particles, but it does not move that air out of the house. An exterior vent does.
That difference matters most when you cook often or use gas burners. Better ventilation can reduce condensation on windows, help control greasy film on surfaces, and keep the room from feeling heavy after a meal. For a first-time homeowner, this is also a useful upgrade that supports cleaner indoor air and better long-term kitchen maintenance.
Tools and Materials You’ll Need
Before you begin, gather your tools and supplies so the work flows smoothly:
- Range hood rated for ducted installation
- Rigid metal ductwork, usually 6-inch or 7-inch diameter
- Wall cap or roof cap with backdraft damper
- Duct elbows and connectors as needed
- Foil HVAC tape for sealing duct joints
- Measuring tape
- Stud finder
- Drill and drill bits
- Jigsaw, reciprocating saw, or hole saw
- Screwdriver or drill driver
- Level
- Pencil or marker for layout lines
- Safety glasses, gloves, and dust mask
- Exterior-grade caulk
- Mounting screws and wall anchors if required
- Optional: a headlamp for better visibility inside cabinets or attic spaces
Step-by-Step Guide on How to Vent Kitchen Hood Outside
Step 1 – Choose the Best Vent Path

Start by figuring out where the air will exit your home. In most kitchens, the shortest and straightest route gives the best airflow. That may mean venting through an exterior wall behind the hood, up through a cabinet and out the wall, or through the ceiling and roof. Each extra bend slows airflow, so keep turns to a minimum.
Stand near the cooktop and picture the path the duct will follow. Listen for common obstacles like plumbing lines, wiring, studs, or ceiling joists that could block the route. A stud finder helps here, but you may also need a small inspection hole to confirm what is hidden behind the surface. Good planning at this stage saves time, cuts cleaner holes, and helps the hood perform the way it should.
Step 2 – Confirm Hood Size and Duct Requirements
Before cutting anything, check the hood manual for duct size, mounting height, and venting rules. Many range hoods use 6-inch round ducting, but some larger or more powerful units require 7-inch or even 8-inch ducts. Using the wrong size can reduce suction and create more noise.
Pay close attention to the recommended distance between the hood and the cooktop. If the hood sits too high, it may not catch steam and smoke well. If it sits too low, it can feel cramped and unsafe. This is also the point where many beginners first understand how to vent kitchen hood outside correctly: the hood, duct diameter, and vent cap all need to work together as one system.
Step 3 – Mark the Mounting and Duct Openings
Once you know the route, mark the hood position on the wall. Use a level so the unit sits straight, then mark the screw holes and duct opening based on the template from the manufacturer. Measure twice and compare everything against the cooktop centerline. Even a small shift can make the finished installation look off.
If the duct will pass through a cabinet, mark the cabinet bottom and top carefully. If it will exit through a wall, mark the center point for the vent opening and check the exterior side before cutting. You want to avoid siding seams, trim pieces, and hidden obstructions. A clean layout gives you a much smoother install and reduces the risk of patchwork later.
Step 4 – Cut the Interior and Exterior Openings
Now it is time to cut. Drill a pilot hole first where the duct opening will go. That small hole helps you confirm the location from the opposite side of the wall or ceiling. Once you know the placement is correct, use the proper saw to cut the opening slowly and cleanly.
Expect dust, noise, and a little resistance, especially if you are cutting through drywall, plywood, or exterior sheathing. Work with steady pressure instead of forcing the blade. If you reach insulation, wiring, or another surprise, stop and inspect before continuing. This part can feel tense for beginners, but careful cutting is a big part of learning how to vent kitchen hood outside without creating avoidable repairs.
Step 5 – Install the Exterior Vent Cap
With the opening ready, install the wall cap or roof cap on the outside of the home. This piece lets air escape while helping block rain, pests, and drafts. Make sure the built-in damper swings freely. If it sticks, the hood will not exhaust well.

Set the cap in place and fasten it securely. Then seal around the flange with exterior-grade caulk to keep water out. On siding, take your time so the cap sits flat and looks neat. On a roof installation, proper flashing matters even more because small gaps can lead to leaks. This is one of the most important weatherproofing steps in the whole project.
Step 6 – Mount the Range Hood Securely
Bring the hood into position and attach it according to the manual. Some models mount directly to wall studs, while others hang from a bracket first. If you are installing an over-the-range microwave hood combo, double-check the support requirements because those units are heavier and often need two people.
Hold the hood level as you fasten it. You should feel it pull tight against the wall or cabinet base without wobbling. Once mounted, test the fit visually from a few angles. A hood that sits square not only looks better, but also lines up more smoothly with the duct connection. Take your time here, because a rushed mount can make the next steps harder.
Step 7 – Connect and Seal the Ductwork
Attach the rigid metal duct between the hood outlet and the exterior cap. Use the fewest elbows possible and keep the run as short as you can. Smooth metal duct is better than flexible duct for kitchen ventilation because it resists grease buildup and supports stronger airflow.
Fit each section together tightly, then seal all seams with foil HVAC tape. Do not use regular cloth duct tape, which breaks down over time. As you build the duct run, check that nothing pinches or sags. Air should move through the line with as little resistance as possible. When the joints are sealed well, you get better suction, less noise, and fewer chances for greasy air to leak into walls or cabinets.
Step 8 – Handle Electrical Connections Safely
If your hood plugs into an outlet inside a cabinet, this step may be simple. If it needs hardwiring, turn off power at the breaker first and follow local electrical code. Match the wires carefully, secure them with wire connectors, and tuck them neatly into the electrical box.
If you feel unsure about this part, hiring a licensed electrician is a smart choice. The ducting side of the project is manageable for many beginners, but electrical work leaves less room for guesswork. Once power is restored, turn on the hood light and fan to confirm everything responds properly. You want the unit to run smoothly before you close up surrounding trim or finish work.
Step 9 – Test Airflow and Finish the Installation
The final step is to test the system in real conditions. Turn on the fan at each speed and listen. A steady hum is normal, but rattling or whistling usually means a loose duct joint or misaligned damper. Hold a tissue near the filters to confirm the hood is pulling air upward.
Then go outside and check the vent cap while the fan is running. You should feel warm air moving out, and the damper should open freely. If the airflow seems weak, inspect the duct path for extra bends, crushed sections, or a mismatch in duct size. Once everything works, reinstall covers, clean the work area, and enjoy a kitchen that clears smoke and steam much faster.
Common Mistakes
One common mistake is choosing a duct route with too many turns. Every elbow adds resistance, and a long winding path can make even a strong hood feel weak. Beginners often work around obstacles instead of rethinking the route, but a shorter path usually gives much better results.
Another issue is using the wrong duct material. Flexible duct may seem easier to install, but it traps grease more easily and restricts airflow. Smooth rigid metal duct is the safer and more effective choice for most kitchen exhaust setups.
Many people also skip proper sealing. If duct joints are left loose or sealed with the wrong tape, greasy air can leak into cabinets, walls, or attic spaces. Over time, that can create odors, dust buildup, and extra cleaning problems. Foil HVAC tape is the right product for these seams.
Poor exterior cap placement causes trouble too. If the vent exits too close to a window, soffit, or walkway, odors and moisture can drift back toward the house. Finally, some installers ignore the hood’s manual and assume all units work the same way. Mounting height, duct size, and support details vary by model, so following the manufacturer’s instructions is essential.
Expert Tips
If you want the best performance, keep the duct run short, straight, and properly sized from start to finish. That one decision affects airflow more than most people expect. It also helps to choose a hood with enough CFM for your cooking style. If you cook with high heat often, a more powerful fan may be worth it.
Install the hood lighting and filters before your final test so you can check the full setup at once. After installation, clean the filters on schedule and inspect the outside cap every few months. A simple maintenance routine keeps the fan quieter, improves airflow, and helps your vent system last longer.
Frequently Asked Questions
Can I vent a kitchen hood through the wall instead of the roof?
Yes, and in many homes that is the easiest option. A wall vent often allows for a shorter and straighter duct run, which improves airflow. You just need enough clearance on the outside wall for a proper vent cap and damper. Always check for studs, wiring, and plumbing before cutting.
What kind of duct should I use for a kitchen hood?
Rigid metal duct is the best choice for most kitchen hood installations. It supports better airflow, holds its shape, and is easier to keep clean than flexible duct. Smooth interior surfaces also reduce grease buildup. Try to match the duct diameter recommended by the hood manufacturer for the best results.
Do I need a professional to install a vented range hood?
Not always. Many homeowners can handle the mounting and ductwork if the route is simple and tools are available. Electrical work is the part that often leads people to call a professional. If you are unsure about wiring, roof penetration, or code requirements, bringing in help is a smart move.
How high should a kitchen hood be above the stove?
The correct height depends on the hood model and the type of cooktop. Many installations fall somewhere around 24 to 30 inches above the cooking surface, but you should always follow the manufacturer’s instructions. Proper height helps the hood capture smoke and grease without making the cooking area feel cramped.
Why does my kitchen hood seem noisy after installation?
Noise often comes from restricted airflow, loose duct connections, or a damper that is not opening fully. A duct run with too many bends can also make the fan work harder and sound louder. Check that the duct size matches the hood, all joints are sealed, and the exterior cap opens freely when the fan runs.
Conclusion
Installing a ducted range hood is one of the most practical ways to improve your kitchen. It removes smoke, heat, grease, and moisture at the source, which helps protect your home and makes cooking more comfortable. The key is to plan the vent path carefully, use the right duct size and materials, seal every joint, and test the system before calling the job done.
If you are a first-time DIYer, take the project one stage at a time. Measure carefully, follow the hood manual, and do not rush the cuts or electrical work. Once you understand how to vent kitchen hood outside, the process feels much less intimidating and far more manageable. Start by mapping your duct route today, and you will be much closer to a cleaner, better-ventilated kitchen.

About
Nick Hall has spent the last seven years working at the intersection of kitchen design and home repair — first as a design assistant at a residential renovation studio, then as a freelance writer covering everything from cabinet layouts to leaky faucet fixes.
Her approach is simple: kitchens should look good and function well. That means she’s just as comfortable talking about color palettes and counter materials as she is walking readers through how to fix a wobbly cabinet hinge or troubleshoot a garbage disposal.
Nick has worked directly with homeowners on small-space kitchen makeovers, budget-conscious renovations, and the kind of everyday repairs that don’t need a contractor — just the right instructions. She writes from experience, not theory, and tests most of the fixes and tips she shares before publishing them.
When she’s not writing, Nick is usually hunting for mid-century kitchen finds at estate sales or helping friends plan their own renovations. She lives in Columbus, Ohio.