
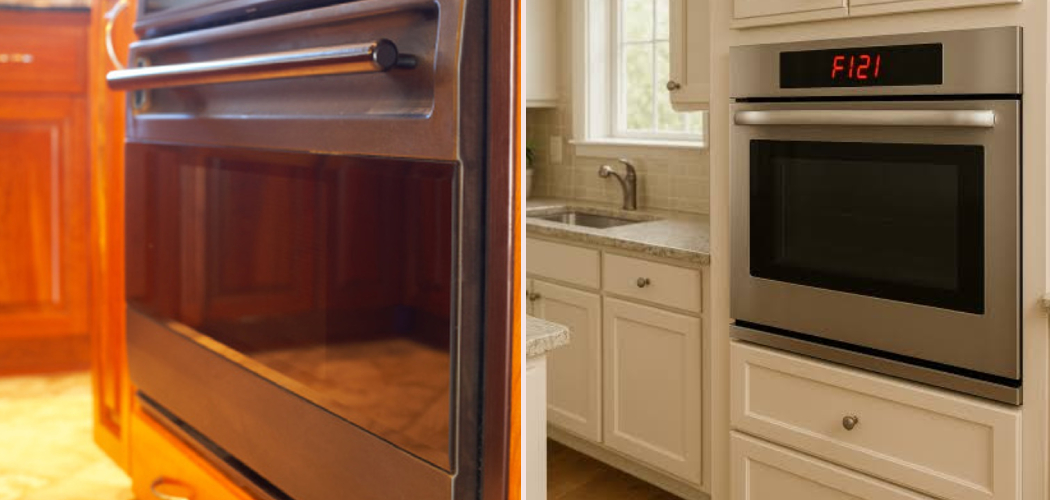
A squeaky or stiff oven door can make everyday cooking feel awkward, especially when the door resists movement or drops unevenly. In many cases, the issue comes from dry hinge points, grease buildup, baked-on grime, or a hinge mechanism that has not had basic maintenance in years. Learning how to lubricate oven door hinges helps reduce friction, protect the hinge arms, and keep the door moving smoothly without forcing it.
You do not need to be an appliance technician to handle this task. You do need the right lubricant, a careful hand, and a clean work area. This guide explains how to inspect, clean, lubricate, and test oven door hinges safely and confidently.
Why Learning to Lubricate Oven Door Hinges Matters
Oven door maintenance matters because the door does more than open and close. It helps seal heat inside the oven, protects your hands from hot air, and supports safe cooking. When hinges stick, squeak, or pull unevenly, the door may feel heavy, noisy, or out of alignment.
This skill is also useful for campers and outdoor beginners who cook in RVs, cabins, trailers, and compact camp kitchens. Smaller ovens often face more dust, humidity, vibration, and temperature changes than home appliances. A little hinge care can reduce opening resistance, prevent sudden door drops, and make cooking in tight spaces safer. It also helps you spot damage early before a simple squeak becomes a bigger repair.
Tools and Materials You’ll Need
Gather everything before you start so you do not have to leave the oven door open while searching for supplies. Use products that can handle heat and will not leave sticky residue near the hinge area.
- High-temperature lubricant approved for appliances
- Silicone-based lubricant or dry graphite, if allowed by your manual
- Clean microfiber cloths or paper towels
- Mild dish soap and warm water
- Soft toothbrush or small nylon brush
- Cotton swabs for tight hinge slots
- Work gloves for grip and hand protection
- Flashlight for seeing hinge arms clearly
- Owner’s manual for lubricant guidance
- Optional: painter’s tape to mark hinge positions before inspection
Avoid cooking oil, petroleum jelly, or random household sprays unless your appliance manual specifically approves them.
Step-by-Step Guide on How to Lubricate Oven Door Hinges
Step 1 – Make Sure the Oven Is Off and Cool
Start with safety. Turn the oven off, check the knobs or control panel, and wait until every surface feels cool. Hinges can stay warm longer than the door handle, especially after baking at high heat.
Place your hand near the oven door without touching the metal first. If you feel heat rising, give it more time. A cool oven lets you work slowly and keeps cleaning cloths, lubricant, and your hands safe.
Before you begin how to lubricate oven door hinges, read your manual if you have it. Some brands recommend a specific product or warn against applying lubricant near certain parts.
Step 2 – Open the Door and Inspect the Hinges
Open the oven door slowly and listen. A dry hinge may squeak, scrape, or creak as the door moves. A sticky hinge may feel tight at one point, then suddenly release.
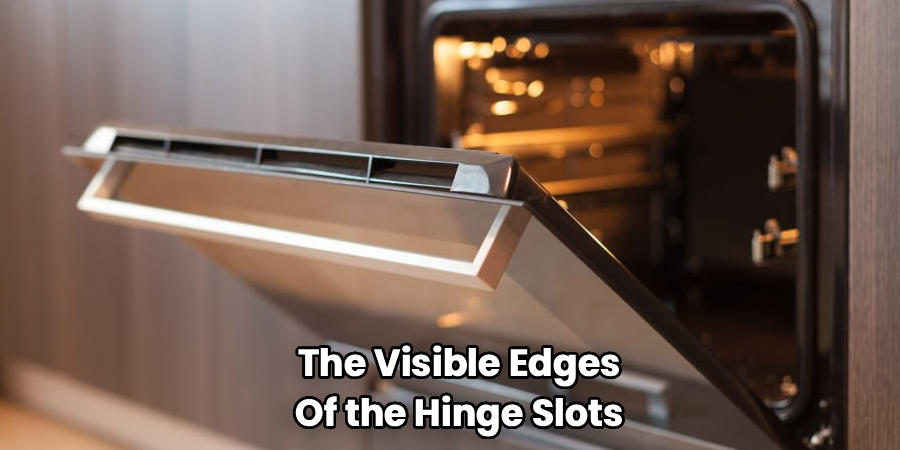
Look at both sides where the hinge arms slide into the hinge slots. Use a flashlight so you can see grease buildup, residue, crumbs, rust spots, or bent metal. The hinge mechanism should look even on both sides.
Do not remove the door unless the manual explains how and you feel comfortable doing it. Many doors are heavy and can shift quickly. For basic lubrication, you can usually inspect and treat the visible hinge areas with the door attached.
Step 3 – Remove Surface Grime Around the Hinges
Clean before you lubricate. If you add lubricant over baked-on grime, the hinge area can become sticky and collect more dirt. That makes the oven door squeak return faster.
Dip a cloth in warm, soapy water and wring it out well. Wipe around the hinge slots, lower door edges, and nearby frame. Use a soft toothbrush to loosen dry crumbs or greasy film, but do not force bristles deep into the hinge assembly.
Keep water away from electrical parts and control areas. The goal is light cleaning, not soaking. Once the grime lifts, dry the area fully with a clean cloth before applying any lubricant.
Step 4 – Identify the Correct Lubrication Points
Look for the points where metal moves against metal. These are usually along the hinge arms, pivot points, and the visible edges of the hinge slots. You may notice shiny rub marks where friction has worn away residue.
Do not spray the entire door frame. More lubricant does not mean better movement. It can drip, smoke, smell, or attract dust if it reaches hot surfaces or insulation.
Use your manual as the final guide. Some ovens have enclosed hinges that need very little product. Others may call for dry graphite instead of a wet lubricant. If the hinge looks broken, cracked, or loose, stop and consider professional service.
Step 5 – Apply the Proper Lubricant in Small Amounts
Apply a tiny amount of high-temperature lubricant to the moving hinge points. If you use a silicone-based lubricant, aim carefully and use only what you need. If you use graphite, apply a light dusting where the hinge moves.
The safest part of how to lubricate oven door hinges is using less than you think. A small amount can reduce friction, while too much can run into places it should not go.
Never use cooking oil, petroleum jelly, butter, or general household sprays unless the oven manufacturer approves them. These products can gum up, smell bad, smoke, or leave residue when exposed to heat. Appliance care depends on heat-safe materials.
Step 6 – Move the Door Gently to Distribute the Lubricant
Once you apply the lubricant, move the door slowly. Open it halfway, then close it most of the way without letting it slam. Repeat this gentle motion several times.
Listen as you move it. The squeak may fade, and the movement may feel smoother after a few passes. You may also feel the closing tension even out as the lubricant reaches the contact points.
Do not force a stuck door. If the hinge catches hard, stop and inspect again. Forcing it can bend hinge arms or worsen door alignment. Smooth motion should come from cleaning and lubrication, not pressure.
Step 7 – Wipe Away Extra Lubricant and Residue
After working the door back and forth, wipe the hinge area again. Use a clean cloth or cotton swab to remove extra lubricant from the door frame, hinge slots, and lower trim.
This step matters because excess product can attract dust, drip onto warm surfaces, or leave a burnt smell the next time you use the oven. The hinge should look clean, not wet or greasy.
Check the floor beneath the door, too. A tiny drop can make tile or vinyl slippery. If you notice residue on the glass, gasket, or painted finish, wipe it right away with a mild cleaner approved for that surface.
Step 8 – Test Door Movement and Alignment
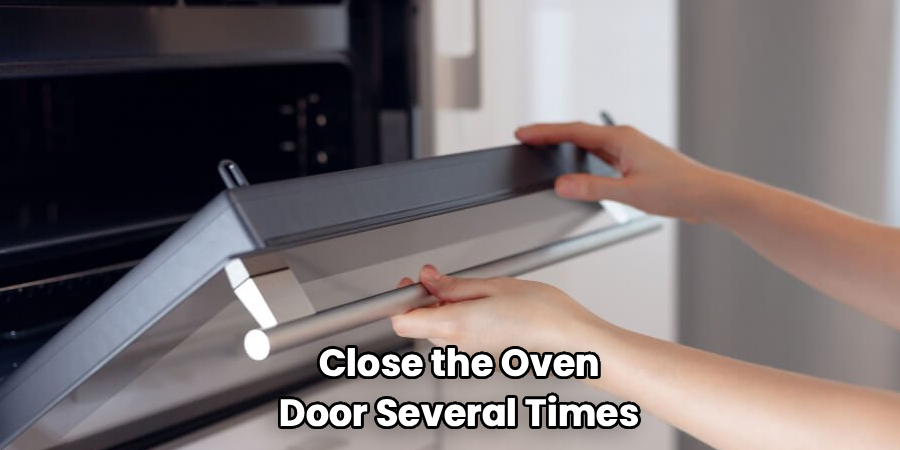
Open and close the oven door several times. It should move with less noise and steadier resistance. The door should not pull to one side, scrape the frame, or spring shut too fast.
Look at the gap around the door. It should appear even from side to side. The gasket should meet the frame without obvious bending or pinching. If the door still feels crooked, lubrication may not solve the whole problem.
Heat the oven only after you finish wiping away residue. During the first use, stay nearby and notice any unusual smell. A faint odor from recent cleaning may pass, but smoke or a strong chemical smell means you should turn the oven off and inspect again.
Common Mistakes When Lubricating Oven Door Hinges
One common mistake is using the wrong product. Cooking oil, petroleum jelly, and random sprays may seem convenient, but they can break down under heat, collect dirt, or create odor. Always choose a high-temperature lubricant, dry graphite, or silicone-based product approved for appliance use.
Another mistake is skipping the cleaning step. Grease buildup and baked-on grime can block lubricant from reaching the hinge mechanism. When you clean first, the lubricant can reach the moving parts instead of sitting on a dirty surface.
Many beginners also apply too much lubricant. Extra product can drip into hinge slots, spread onto the gasket, or leave residue near hot areas. Use a small amount, move the door gently, then wipe away the excess.
A fourth mistake is ignoring door alignment. If one hinge arm bends or the door sits unevenly, lubrication may reduce squeaking but not fix the cause. Watch for scraping, uneven gaps, or a door that will not close fully. Those signs may point to worn hinges, loose screws, or a damaged spring.
Expert Tips
Use the oven door’s feel as a guide. A dry hinge often sounds sharp and squeaky, while a dirty hinge may feel gritty or sticky. Cleaning helps with grit; lubricant helps with friction.
Work in bright light and take your time. A flashlight can reveal old residue around the hinge slots that normal kitchen lighting hides. If your oven sits low, kneel on a towel so you can inspect both sides evenly.
Make hinge care part of seasonal maintenance, especially in RVs, cabins, and outdoor kitchens. Heat, moisture, and travel vibration can all affect door movement. If lubrication helps only for a short time, the hinge may be worn and ready for replacement.
Frequently Asked Questions
What Type of Lubricant Should I Use on Oven Door Hinges?
Use a high-temperature lubricant approved for appliances, or use dry graphite or a silicone-based lubricant if your manual allows it. The product must handle heat and should not leave heavy residue. Avoid cooking oil, petroleum jelly, and general household sprays unless the manufacturer clearly says they are safe for your oven model.
Can I Lubricate Oven Hinges Without Removing the Door?
Yes, many oven hinges can be cleaned and lightly lubricated without removing the door. You can often reach the visible hinge arms, hinge slots, and pivot areas with the door open. If the manual requires door removal, follow it carefully. Oven doors are heavy, so get help if you feel unsure.
Why Is My Oven Door Still Squeaking After Lubrication?
A squeak may continue if grime remains inside the hinge mechanism, the wrong lubricant was used, or the hinge is worn. The door may also squeak if one hinge is bent or misaligned. Clean the area again, apply a small amount of approved lubricant, and test the door. If the noise remains, consider service.
How Often Should I Maintain Oven Door Hinges?
Most home ovens do not need frequent hinge lubrication. Check the hinges when you notice squeaking, stiffness, uneven movement, or closing trouble. For RV ovens, cabin ovens, and outdoor cooking setups, inspect them more often because dust, moisture, and travel movement can affect the hinges faster than normal kitchen use.
Is It Safe to Use the Oven Right After Lubricating the Hinges?
It is usually safe after you wipe away excess lubricant and confirm the product is heat-safe. Let the area dry if you used any damp cleaning cloths. During the first heating cycle, stay nearby and watch for smoke or strong odors. If anything seems unusual, turn the oven off and inspect the hinge area.
Conclusion
A smooth oven door makes cooking safer, quieter, and easier. Start by letting the appliance cool, then inspect the hinge arms, hinge slots, and surrounding frame. Clean away grease buildup and baked-on grime before adding any product. Use only a small amount of high-temperature lubricant, silicone-based lubricant, or graphite when your manual allows it.
Once you know how to lubricate oven door hinges, you can handle squeaks and stiffness before they become bigger problems. Move the door gently to spread the lubricant, wipe away residue, and test the door alignment before using the oven again.
If the door still scrapes, drops, or refuses to close evenly, the issue may involve worn hinges or damaged hardware. In that case, stop and get qualified help. Careful maintenance protects your appliance and gives you a better cooking experience every time you open the door.

About
Nick Hall has spent the last seven years working at the intersection of kitchen design and home repair — first as a design assistant at a residential renovation studio, then as a freelance writer covering everything from cabinet layouts to leaky faucet fixes.
Her approach is simple: kitchens should look good and function well. That means she’s just as comfortable talking about color palettes and counter materials as she is walking readers through how to fix a wobbly cabinet hinge or troubleshoot a garbage disposal.
Nick has worked directly with homeowners on small-space kitchen makeovers, budget-conscious renovations, and the kind of everyday repairs that don’t need a contractor — just the right instructions. She writes from experience, not theory, and tests most of the fixes and tips she shares before publishing them.
When she’s not writing, Nick is usually hunting for mid-century kitchen finds at estate sales or helping friends plan their own renovations. She lives in Columbus, Ohio.