
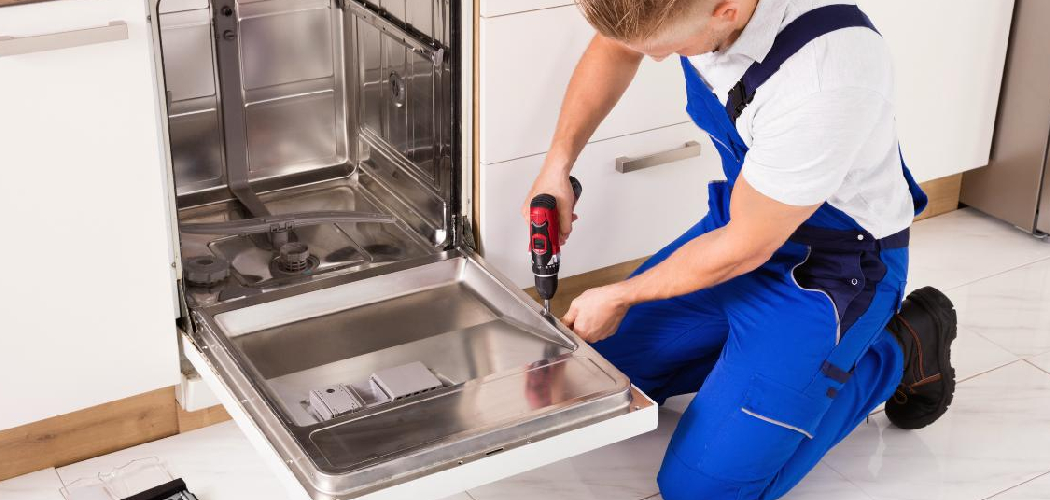
Few things are more frustrating than opening your dishwasher after a cycle and finding the detergent cup still full. Your dishes come out cloudy, greasy, or covered in dried residue, and the soap never even released. A faulty soap dispenser is one of the most common dishwasher problems, and the good news is it’s often a quick fix.
Knowing how to repair dishwasher soap dispenser issues saves you money and spares you the hassle of waiting on a service call. Most causes are simple: a sticky latch, gunked-up residue, a worn spring, or a tired gasket. You don’t need fancy skills or a workshop full of gear.
This guide walks you through every step, from spotting the problem to testing your fix, so your dishwasher cleans properly again.

Why Learning to Repair a Dishwasher Soap Dispenser Matters
A working soap dispenser is the heart of a clean wash. When it fails, every load suffers, and rewashing dishes by hand wastes both your time and your water.
For busy families, that reliability really counts. You load the dishwasher, press start, and trust it to do its job while you handle a dozen other things. A broken dispenser throws off that whole rhythm.
If you rent, fixing a small part yourself beats waiting days for a landlord’s repair crew. And for anyone who values an efficient kitchen cleanup, this skill pays off again and again.
The repair itself is beginner-friendly, low-cost, and surprisingly satisfying. Once you understand how the detergent cup, latch, and spring work together, you’ll feel confident tackling the problem the moment it pops up.
Tools and Materials You’ll Need
You won’t need much to get this job done. Most of these items are already in your kitchen or toolbox, so gather everything before you start to keep the work smooth.
- Phillips and flathead screwdrivers
- A cleaning brush or old toothbrush
- White vinegar or a mild cleaner for residue buildup
- Warm soapy water and a soft cloth
- Cotton swabs for tight corners
- A flashlight to see inside the door panel
- Replacement part (dispenser, spring, or gasket) if needed
- Work gloves to protect your hands
- A small bowl to hold screws
One optional convenience item: a pair of needle-nose pliers. They make grabbing a slipped spring or stubborn clip far easier, especially when you’re working in the tight space behind the dishwasher door.
Step-by-Step Guide on How to Repair Dishwasher Soap Dispenser
Step 1 – Cut the power and empty the unit
Safety comes first, always. Before you touch anything, switch off the power to your dishwasher at the breaker or unplug it under the sink. You’ll be working near the control panel, so this step protects you from any shock.
Next, empty the unit completely. Pull out the racks if they’re in the way, and remove any dishes so you have clear, easy access to the dispenser.
Wipe down the inside of the dishwasher door with a damp cloth. A clean surface helps you spot cracks, residue, or worn parts more easily.
Take a slow look at the dispenser now. Notice whether the cup is cracked, the lid sticks, or old soap clings to the edges.
Step 2 – Inspect the detergent cup and latch
Now examine the heart of the problem. Open and close the detergent cup lid a few times with your finger and feel how it moves. A healthy latch snaps shut with a crisp click and pops open freely.
If the lid feels gummy, sticky, or refuses to stay closed, you’ve likely found your culprit. Look closely at the dispenser latch for chips, warping, or trapped debris.
Run your fingertip along the edges of the cup. Sticky residue or hardened detergent often jams the mechanism without you realizing it.
Shine your flashlight inside to check for cracks in the plastic. Spotting the exact issue here saves you guesswork later and points you toward the right repair.
Step 3 – Clean out residue buildup
Residue buildup is the number one reason a dispenser stops working. Caked detergent and grease clog the latch, gum up the spring, and stop the lid from releasing during the rinse cycle.
Dip your cleaning brush in warm soapy water and scrub the cup, lid, and surrounding edges. Work the bristles into the corners where soap loves to harden.
For stubborn spots, soak a cloth in white vinegar and press it against the buildup for a few minutes. You’ll feel the crust soften and lift away.
Use cotton swabs to clear the tiny grooves around the latch. As you work, the mechanism should start moving more freely, and that smooth motion tells you you’re on the right track.
Step 4 – Check and free up the spring
Behind the latch sits a small spring that powers the lid open. When it weakens, sticks, or pops loose, the cup won’t release your detergent.
Open the cup and watch the spring as the lid moves. It should stretch and snap back with a quick, springy tension. If it feels limp or stuck, that’s your problem.
Use your needle-nose pliers to gently reseat a spring that’s slipped out of place. Be careful here, since these little parts love to fly across the room.
Clear away any residue clinging to the spring with a swab. Often, a good clean is all it takes to restore that satisfying snap and get the lid working again.

Step 5 – Examine the gasket and seals
The gasket keeps water where it belongs and helps the dispenser open at the right moment. A dried, cracked, or warped gasket lets water seep in early and throws off the timing.
Run your finger along the rubber seal around the dispenser and the dishwasher door. It should feel soft and springy, not brittle or flattened.
Press gently in a few spots. If the rubber stays dented or feels crumbly, it’s worn out and needs replacing.
Look for gaps where the gasket meets the door panel. Even a small opening invites leaks and poor performance. Clean any grime from the seal with a damp cloth, and note whether you’ll need a replacement part before moving on.
Step 6 – Replace worn parts if needed
Sometimes cleaning isn’t enough, and that’s perfectly okay. If the latch is cracked, the spring is broken, or the gasket has gone brittle, a fresh part brings everything back to life.
Find your dishwasher’s model number, usually printed on a sticker along the door edge. Order the matching replacement part online or from an appliance store.
Knowing how to repair dishwasher soap dispenser problems often comes down to swapping one small piece. Remove the screws holding the old dispenser assembly, lift it free, and set the screws in your small bowl.
Fit the new part exactly where the old one sat, lining up the holes. Tighten the screws snugly without forcing them, and you’re nearly there.
Step 7 – Reassemble the door panel
With cleaning and any swaps done, it’s time to put everything back together. Line up the dispenser assembly against the inside of the door panel and make sure it sits flush.
Drive each screw back into place, working in the order you removed them. Snug them firmly, but stop the moment you feel solid resistance so you don’t strip the plastic.
Reconnect any wires you unclipped near the control panel, pressing each connector until it clicks. Give them a light tug to confirm they’re secure.
Wipe the area one last time and check that nothing wobbles. Run your finger over the seams to feel for any gaps. A clean, tight reassembly sets you up for a successful test run.
Step 8 – Restore power and test the dispenser
Now for the moment of truth. Restore power at the breaker or plug the unit back in, then close the dishwasher door until it latches firmly.
Add a small amount of detergent to the cup and start a normal cycle with hot water. Stay nearby and listen.
Partway through, you’ll hear a click as the lid pops open and releases the soap. That sound means your repair worked.
When the cycle finishes, open the door and check the detergent cup. It should be empty and rinsed clean, with no leftover soap clinging inside.
Run your hand over the dishes too. Clean, residue-free plates confirm the dispenser is doing its job once again.

Critical Mistakes When Repairing a Dishwasher Soap Dispenser
Even an easy repair goes sideways when you skip the basics, so let’s cover the slip-ups that catch beginners off guard.
The biggest mistake is leaving the power on. People dive in without flipping the breaker, then risk a shock while poking near the control panel and wiring. Always cut the power first, no exceptions. This single habit keeps every repair safe.
Another common error is forcing a stuck latch. When the lid won’t budge, folks yank or pry hard and end up snapping the plastic. Instead, clean away the residue buildup first and let the mechanism loosen naturally. Patience saves the part.
Many people also buy the wrong replacement part. They guess at the model instead of checking the sticker, then end up with a piece that doesn’t fit. Always match your exact model number before ordering.
Overtightening screws during reassembly is another frequent slip. Cranking too hard strips the soft plastic threads and leaves the dispenser loose. Snug is the goal, not crushing force.
Finally, never skip the test cycle. Always run a load with hot water and confirm the cup empties before you call the job finished.
Expert Tips
A few smart habits make this repair smoother and longer-lasting. Run a monthly maintenance cycle with white vinegar to dissolve residue before it ever clogs the dispenser. This simple routine prevents most problems from starting.
Always store your detergent in a cool, dry spot. Damp powder clumps and gums up the cup faster, so fresh, dry soap keeps things flowing.
When you reseat a spring, work over a clean towel laid across the bottom of the unit. If the part slips, the towel catches it instead of letting it vanish under the dishwasher.
And snap a quick photo before you remove any wires or screws. That picture becomes your roadmap during reassembly, turning a confusing tangle into a clear, simple guide you can follow step by step.
Frequently Asked Questions
Why won’t my dishwasher soap dispenser open during the cycle?
Most often, residue buildup is jamming the latch or spring. Hardened detergent glues the lid shut so it can’t pop open when the cycle calls for it. Clean the cup, latch, and spring thoroughly with warm soapy water and a brush. If the spring feels limp or the latch is cracked, you’ll likely need a replacement part to restore proper function.
Can I fix the dispenser myself, or do I need a technician?
You can almost always handle this yourself. The repair involves simple cleaning, freeing up a spring, or swapping one small part, none of which require special skills. As long as you cut the power first and follow each step carefully, you’ll save the cost of a service call. Only call a technician if the problem traces back to deeper wiring or the control panel.
How do I know if I need a new dispenser or just a cleaning?
Start with a deep clean, since residue causes most failures. After cleaning, test the latch and spring. Here’s a quick check:
- Latch clicks shut and pops open freely → cleaning fixed it
- Lid stays sticky or cracked → replace the part
- Spring feels limp or broken → replace it
If movement stays smooth after cleaning, you’re done.
What causes a soap dispenser to stop working?
Several things can do it. The most common culprit is residue buildup that gums up the latch and spring. Other causes include a worn or weak spring, a cracked detergent cup, a brittle gasket that throws off timing, or detergent that clumped from moisture. Damp, clumpy soap is an easy one to overlook, so always check your detergent’s condition first.
How often should I clean my dishwasher soap dispenser?
Aim for a quick wipe-down once a month and a deeper clean every few months. Regular care stops residue from hardening inside the latch and around the cup. Running an empty cycle with white vinegar also keeps the whole mechanism clear. This small routine prevents most clogs and helps your dispenser open reliably with every single wash.
Conclusion
You now have everything you need to bring your detergent dispenser back to life. From cutting the power and inspecting the latch, to clearing residue buildup, freeing the spring, checking the gasket, and running a test cycle, each step builds toward a dishwasher that cleans properly again.
The main takeaways are simple. Always shut off the power first. Clean before you replace, since residue causes most failures. Match your exact model number when buying parts, keep your screws snug rather than crushing, and never skip the final test with hot water.
The best part? You handled it yourself, skipped the service fee, and gained a skill you’ll use for years. A reliable dispenser means cleaner dishes, less rewashing, and a smoother kitchen routine for your whole household.
So grab your screwdriver and give it a try. Learning how to repair dishwasher soap dispenser problems is one of those satisfying wins that keeps your kitchen running the way it should. You’ve got this.

About
Nick Hall has spent the last seven years working at the intersection of kitchen design and home repair — first as a design assistant at a residential renovation studio, then as a freelance writer covering everything from cabinet layouts to leaky faucet fixes.
Her approach is simple: kitchens should look good and function well. That means she’s just as comfortable talking about color palettes and counter materials as she is walking readers through how to fix a wobbly cabinet hinge or troubleshoot a garbage disposal.
Nick has worked directly with homeowners on small-space kitchen makeovers, budget-conscious renovations, and the kind of everyday repairs that don’t need a contractor — just the right instructions. She writes from experience, not theory, and tests most of the fixes and tips she shares before publishing them.
When she’s not writing, Nick is usually hunting for mid-century kitchen finds at estate sales or helping friends plan their own renovations. She lives in Columbus, Ohio.