
A good kitchen knife can make prep work feel smooth, safe, and almost effortless. A dull or poorly cared-for blade does the opposite. It slips, crushes food, and makes even simple tasks like slicing onions or trimming herbs more tiring than they should be. Learning how to maintain kitchen knives helps you protect your tools, improve your cooking, and avoid replacing blades too soon.

The good news is that knife care is not hard. You do not need special training or a drawer full of gear. You just need a few simple habits, the right tools, and a clear routine. This guide will show you exactly how to clean, store, sharpen, and care for your kitchen knives the right way.
Why Maintenance Matters for Beginners
If you are new to cooking, knife maintenance may seem like a small detail. In practice, it changes everything. A sharp, clean blade cuts with less force, which gives you better control and lowers the chance of slipping. That matters when you are still building confidence with basic kitchen skills.
Regular care also helps your knives last longer. Moisture can lead to rust, rough cutting boards can wear down the edge, and poor storage can chip the blade before you even use it. When you maintain your knives well, you protect both performance and safety. For beginners, that means less frustration, more precise cuts, and a better cooking experience from the start.
Tools and Materials You’ll Need
You do not need a professional setup to care for your knives well. A few basic items will cover most of your routine maintenance.
- Mild dish soap
- Warm water
- Soft sponge or dish cloth
- Clean, dry towel
- Honing rod
- Whetstone or knife sharpener
- Food-safe mineral oil for carbon steel handles or blades if needed
- Knife block, magnetic strip, or blade guards
- Stable cutting board made of wood or plastic
- Optional: a non-slip mat to place under your whetstone for added control
Choose simple, reliable tools over flashy ones. A soft cloth and a good sharpening method will do more for your knife than most gadgets.
Step-by-Step Guide on How to Maintain Kitchen Knives
Step 1 – Wash Your Knife Right After Use
The best time to clean a knife is right after you finish using it. Food acids, salt, moisture, and oils can sit on the blade and slowly damage the steel. This is especially true if you cut tomatoes, citrus, onions, or raw meat. A quick wash keeps residue from drying into a stubborn film.
Use warm water, mild soap, and a soft sponge or cloth. Wipe from the spine toward the edge with care, and never scrub carelessly across the cutting edge. Rinse well so no soap remains on the blade or handle.
Avoid soaking the knife in the sink. It can bang against other tools, dull the edge, or hide under cloudy water where it becomes a safety risk. A few seconds of careful washing is always the better choice.

Step 2 – Dry the Blade Completely
Drying matters just as much as washing. Even stainless steel knives can stain or spot if water sits on the blade for too long. Carbon steel knives are even more sensitive and can rust fast if left damp on the counter or in a dish rack.
Use a clean towel and dry the knife fully, including the handle, bolster, and the area where the blade meets the handle. Pay attention to small seams where moisture can hide. A dry blade should feel smooth, not slick or cool with leftover water.
This simple habit is one of the easiest ways to practice how to maintain kitchen knives without spending extra money. It takes less than a minute, but it helps protect the finish, edge, and overall life of the blade.
Step 3 – Use the Right Cutting Surface
Your cutting board has a big effect on edge retention. Hard surfaces like glass, stone, ceramic, or metal can wear down a blade quickly. Even a well-sharpened knife will lose its bite if you use it on the wrong surface day after day.
Choose a wood or plastic cutting board instead. These materials have enough give to protect the edge while still giving you a stable prep surface. When the knife lands, the board should feel slightly forgiving rather than harsh and loud.
You can often hear the difference. On a good board, the sound is softer and more controlled. On a hard board, the contact sounds sharp and jarring. That repeated impact adds up. If you want your knife to stay sharp longer, start with the surface beneath it.
Step 4 – Hone the Edge Regularly
Honing and sharpening are not the same thing. Honing straightens the fine edge of the blade, while sharpening removes metal to create a new edge. Most home cooks need to hone more often than they sharpen. This keeps the knife feeling lively between full sharpening sessions.
Hold the honing rod upright with the tip planted securely on a towel or board. Glide the knife down the rod at a steady angle, alternating sides with light pressure. A few careful passes are enough. You are guiding the edge back into line, not grinding it down.
A freshly honed knife often feels smoother right away. It moves through onions, herbs, and peppers with less drag. If the blade still feels dull after honing, that is your sign it likely needs sharpening next.
Step 5 – Sharpen When the Knife Feels Dull
A dull knife does not always look dull, but you can feel it. It crushes tomatoes instead of slicing cleanly. It slips on onion skin. It makes you press harder, which is when control starts to drop. Sharpening restores the edge so the blade can cut cleanly again.
A whetstone gives the most control and usually the best results, though a quality pull-through sharpener can work for beginners if used gently. Follow the angle recommended for your knife and keep your strokes even. Take your time. Rushing leads to uneven edges.
When learning how to maintain kitchen knives, sharpening is often the step people avoid. That is understandable, but it does not have to be intimidating. Start slow, stay consistent, and focus on smooth motion rather than speed.
Step 6 – Store Knives the Right Way
Good storage protects the edge when the knife is not in your hand. Tossing knives loose into a drawer is one of the fastest ways to dull or chip them. The blade hits other utensils, the edge gets knocked around, and reaching in becomes risky.
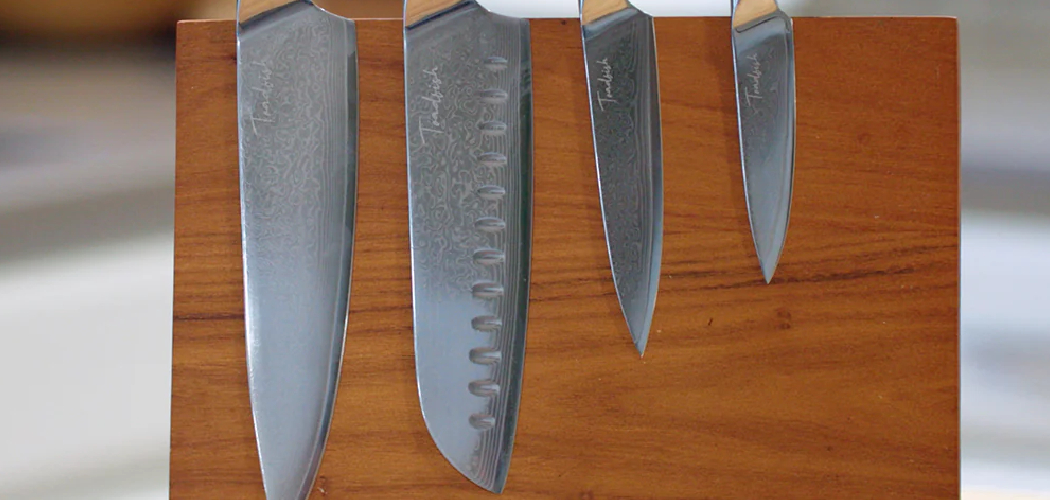
Use a knife block, magnetic strip, in-drawer knife tray, or blade guard. Each option can work well if it keeps the edge from rubbing against hard objects. If you use a magnetic strip, place the spine against the magnet first, then roll the blade gently into place.
Proper storage also keeps your knives cleaner and easier to grab during prep. A well-stored knife feels ready when you need it. That small sense of order makes cooking smoother and helps build better habits over time.

Step 7 – Protect Carbon Steel and Wooden Handles
Not all knives need the same care. Carbon steel blades can take a very sharp edge, but they react more easily to moisture and acid. Wooden handles can also dry out, crack, or feel rough if they are never conditioned. These parts need a little extra attention.
For carbon steel, dry the blade right away and apply a tiny amount of food-safe mineral oil if you live in a humid climate or store the knife for a while. For wooden handles, rub in a light coat of mineral oil now and then to help prevent drying.
You do not need to oil your knife every week. Just watch for signs. If the handle looks thirsty or the blade is prone to spotting, a little protection goes a long way.
Step 8 – Build a Simple Maintenance Routine
The easiest way to care for knives is to make maintenance part of your cooking routine. Wash and dry after each use. Hone regularly. Sharpen when performance drops. Check storage now and then to make sure your edge is not getting damaged between meals.
You can keep the routine simple. Daily care takes less than two minutes. Honing may take a few passes every week or two, depending on how much you cook. Sharpening might only happen every few months for a home cook with good habits.
A knife that is cared for consistently feels different in the hand. It cuts cleanly, responds predictably, and gives you more confidence at the board. That is the real payoff of maintenance: better control, better results, and less stress in the kitchen.
Common Mistakes
One common mistake is putting kitchen knives in the dishwasher. The high heat, harsh detergent, and rattling contact with other items can damage the edge, stain the blade, and loosen the handle over time. Hand washing is always safer and far better for long-term performance.
Another mistake is storing knives loose in a drawer. Even if the blade looks fine at first, repeated contact with metal utensils dulls the edge and can create tiny chips. It also turns an ordinary reach into the drawer into a cut risk.
Many beginners also confuse honing with sharpening. If you only hone a truly dull knife, it will still struggle to cut. If you sharpen too often, you remove more metal than needed. You need both, but at the right times and for the right reasons.
Using the wrong cutting surface is another issue. Glass boards may look clean and stylish, but they are tough on knife edges. Hard counters are even worse. Stick with wood or plastic to protect the blade.
Finally, some people leave knives wet after washing. That can lead to water spots, rust, or handle damage. Drying the knife fully is a small step, but it prevents many bigger problems.
Expert Tips
If you want your knives to perform better with less effort, focus on consistency more than perfection. A knife that is washed, dried, honed, and stored properly will usually outlast a more expensive knife that gets neglected. Daily habits matter most.
Pay attention to how the knife feels during use. If it drags through herbs, slips on tomato skin, or needs extra force, do not wait too long to tune it up. Small signs are easier to fix than major dullness.
It also helps to learn your knife’s steel type. Stainless steel is easier to care for, while carbon steel rewards attention with a very keen edge. Once you know what you own, you can give it the care it actually needs.
Frequently Asked Questions
How often should I sharpen my kitchen knives?
Most home cooks only need to sharpen their knives every few months, though it depends on how often they cook and what surfaces they cut on. If you use a wood or plastic board and hone regularly, the edge will last longer. If the knife crushes soft foods or slips easily, it is time to sharpen.
Can I put kitchen knives in the dishwasher?
No, it is best not to. Dishwashers expose knives to heat, strong detergent, and contact with other items, all of which can damage the blade and handle. Hand washing with mild soap and warm water is safer, faster, and much better for maintaining a sharp edge.
What is the difference between honing and sharpening?
Honing straightens the existing edge of the blade, while sharpening removes a small amount of metal to form a new cutting edge. Think of honing as regular upkeep and sharpening as a deeper reset. Both are useful, but honing is needed more often for most kitchen knives.
What kind of cutting board is best for knives?
Wood and plastic cutting boards are the best choices for protecting your knife edge. They are firm enough for stable cutting but soft enough to reduce wear on the blade. Avoid glass, stone, ceramic, or metal surfaces because they dull knives much faster and can even cause chips.
How do I know if my knife is being stored properly?
Your knife is stored properly if the edge is protected and the blade does not hit other hard objects. Knife blocks, magnetic strips, blade guards, and in-drawer trays are all solid options. If your knife is loose in a drawer with other utensils, it is not being stored in a safe or edge-friendly way.
Conclusion
Good knife care is not about fancy tools or complicated methods. It comes down to a few simple habits done well: wash by hand, dry fully, use a safe cutting board, hone often, sharpen when needed, and store each knife with care. When you follow those basics, your knife stays sharper, safer, and easier to use.
If you are just starting out, do not try to master everything at once. Begin with cleaning and drying, then add honing and better storage. Over time, those small steps become automatic. Once you understand how to maintain kitchen knives, you will notice smoother prep, cleaner cuts, and more confidence every time you cook.

About
Nick Hall has spent the last seven years working at the intersection of kitchen design and home repair — first as a design assistant at a residential renovation studio, then as a freelance writer covering everything from cabinet layouts to leaky faucet fixes.
Her approach is simple: kitchens should look good and function well. That means she’s just as comfortable talking about color palettes and counter materials as she is walking readers through how to fix a wobbly cabinet hinge or troubleshoot a garbage disposal.
Nick has worked directly with homeowners on small-space kitchen makeovers, budget-conscious renovations, and the kind of everyday repairs that don’t need a contractor — just the right instructions. She writes from experience, not theory, and tests most of the fixes and tips she shares before publishing them.
When she’s not writing, Nick is usually hunting for mid-century kitchen finds at estate sales or helping friends plan their own renovations. She lives in Columbus, Ohio.