
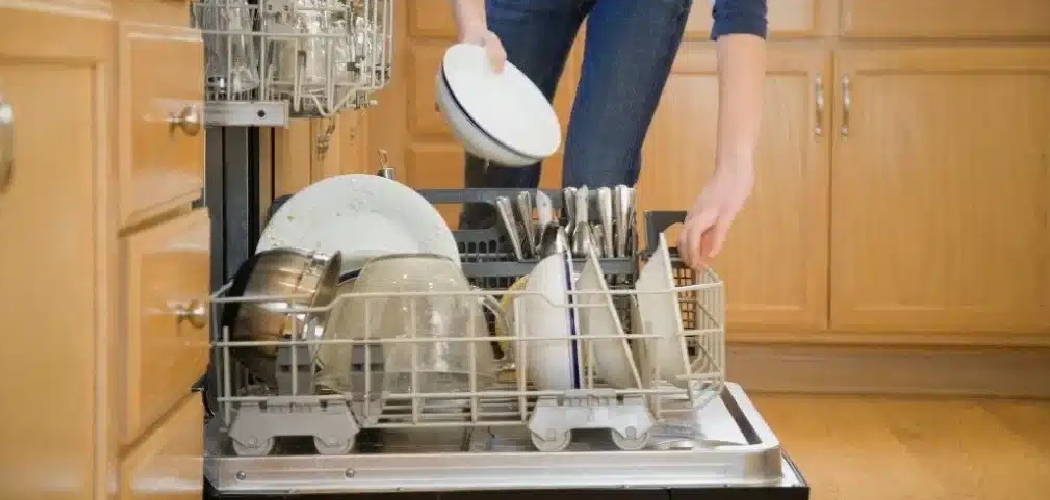
Got an old dishwasher that’s leaking, dead, or just plain in the way of your kitchen upgrade? Pulling it out yourself is more doable than you might think, and it saves you a service call fee. Knowing how to get rid of dishwasher safely comes down to a handful of careful steps: cutting the power, stopping the water, loosening a few connections, and sliding it free.
You don’t need a contractor or special training. With basic tools, a little patience, and respect for the water and electrical lines, you can handle this in an afternoon.

This guide walks you through every step, from the first shut-off to hauling the unit out the door and disposing of it the right way, so you finish safely and stress-free.
Why Learning How to Remove and Dispose of a Dishwasher Matters
Tackling this yourself puts you in control of your kitchen and your wallet. Hiring someone to disconnect and haul away an appliance adds up fast, and the job itself is mostly simple once you know the order of operations.
There’s real value in understanding how your dishwasher connects to your home, too. When you learn where the supply line, drain hose, and electrical wiring live, you become a more confident DIYer for every future project.
This skill also matters for safety and the environment. Done wrong, you risk water damage, electric shock, or a flooded floor. Done right, you protect your home and make sure the old unit reaches a recycling center instead of a landfill.
For anyone planning a kitchen refresh or replacing a tired machine, this knowledge pays off every time.
Tools and Materials You’ll Need
You won’t need a fancy toolkit for this job. Most of these items are probably already sitting in your garage or under the sink. Gather everything before you start so you’re not hunting for a screwdriver mid-task.
- Phillips and flathead screwdrivers
- Adjustable wrench or pliers
- Bucket and old towels for catching water
- Flashlight or headlamp for seeing under the counter
- Voltage tester to confirm the power is off
- Work gloves to protect your hands from sharp edges
- Putty knife or scraper to loosen any sealant
- A furniture dolly or hand truck for moving the unit
One optional convenience item: a smartphone to snap photos of the wiring and plumbing connections before you disconnect them, making any future reinstall far easier.
Step-by-Step Guide on How to Get Rid of Dishwasher
Step 1 – Disconnect power to the unit
Safety comes first, always. Before you touch a single connection, head to your electrical panel and switch off the breaker that feeds the dishwasher. Many machines share a circuit with the garbage disposal, so flip that one too if you’re unsure.
Knowing how to get rid of dishwasher safely starts right here, because water and live wires don’t mix. Once the breaker is off, find the junction box, usually located behind the lower kick plate at the front.
Use your voltage tester to confirm no current flows to the wires. Touch the probes to each connection and watch for any light or beep.

No signal means you’re clear to keep going. This quick check protects you from a dangerous shock.
Step 2 – Shut off the water supply
With the power handled, turn your attention to the water. Look under your kitchen sink for the hot water shut-off valve, often a small handle on the supply line feeding the dishwasher.
Turn it clockwise until it stops. This closes the flow and prevents a surprise spray when you loosen the connection later.
If you can’t find a dedicated valve, shut off the main water supply to your home instead. Better safe than soaked.
Once closed, open the dishwasher door and run the cancel or drain cycle if the unit still has power memory, or simply let any standing water settle. Place an old towel underneath to catch the drips that always seem to appear at the worst moment.
Step 3 – Disconnect the water supply line
Now you’ll separate the supply line. Slide your bucket and towels into position beneath the front of the dishwasher, because even with the valve closed, water sits trapped in the line.
Reach to the connection point, usually a brass fitting where the supply line meets the dishwasher’s water inlet valve. Grip it with your adjustable wrench and turn counterclockwise to loosen.
Expect a small trickle as you pull the line free. Let it drain fully into your bucket before moving on.
Wipe the fitting dry and tuck the loose end of the supply line aside so it won’t drip across your floor. That faint metallic smell of old water is normal, so don’t worry about it.
Step 4 – Detach the drain hose
The drain hose carries dirty water out, and it’s next on your list. Trace it from the back of the dishwasher to where it connects, typically at the garbage disposal connection or a dedicated port on the sink drain.
Loosen the metal clamp holding it in place with your screwdriver or pliers. Once the clamp slides back, gently twist and pull the hose free.
Be ready here. Murky, sometimes smelly water will spill out, so keep that bucket close and your towels handy.
Let the hose drain completely, then tuck it back toward the dishwasher. If the hose feeds through a hole in the cabinet wall, leave it loose for now so it slides out easily with the unit later.
Step 5 – Disconnect the electrical wiring
Return to the junction box you found earlier behind the kick plate. With the power confirmed off, you can safely separate the wires.
Remove the cover plate and you’ll see the connections, usually held together with twist-on wire nuts. Snap a quick photo first so you remember which wire pairs with which.
Unscrew each wire nut and gently separate the black, white, and green or copper ground wires. Loosen the cable clamp that secures the wire to the box, then slide the house wiring free.
Cap the loose house wires with the wire nuts and tuck them safely aside. Treating the electrical step with care gives you solid leak protection and shock protection alike.
Step 6 – Loosen the mounting brackets and countertop screws
Your dishwasher is held in place by small mounting brackets near the top, screwed into the underside of the countertop. Open the door and look along the upper edge of the opening.
You’ll spot the countertop screws holding those brackets tight. Grab your screwdriver and back each one out, keeping them in a small dish so they don’t roll away and disappear.
Some models also have brackets fastened to the side cabinets, so check the sides too. As you remove the last screw, the unit may shift slightly, which is perfectly normal.
Once everything is loose, the dishwasher should sit free of the cabinetry, resting only on its adjustable leveling legs at the base.
Step 7 – Lower and slide the dishwasher out
Almost there. Look at the front legs and you’ll see leveling feet you can turn to lower the unit. Twist them counterclockwise to drop the dishwasher down about an inch, giving it room to clear the countertop lip.
Gently rock the unit and pull it forward, guiding the supply line, drain hose, and electrical cable through their openings as you go. Move slowly so nothing snags.
Watch the flooring beneath, especially if you have tile or vinyl, and slide a piece of cardboard under the front to protect it.
Tilt the dishwasher onto your dolly once it clears the cabinet. This is the satisfying moment of old dishwasher removal where the heavy lifting finally pays off.
Step 8 – Clean up and prepare for disposal
With the unit out, take a minute to inspect the empty cavity. Wipe up any spilled water right away to prevent damage to your subfloor, and check for hidden leaks or mold you’ll want to address.
Coil the drain hose and supply line neatly against the old dishwasher so nothing dangles during transport. Tape any loose cords to the side.
If you’re recycling, give the interior a quick rinse and let it dry, since most facilities prefer clean units. Snap a final photo of the connections for your records.
Now you’re ready to move the unit to your vehicle or a staging spot, knowing the messy part is behind you and your kitchen is safe and dry.

Step 9 – Dispose of the old dishwasher responsibly
You’ve got several good options for the final step. Many cities offer curbside appliance pickup for a small fee, so check your local waste service schedule first.
A nearby recycling center will often take the unit free of charge, since the steel and components hold real value. Call ahead to confirm hours and any drop-off rules.
If you bought a replacement, ask the retailer about haul-away service during delivery, which frequently costs little or nothing.
Avoid dumping the appliance illegally, as it carries fines and harms the environment. Whether you choose appliance pickup or a drop-off, disposing of it properly is the responsible way to wrap up the whole project and free up that kitchen space for good.
Critical Mistakes When Removing or Getting Rid of a Dishwasher
Even a straightforward job goes sideways when you skip key steps, so let’s cover the slip-ups that catch beginners.
The biggest mistake is forgetting to shut off the power and water before disconnecting anything. People assume the appliance is harmless because it’s off, but live wires and pressurized lines cause serious shocks and floods. Always cut the breaker, confirm with a voltage tester, and close the shut-off valve first.
Another common error is yanking the unit out without freeing the connections fully. A snagged drain hose or supply line tears loose under pressure, spraying water across your floor and damaging the fitting. Move slowly and guide each line through its opening.
Many folks also skip placing towels and a bucket beneath the work area. Trapped water always lingers in the hoses, and that murky spill ruins flooring fast without proper leak protection underneath.
Finally, dumping the old unit on the curb illegally or tossing it in regular trash invites fines. Take a few minutes to arrange a recycling center drop-off or appliance pickup instead. Rushing the disposal step undoes all your careful work.
Expert Tips
A few small habits make this job smoother and safer. Always photograph every connection before you disconnect it, especially the electrical wiring in the junction box. That snapshot saves you serious guesswork if you ever install a replacement.
Keep a small magnetic tray or dish nearby for screws and brackets. Tiny countertop screws love to roll away and hide, and hunting for them mid-job is a headache you don’t need.
Work with a helper if you can. Dishwashers feel light until you’re guiding one out alone, and an extra set of hands protects both your back and your flooring.
Before you start, lay down old towels and a sheet of cardboard across the floor. This catches drips and lets you slide the unit without scratching tile or vinyl. Little bit of prep goes a long way.
Frequently Asked Questions
Do I need to turn off the main water supply, or just the dishwasher valve?
In most kitchens, you only need to close the dedicated hot water shut-off valve under the sink that feeds the dishwasher. Turn it clockwise until it stops. If your home lacks a dedicated valve, or the existing one is corroded and won’t close fully, shut off the main water supply to be safe. Always test by loosening the supply line slowly with a bucket ready underneath.
Can I really do this without an electrician?
Yes, most people can handle this safely as long as you respect the electrical step. The key is confirming the power is fully off at the breaker and verifying it with a voltage tester before touching any wires inside the junction box. If you ever see signs of damaged wiring, scorch marks, or feel unsure, stop and call a professional. There’s no shame in getting help with electrical work.
How heavy is a dishwasher, and can I move it alone?
A standard dishwasher weighs roughly 60 to 100 pounds. You can move one alone with a furniture dolly, but a helper makes it far safer. To make handling easier:
- Drain all water from the hoses first
- Lower the leveling legs before pulling it out
- Slide cardboard underneath to glide across flooring
- Tilt it onto a dolly rather than lifting straight up
Where can I dispose of my old dishwasher?
You have a few solid choices. Many local recycling centers accept appliances free of charge because the steel is valuable. Your city may also offer scheduled curbside appliance pickup for a small fee. If you bought a new unit, ask the retailer about haul-away service during delivery, which is often cheap or free. Never dump it illegally, as that risks fines and harms the environment.
What if water keeps dripping after I disconnect everything?
Some dripping is completely normal because water stays trapped inside the drain hose and supply line even after you shut the valve. Keep towels and a bucket positioned beneath each connection as you work. Let the lines drain fully before moving the unit. If water continues flowing steadily rather than just trickling, your shut-off valve isn’t fully closed, so tighten it again or use the main supply.
Conclusion
You’ve now got the full roadmap for tackling this project with confidence. From cutting the power and closing the water valve, to freeing the supply line, drain hose, and electrical wiring, to loosening the mounting brackets and sliding the unit out, each step builds safely on the last.
The key takeaways are simple. Safety always comes first, so shut off power and water before touching any connection. Keep towels and a bucket ready for trapped water, move slowly to avoid snags, and protect your flooring as you go. When the unit is finally free, dispose of it the right way through a recycling center or appliance pickup.
The best part? You handled the whole thing yourself, saved the cost of a technician, and learned how your kitchen connects together along the way. That confidence carries into every future project.
So roll up your sleeves and give it a go. Mastering how to get rid of dishwasher is one of those practical wins that clears your space and proves you can handle more than you thought. You’ve got this.

About
Nick Hall has spent the last seven years working at the intersection of kitchen design and home repair — first as a design assistant at a residential renovation studio, then as a freelance writer covering everything from cabinet layouts to leaky faucet fixes.
Her approach is simple: kitchens should look good and function well. That means she’s just as comfortable talking about color palettes and counter materials as she is walking readers through how to fix a wobbly cabinet hinge or troubleshoot a garbage disposal.
Nick has worked directly with homeowners on small-space kitchen makeovers, budget-conscious renovations, and the kind of everyday repairs that don’t need a contractor — just the right instructions. She writes from experience, not theory, and tests most of the fixes and tips she shares before publishing them.
When she’s not writing, Nick is usually hunting for mid-century kitchen finds at estate sales or helping friends plan their own renovations. She lives in Columbus, Ohio.