
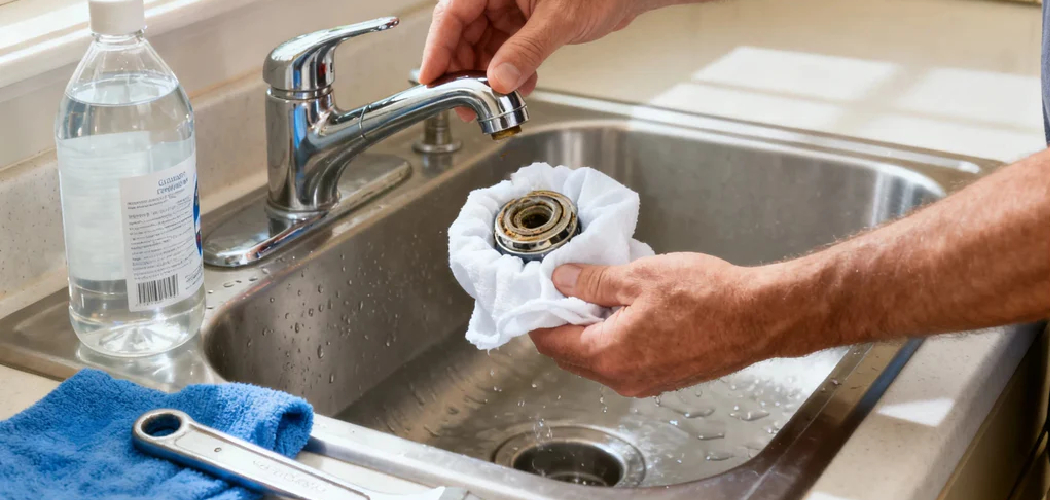

A clogged or stuck faucet aerator can turn a steady stream of water into a weak, sputtering mess. If you have never handled one before, the good news is that learning how to remove kitchen sink aerator parts is usually simple, fast, and beginner-friendly. In most cases, you only need a few basic tools, a little patience, and a careful hand to get the job done without scratching the faucet finish.
This small screen-and-mixing piece at the faucet tip often traps mineral buildup, sand, and debris over time. Once you know how to take it off, you can clean it, replace it, and restore better water flow with less stress. This guide will walk you through each step in a clear, practical way.
Why Learning to Remove a Sink Aerator Matters
Knowing how to remove a sink aerator is useful at home, but it can matter even more if you camp, travel in an RV, or spend time in outdoor setups with limited plumbing support. Water systems in campers and mobile kitchens often collect sediment, hard-water scale, or tiny particles from storage tanks and hookups. Those particles can clog the faucet tip and cut down flow right when you need it.
A weak stream makes simple tasks harder. Washing dishes takes longer, filling a pot feels slow, and rinsing gear becomes more annoying than it should be. If you know how to fix the issue yourself, you save time and avoid calling for help over a very small part. It is a practical skill that gives you more control over your water system wherever you are.
Tools and Materials You’ll Need
Before you begin, gather your supplies so you do not stop halfway through the job. Most aerators come off with simple household items, though some need a special key or a gentler touch.
- Soft cloth or rag to protect the faucet finish
- Adjustable pliers or channel-lock pliers
- Rubber jar opener or rubber grip pad for extra traction
- Small bowl or cup to hold the aerator parts
- Old toothbrush for scrubbing mineral deposits
- White vinegar for soaking scale and hard-water buildup
- Mild dish soap and warm water for basic cleaning
- Flashlight to inspect threads, washers, and hidden debris
- Towel for the sink area to catch drips and small parts
- Optional: aerator key if your faucet has a recessed or cache-style aerator
These tools help you work neatly and reduce the chance of losing tiny screens or washers down the drain.
Step-by-Step Guide on How to Remove Kitchen Sink Aerator
Step 1 – Clear the Sink Area

Start by emptying the sink and drying the faucet area so you can get a firm grip. Remove dishes, scrub pads, and anything else that crowds your workspace. Then place a towel over the drain or insert a sink stopper. This small move matters because aerators contain tiny pieces that can slip from wet fingers and vanish fast.
Take a moment to look at the tip of the faucet. Some aerators sit on the outside and are easy to spot, while others are recessed and sit flush inside the spout. Shine a flashlight upward if needed. The metal may look dull from water spots or chalky from mineral scale. By setting up a clean, dry area first, you make the rest of the job much easier and safer.
Step 2 – Identify the Aerator Type
Before you twist anything, figure out what kind of aerator you have. A standard aerator usually has visible edges that screw onto or into the faucet spout. A hidden or cache aerator sits deeper inside the faucet and often needs a special key. If you force the wrong part, you can damage the threads or scratch the finish.
Run your fingers gently around the faucet tip. You may feel ridges, a smooth ring, or a slightly recessed insert. If there are no exposed edges, check your faucet manual or look for a brand mark that suggests a cache-style design. This is a smart point to slow down. Much of learning how to remove kitchen sink aerator parts without damage comes down to identifying the style before you apply pressure.
Step 3 – Try Removing It by Hand First
Once you know what you are working with, try the gentlest method first. Wrap the aerator with a dry cloth or use a rubber grip pad and turn it counterclockwise. Many aerators only need a little grip to break loose, especially if they were installed properly and cleaned now and then.
Use steady pressure instead of quick jerks. You may feel a slight pop as the threads release, followed by a smoother turning motion. If the metal feels gritty or stiff, stop and reset your grip rather than forcing it. A hand-only attempt protects plated finishes like chrome, brushed nickel, or matte black. If the aerator will not budge after a few careful tries, move on to tools instead of wrestling with it and risking damage.
Step 4 – Use Pliers the Safe Way

If hand pressure is not enough, bring in adjustable pliers. First wrap the aerator with a soft cloth to shield the metal from tooth marks and scratches. Then grip the covered aerator gently but firmly. Turn counterclockwise in small, controlled movements. You do not need crushing force. Too much pressure can flatten the metal or crack a plastic insert inside.
Keep one hand on the faucet neck if possible to steady it while you turn. This helps prevent stress on the faucet body, especially with older fixtures. If the aerator still resists, pause rather than forcing it harder. A stuck part often needs loosening treatment, not more muscle. Careful tool use is one of the most important parts of how to remove kitchen sink aerator pieces without creating a bigger repair.
Step 5 – Loosen Mineral Buildup
Hard-water deposits often act like glue around the threads. If the aerator is stuck, soak a cloth or paper towel in white vinegar and wrap it around the faucet tip. Let it sit for 15 to 30 minutes. The vinegar smell may be sharp, but it works well to soften crusty scale and dissolve chalky mineral rings.
For heavier buildup, you can dip only the removable part in vinegar after it comes off, but for a stuck piece, the wrap method helps first. After soaking, wipe the area and try again with your hand or protected pliers. Often the aerator starts moving with far less effort. You may even hear a faint crackle as the deposits break loose. Patience here saves the finish and makes removal much smoother.
Step 6 – Remove and Separate the Parts
When the aerator comes free, unscrew it slowly over the covered drain. Inside, you may find several small pieces stacked in order, such as a washer, mixing insert, flow restrictor, and metal screen. Set them in a small bowl exactly as they came out. If you are unsure, snap a quick photo before separating them.
This step is where beginners often realize the part is more detailed than expected. Do not worry. Most aerators are simple once you see the layers. You may notice slimy residue, sandy grit, or white flakes trapped in the screen. Those signs point to sediment or hard-water buildup. Keeping the pieces organized now makes reassembly much faster and helps you avoid backward installation later.
Step 7 – Clean the Aerator and Faucet Threads
Rinse each part in warm water first to remove loose debris. Then soak the pieces in white vinegar for 20 to 30 minutes if you see scale or cloudy buildup. After soaking, scrub gently with an old toothbrush. The screen should start to look cleaner and more open, and the small passages should feel less gritty.
Do not forget the faucet threads. Wipe the inside or outside threads on the spout with a cloth or soft brush to clear out old mineral crust and trapped dirt. If you leave buildup there, the aerator may not screw back on smoothly. Use mild dish soap and warm water for a final rinse, then dry everything well. Clean threads and clean parts are the key to a snug, leak-free fit.
Step 8 – Reinstall or Replace the Aerator
Once the parts are clean and dry, put them back together in the same order. If a washer looks cracked, flattened, or brittle, replace it. If the screen is torn or the aerator body is damaged, install a new unit with the same size and thread type. A fresh aerator can improve spray pattern, water flow, and efficiency right away.
Screw the aerator back on by hand first. This is important because hand-threading helps prevent cross-threading, which can ruin the fit. Turn it clockwise until it feels snug. If needed, give it a very light final turn with pliers over a cloth, but stop as soon as it is secure. It should sit straight and even, not tilted or forced into place.
Step 9 – Test the Water Flow
Turn the faucet on slowly at first. Let a gentle stream run for a few seconds so any loosened debris can flush through. Then increase the water pressure and watch the flow. A clean aerator should produce a steady, even stream without sputtering, side spray, or drips around the edges.
Check for leaks where the aerator meets the faucet tip. If water beads or trickles from the threads, turn off the faucet and tighten the aerator slightly by hand. If that does not fix it, remove it and inspect the washer alignment. The water should sound smoother now, with less hiss and less uneven splashing against the sink. Once everything runs cleanly, your job is done, and your faucet should work like new again.
Common Mistakes When Removing a Sink Aerator
One common mistake is jumping straight to pliers without checking whether the aerator can be removed by hand. That often leaves scrape marks on the finish and can deform softer metal parts. Another mistake is turning the aerator the wrong way. Because you are often looking up from below, it is easy to get disoriented and tighten it instead of loosening it.
Many beginners also forget to cover the drain. That can turn a simple repair into a frustrating search for tiny washers and screens. Losing one small insert can make reassembly confusing and may force you to buy a replacement sooner than expected. Rushing through disassembly is another problem. If you do not keep the parts in order, it is easy to reinstall the screen or flow restrictor backward.
People also underestimate mineral buildup. If the aerator is stuck, more force is not always the answer. A vinegar soak often works better and reduces the risk of damage. Finally, some people overtighten the aerator during reassembly. It only needs to be snug. Too much force can bind the threads, crack internal parts, and make the next cleaning job much harder.
Expert Tips
If you live in a hard-water area, clean the aerator every few months instead of waiting for a major clog. Regular care keeps water flow steady and prevents the threads from locking up with scale. It also helps you spot worn washers before they start leaking.
When you remove the parts, take a quick photo with your phone. That simple habit makes reassembly much easier, especially if your aerator has several layers. If your faucet uses a hidden aerator, keep the special key in a labeled drawer near sink supplies. For older faucets, apply extra care and use light pressure, since age can make finishes and internal parts more fragile. A calm, methodical approach almost always works better than force.
Frequently Asked Questions
Can I remove a sink aerator without tools?
Yes, many aerators can come off by hand, especially if they are not stuck with mineral buildup. Use a dry cloth or rubber grip pad to improve traction. Turn counterclockwise with slow, steady pressure. If it does not move easily, stop and try vinegar or protected pliers rather than forcing it and risking scratches.
Why is my aerator stuck so tightly?
The most common reason is hard-water scale building up around the threads. Soap residue, rust, and trapped sediment can also make the part seize in place. A vinegar-soaked cloth wrapped around the faucet tip for 15 to 30 minutes usually helps loosen deposits so the aerator can turn more easily.
How often should I clean a kitchen sink aerator?
A good rule is every three to six months, though homes with hard water may need more frequent cleaning. If you notice weak flow, sputtering, uneven spray, or visible debris in the screen, clean it sooner. Regular maintenance helps prevent full blockages and keeps the faucet working at its best.
What if my faucet has a hidden aerator?
A hidden or cache aerator sits inside the faucet spout and usually needs a matching aerator key for removal. Do not force it with standard pliers, since that can damage the faucet opening. Check the faucet brand or manual to find the right tool, then remove it carefully and clean it the same way.
Should I clean the aerator or replace it?
If the screen and housing are intact, cleaning is usually enough. Soaking the parts in vinegar and brushing away debris often restores normal flow. Replace the aerator if the screen is torn, the threads are damaged, the washer is worn beyond use, or cleaning does not fix poor water flow.
Conclusion
Once you understand the basic parts and use a careful process, learning how to remove kitchen sink aerator components is not difficult. The job starts with a dry workspace, the right grip, and a quick check of the aerator style. From there, a gentle hand, protected pliers, and a vinegar soak can solve most problems without damaging the faucet.
Cleaning the screen, clearing mineral buildup, and checking the washer can restore smooth water flow in just a short time. This small repair is especially useful if you live with hard water, use an RV kitchen, or want to handle simple faucet maintenance on your own. The more often you do it, the easier it gets.
Take your time, keep the parts in order, and avoid forcing anything. With a little patience, you can clean or replace the aerator confidently and keep your faucet running the way it should.

About
Nick Hall has spent the last seven years working at the intersection of kitchen design and home repair — first as a design assistant at a residential renovation studio, then as a freelance writer covering everything from cabinet layouts to leaky faucet fixes.
Her approach is simple: kitchens should look good and function well. That means she’s just as comfortable talking about color palettes and counter materials as she is walking readers through how to fix a wobbly cabinet hinge or troubleshoot a garbage disposal.
Nick has worked directly with homeowners on small-space kitchen makeovers, budget-conscious renovations, and the kind of everyday repairs that don’t need a contractor — just the right instructions. She writes from experience, not theory, and tests most of the fixes and tips she shares before publishing them.
When she’s not writing, Nick is usually hunting for mid-century kitchen finds at estate sales or helping friends plan their own renovations. She lives in Columbus, Ohio.