
Stone floors bring a gorgeous, timeless feel to any kitchen. Yet they show every crumb, splash, and smudge the moment they appear.
Here’s the good news: keeping them spotless is easier than you think. Once you learn how to clean stone floors in kitchen spaces the right way, you’ll protect that natural beauty for years to come.
You don’t need harsh chemicals or a professional crew. With a few gentle supplies and a simple routine, anyone can keep their floor looking fresh and feeling smooth underfoot.
Stone is durable, but it’s also sensitive to the wrong products. That’s why the right approach matters so much.
This guide walks you through every step in plain, friendly language so you can clean and care for your stone floors with total confidence.
Why Cleaning Stone Kitchen Floors Matters
Clean stone floors do more than just look pretty. They stay safer, last longer, and keep your whole kitchen feeling fresh.
For homeowners and kitchen enthusiasts, proper care protects a real investment. Natural stone like slate, travertine, limestone, and marble can serve you for decades when you treat it gently.
For DIY beginners, this skill builds genuine confidence. You learn how sealed stone behaves, why pH-neutral cleaner matters, and how good moisture control prevents stains before they start.
There’s a safety angle too. Grease buildup near the stove makes floors slippery and risky. Regular cleaning keeps that surface grippy and secure.
Most of all, a clean stone floor simply feels wonderful. That smooth, cool surface under your feet turns everyday cooking into something you actually look forward to.
Tools and Materials You’ll Need
Gather your supplies before you begin so the whole job flows smoothly. Start with a soft broom or dust mop to sweep away gritty crumbs without scratching the surface. You’ll also want a quality pH-neutral stone cleaner, since regular household cleaners can dull and damage delicate stone over time.
Fill a bucket with warm water and keep a microfiber mop close, as it lifts dirt gently and dries with fewer streaks. Have a few soft cloths or towels ready for drying and spot-cleaning sticky messes. For grout cleaning, grab a soft-bristle brush that scrubs those lines without tearing them up.
One optional convenience item, a spray bottle, lets you apply your cleaner evenly and reach tricky corners. It makes quick daily touch-ups feel almost effortless.
Step-by-Step Guide on How To Clean Stone Floors In Kitchen
Step 1 – Clear The Floor Completely
Before you clean anything, give yourself room to work. Move chairs, mats, the trash can, and any small furniture out of the way.
You’ll be surprised how much dirt hides under rugs and beneath table legs. Those spots rarely get attention, so they collect a surprising amount of grime.
Take a moment to scan the whole floor. Notice where the gritty crumbs gather, where that dull haze sits, and where sticky cooking residue lingers near the stove.
A clear floor lets you reach every corner without dodging obstacles. It also keeps you from accidentally spreading dirt onto clean spots later.
This quick prep step takes just a minute or two. Once everything is out of the way, the actual cleaning goes faster and feels far less frustrating.
Step 2 – Sweep Away Loose Debris
Now grab your soft broom or dust mop and clear every speck of loose dirt. This step matters more than people realize.
Those gritty crumbs underfoot act like sandpaper when you mop over them. Drag them across natural stone and they leave tiny scratches that dull the surface over time.
Sweep in slow, gentle strokes, working from the far corner toward the doorway. Pay close attention to the spaces beneath cabinets and along the baseboards where dust loves to hide.
Listen for that faint scratchy sound as the bristles gather grit. When it goes quiet, you know the floor is ready.
A thorough sweep protects your stone and sets you up for a smooth, streak-free clean. Never skip it.
Step 3 – Mix Your Stone-Safe Cleaning Solution
With the floor swept, it’s time to prepare your cleaner. Fill your bucket with warm water and add your pH-neutral stone cleaner, following the bottle’s directions.
This is where many beginners go wrong. Vinegar, lemon, and bleach feel powerful, but their acids etch and dull stone surfaces fast. Always reach for stone-safe products instead.
Stir the mixture gently until it blends. The warm water helps loosen grease buildup and sticky residue far better than cold.
If you prefer, pour some solution into a spray bottle for easy spot-treating. That tool makes daily maintenance quick and tidy.
Knowing how to clean stone floors in kitchen areas starts right here, with the right gentle formula. Get this part correct and the rest falls easily into place.
Step 4 – Tackle Sticky Spots And Stains First
Before mopping the whole floor, deal with the trouble spots. Those greasy, sticky patches near the stove need a little extra attention.
Dip a soft cloth into your cleaning solution and lay it over the sticky residue. Let it sit for a minute or two so the warm liquid can soften the mess.
Then wipe gently in small circles. You’ll feel the grease loosen and lift away, leaving the stone smooth again beneath your fingers.
For stubborn marks, repeat the process rather than scrubbing hard. Aggressive scrubbing can scratch and harm the finish.
Spot-treating first means these tough areas won’t smear across the rest of your clean floor. This simple habit also supports stain prevention, keeping your stone looking beautiful between deeper cleaning sessions.

Step 5 – Mop With The Right Technique
Now for the main event. Dip your microfiber mop into the solution, then wring it out well so it’s damp, not dripping.
Good mop technique keeps things even. Work in overlapping strokes, moving in one steady direction across the floor. Start at the far end and back your way toward the door so you never step on freshly cleaned stone.
Rinse the mop often in your bucket, and swap the water once it turns murky. Dirty water just smears grime around.
As you go, watch that dull haze disappear and the true color of your slate or travertine shine through. The transformation is genuinely satisfying.
Keep your strokes light and consistent. A gentle, careful pass cleans far better than heavy pressure.
Step 6 – Clean The Grout Lines
Grout often gets overlooked, yet it collects the most dirt. Those damp grout lines darken over time and make even a clean floor look tired.
Grab your soft-bristle brush and dip it in your stone-safe solution. Scrub along each line with gentle back-and-forth strokes.
Work slowly and follow the grout’s path. You’ll see the grime lift and the original color brighten with each pass.
Be careful not to scrub so hard that you splash cleaner onto unsealed areas. Wipe up any extra liquid as you move along.
Good grout cleaning makes a huge visual difference. Once those lines look fresh and bright, your whole floor instantly appears newer, cleaner, and far better cared for than before.
Step 7 – Rinse And Dry Thoroughly
Leftover cleaner can leave a filmy haze, so a proper rinse matters. Empty your bucket and refill it with clean, warm water.
Wring out your mop and go over the floor again, lifting away any soapy residue. This pass restores that crisp, clear finish you’re after.
Now dry the surface with soft cloths or towels. Good moisture control protects your stone, since standing water can seep into seams and cause damage over time.
Run your hand across the surface. Feel how smooth and cool it is now, completely free of stickiness and grit.
Drying also prevents new streaks from forming as the floor air-dries unevenly. A few minutes of buffing rewards you with a gorgeous, streak-free shine.
Step 8 – Set Up A Simple Maintenance Routine
A spotless floor stays that way with light, regular care. The trick is keeping things consistent so dirt never builds up.
Sweep daily to catch crumbs before they scratch. Wipe spills the moment they happen, especially greasy ones near the stove.
Plan a gentle full mop once or twice a week, depending on foot traffic. Save deep cleaning and grout scrubbing for every few weeks.
Ask about resealing too. Sealed stone resists stains far better, and most floors benefit from fresh surface protection every year or so.
Once routine care becomes second nature, your floor practically maintains itself. That fresh, streak-free look becomes your everyday normal, and you’ll spend far less time fixing neglected messes down the road.
Critical Mistakes to Avoid When Cleaning Stone Kitchen Floors
The biggest mistake by far is using acidic or harsh cleaners. Vinegar, lemon juice, bleach, and many all-purpose sprays slowly etch and dull natural stone. They strip away the finish and leave permanent cloudy marks. Always choose a pH-neutral cleaner made specifically for stone, and your floors will thank you for years.
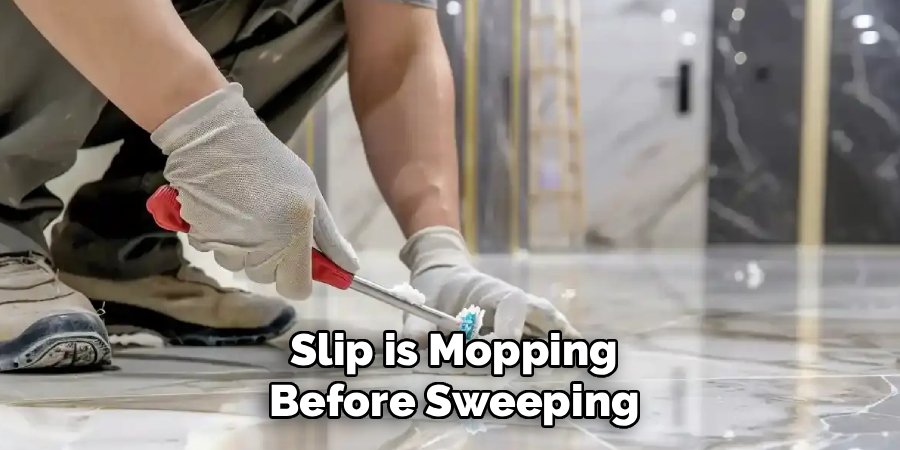
Another common slip is mopping before sweeping. When you skip that first sweep, gritty crumbs get dragged across the surface and act like tiny scratches. Those marks add up fast on softer stones like limestone and marble. A quick sweep first protects the finish every single time.
Many people also soak the floor with too much water. Excess moisture seeps into seams, grout lines, and unsealed areas, leading to staining and slow damage. Use a damp mop, not a dripping one, and dry the surface afterward for proper moisture control.
Then there’s harsh scrubbing. Attacking sticky spots with abrasive pads or heavy pressure scratches the stone. Gentle, patient cleaning always wins. Finally, forgetting to reseal leaves stone vulnerable. Regular surface protection keeps stains out and makes daily maintenance so much easier.
Expert Tips
Want professional-level results? Keep a spray bottle of pH-neutral cleaner and a soft cloth handy near the stove. Wipe greasy splatters the instant they land, before they harden into stubborn stains.
Always use two buckets when deep cleaning, one for your solution and one for rinsing. This simple trick keeps dirty water from smearing grime back across your clean stone.
Test any new product on a hidden corner first. Stone-safe products vary, and a quick patch test saves you from a costly mistake.
Place mats at entry points and in front of the sink. They catch grit and water before it reaches the floor, cutting your cleaning work dramatically.
Finally, reseal sealed stone on a schedule. Mark your calendar yearly, so surface protection never slips your mind.
Frequently Asked Questions
How Often Should I Mop My Stone Kitchen Floor?
It depends on your foot traffic, but most kitchens benefit from a gentle mop once or twice a week. Sweep daily to catch crumbs, and wipe spills right away.
- Daily: sweep and spot-clean spills
- Weekly: full mop with pH-neutral cleaner
- Monthly: deep clean and scrub grout lines
This rhythm keeps your stone fresh without overworking the surface.
Can I Use Vinegar To Clean Natural Stone?
No, please avoid it. Vinegar is acidic, and it slowly etches and dulls natural stone like marble, limestone, and travertine. The damage often shows as cloudy, rough patches that won’t buff out. Instead, stick with a pH-neutral cleaner made for stone. It cleans just as effectively while protecting that beautiful finish, keeping your floor smooth and gleaming for the long haul.
How Do I Get Rid Of A Dull Haze On My Floor?
A dull haze usually means leftover cleaner residue or hard water spots. Mop again using only clean, warm water to rinse away the film, then dry thoroughly with soft towels. If the haze lingers, you may have used the wrong product. Switch to a stone-safe cleaner going forward. Buffing gently with a dry microfiber cloth often restores that lovely, clear shine.
Should I Seal My Stone Kitchen Floor?
Yes, sealing is highly recommended for kitchen stone. Sealed stone resists grease, water, and stains far better, which makes daily maintenance much easier. Most floors need resealing about once a year, though high-traffic kitchens may need it more often. To test, drop a little water on the surface. If it soaks in rather than beading up, it’s time to reseal and refresh your surface protection.
What’s The Best Way To Clean Grout Between Stone Tiles?
Use a soft-bristle brush dipped in your pH-neutral solution, then scrub gently along each line. Avoid stiff wire brushes, since they damage both grout and stone. Work slowly and wipe up extra moisture as you go. For routine care, a quick grout pass every few weeks keeps those lines bright. Sealing your grout too adds extra protection against stains and buildup.
Conclusion
Caring for your stone kitchen floor is simpler than it looks, and the payoff is huge. Clean, well-maintained stone stays beautiful, safe, and welcoming for decades.
Remember the essentials. Always sweep before you mop, and choose a pH-neutral cleaner instead of harsh, acidic products. Spot-treat sticky messes first, then mop with light, even strokes and rinse away every trace of residue. Don’t forget those grout lines, and always dry the surface to keep moisture in check. Finish with regular resealing for lasting surface protection.
The real reward goes beyond a shiny floor. You’ll protect a valuable investment, keep your kitchen safer underfoot, and enjoy that smooth, cool surface every single day.
So grab your supplies and give it a try this weekend. Once you understand how to clean stone floors in kitchen spaces with the right gentle approach, you’ll wonder why it ever felt intimidating. Take it one step at a time, build the habit slowly, and enjoy your fresh, gorgeous floor. You’ve totally got this.
