
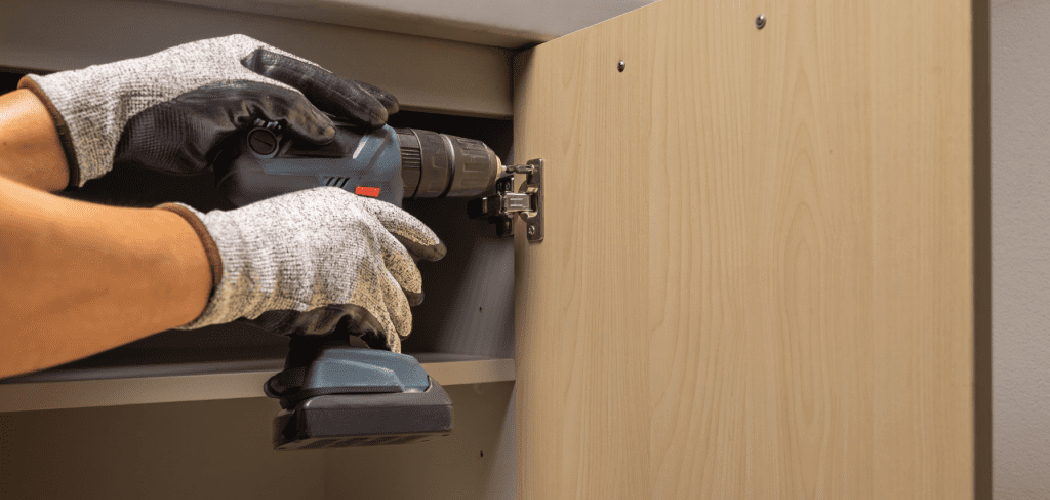
A full kitchen remodel can drain your budget fast, but cabinet refacing gives you a fresh look without tearing everything out. If your cabinet boxes are still solid, you can update worn, dated doors and drawer fronts with new surfaces, hardware, and finishes that make the whole room feel cleaner and brighter. Learning how to reface kitchen cabinets doors is a practical DIY skill that saves money, reduces waste, and gives you a big visual upgrade in just a few days.

This guide will walk you through the process step by step, so you can plan the job, avoid common errors, and get a smooth, professional-looking result.
Why Reface Your Cabinets
Refacing makes sense when your cabinets are structurally sound but look tired, scratched, or out of style. Instead of replacing the entire cabinet system, you keep the existing boxes and update the visible parts. That means less demolition, less mess, and a much lower cost than a full replacement.
For beginners, cabinet refacing is also more approachable than many other kitchen projects. You do not need to move plumbing, reroute wiring, or rebuild walls. Most of the work comes down to careful measuring, prep, alignment, and patience. If you like the current kitchen layout and want a fast cosmetic upgrade, refacing can deliver a dramatic change with manageable tools and skills.
Tools and Materials You’ll Need
Before you start, gather everything in one place so the project moves smoothly from prep to installation.
- Replacement cabinet doors and drawer fronts
- Wood veneer, laminate, or refacing skin for cabinet boxes
- Measuring tape
- Pencil
- Screwdriver or drill
- Drill bits
- Painter’s tape
- Cleaning degreaser
- Microfiber cloths or lint-free rags
- Fine-grit sandpaper or sanding sponge
- Utility knife
- Straightedge or metal ruler
- Contact adhesive or manufacturer-recommended glue
- J-roller or laminate roller
- Wood filler
- Putty knife
- New hinges
- Cabinet handles or knobs
- Level
- Safety glasses
- Work gloves
Optional for convenience:
- Cordless label maker or sticky labels for marking doors, hinges, and cabinet openings
8 Step-by-Step Guide on How to Reface Kitchen Cabinets Doors
Step 1 – Inspect the cabinet boxes and plan the project
Start by checking whether your cabinets are good candidates for refacing. Open every door, pull out each drawer, and look closely at the cabinet boxes. You want solid frames, flat surfaces, and no major water damage, swelling, or loose joints. A little cosmetic wear is fine, but soft wood and warped panels can cause trouble later.
Next, decide on your finish and style. Shaker doors, slab fronts, and woodgrain laminates all create a different feel. Stand in your kitchen and picture how the new color and texture will work with the counters, backsplash, and flooring. Good planning now keeps you from making rushed choices once the work begins.
Step 2 – Measure every opening with care
Accurate measuring is the foundation of a clean result. Measure each cabinet door opening separately, even if two sections look the same. Small differences are common in older kitchens, and a door that is off by even a quarter inch can look crooked or rub against the frame.

Write down height and width for every door and drawer front. Label each cabinet location with painter’s tape so you know exactly where each new piece belongs. This is the stage where many first-time DIYers slow down, and that is a good thing. If you want to master how to reface kitchen cabinets doors, careful measuring is one of the habits that matters most.
Step 3 – Remove the old doors, drawers, and hardware
Once your new parts are ordered or your materials are ready, remove the old cabinet doors, drawer fronts, hinges, knobs, and pulls. Keep a small container nearby for screws, brackets, and any hardware you might reuse. As each piece comes off, label the cabinet opening and the removed part so you can track the layout.
This stage can feel noisy and dusty, but it is also satisfying. The kitchen starts to look stripped back and ready for change. Check the exposed cabinet faces for dents, holes, or rough spots. If old hinge areas are chipped or uneven, fill them now so the refaced surface sits flat and smooth later.
Step 4 – Clean and prep the cabinet surfaces
Kitchen cabinets collect grease, cooking residue, and fine dust over time, especially around handles and near the stove. Wash all exposed cabinet box surfaces with a strong degreaser, then wipe them dry with a clean cloth. Do not rush this step. Adhesives stick best to clean, dry, solid material.
After cleaning, lightly sand glossy or rough areas to help the veneer or laminate bond well. You are not trying to remove the whole finish. You just want to dull the surface and smooth out any small flaws. Run your hand across the cabinet face when you are done. It should feel dry, even, and slightly dull rather than slick or sticky.
Step 5 – Apply veneer or laminate to the cabinet boxes
Now you will cover the visible cabinet frames and sides to match the new doors. Cut veneer or laminate strips slightly oversized, then dry-fit each piece before adding adhesive. When everything lines up well, apply glue according to the product instructions and press the material into place carefully.
Work slowly from one edge to the other to prevent bubbles and wrinkles. Use a roller to press the material down firmly, especially along corners and edges. The surface should feel tight and secure, with no loose spots. This is often the moment when your kitchen begins to transform, because the old finish disappears and the fresh color starts tying the whole design together.
Step 6 – Trim edges and smooth the finish
After the veneer or laminate sets, trim away the excess with a sharp utility knife. Use a straightedge where needed and keep your cuts controlled. Dull blades can tear the finish, so change blades early rather than trying to force them through. A clean edge makes the whole refacing job look more polished.
Lightly smooth rough corners or tiny overhangs with fine sandpaper if the material allows it. Then wipe away dust so the surfaces stay clean for installation. Many people underestimate this stage, but detail work is what separates a rushed DIY job from one that looks built-in and intentional. Precision here pays off every time you open the kitchen door and see the finished line.
Step 7 – Install the new doors and drawer fronts
Attach the hinges to the new doors first, then mount the doors to the cabinet frames. Go one door at a time and adjust each hinge until the gaps look even. You want a steady reveal around the edges, with no rubbing, sagging, or crooked lines. Drawer fronts should sit level and centered.
The first few installations may feel slow, and that is normal. Once you get the hang of hinge adjustment, the process moves faster. This is another key part of how to reface kitchen cabinets doors, because even beautiful materials can look off if the doors are not aligned well. Step back often and check the kitchen from different angles as you work.
Step 8 – Add hardware and make final adjustments
Install knobs, pulls, or handles using a template if possible. Consistent placement gives the kitchen a more professional look. Drill carefully, support the back side when needed, and tighten hardware just enough to hold it firmly without damaging the finish.

Then open and close every door and drawer several times. Listen for rubbing, clicking, or misalignment. Tighten screws, shift hinges, and fine-tune spacing until everything moves smoothly. This final adjustment stage can take longer than expected, but it is worth the effort. The goal is not just a fresh look. You also want a kitchen that feels solid, balanced, and pleasant to use every day.
Common Mistakes
One of the most common mistakes is measuring too quickly. Beginners often assume matching cabinets share the same dimensions, but small differences can throw off the fit. A door that looks close enough on paper can create uneven gaps, scrape against a neighbor, or leave exposed frame edges that are hard to ignore once everything is installed.
Another frequent problem is poor surface prep. Grease, dust, and leftover grime can weaken adhesive and lead to peeling veneer later. Even a beautiful finish will not last if it goes onto a slick or dirty surface. Cleaning and light sanding may feel boring, but they do a lot of the heavy lifting.
Many DIYers also rush the alignment stage. They hang the doors, see that they open, and move on. But cabinet doors need small hinge adjustments to sit level and even. If you skip that fine-tuning, the whole kitchen can look slightly off, even when the materials are high quality.
A final mistake is choosing style over practicality. High-gloss finishes, delicate edges, or trendy hardware may look great in a photo but feel harder to maintain in a busy kitchen. Pick materials that match how you actually live. Durable, easy-clean surfaces usually bring the best long-term satisfaction.
Expert Tips
Order one extra hinge and a little more veneer or laminate than you think you need. Small mistakes happen, and having backup materials nearby keeps the job moving. It also helps to set up a worktable in a clean, well-lit area so you can cut, label, and sort parts without clutter.
If your kitchen gets strong natural light, check the finish in both daylight and evening light before committing. Colors and textures can shift more than you expect. Use a hardware template for consistent knob and pull placement, and do not tighten hinges fully until each run of doors is aligned. Small adjustments done at the right time make the final result look sharp and balanced.
Frequently Asked Questions
Can I reface cabinets if the cabinet boxes are old?
Yes, as long as the cabinet boxes are still strong and square. Surface wear, faded finish, and minor scratches are fine, but soft wood, major warping, or water damage can create problems. Check all frames, side panels, and joints before you start. If the structure is weak, replacing the cabinets may be the smarter long-term choice.
Is cabinet refacing cheaper than replacing cabinets?
In most cases, yes. Refacing usually costs much less because you keep the existing cabinet boxes and only update the visible surfaces, doors, drawer fronts, and hardware. You also avoid major demolition and disposal costs. The final price depends on materials, door style, and whether you hire out part of the work.
How long does a DIY cabinet refacing project take?
For a beginner, the project often takes a long weekend to several days, depending on kitchen size and how prepared you are. Measuring, cleaning, surface prep, and alignment all take time. If you work carefully and do not rush the adhesive or hinge adjustments, you will usually get a better and longer-lasting result.
What is the best finish for beginner-friendly cabinet refacing?
A durable laminate or ready-to-install door system is often the easiest route for beginners. These options are consistent, low maintenance, and available in many colors and wood looks. Real wood veneer can look beautiful too, but it may need a little more care during cutting and installation. Choose a finish that balances appearance, durability, and ease of use.
Do I need special tools to get professional-looking results?
Not many. Most beginners can handle cabinet refacing with a tape measure, drill, screwdriver, utility knife, straightedge, sanding sponge, and roller. The more important factor is not fancy gear but patience. Careful measuring, clean cuts, and slow hinge adjustment usually matter more than owning advanced tools.
Conclusion
Refacing your cabinets is one of the most practical ways to update a kitchen without the cost and chaos of a full remodel. When the cabinet boxes are still in good shape, replacing doors, drawer fronts, and outer surfaces can completely change the look of the room. The process comes down to planning well, measuring carefully, prepping surfaces the right way, and taking your time with alignment and finishing details.
If this is your first cabinet project, do not worry about working fast. Focus on steady progress and clean results. Each step builds on the one before it, and even small improvements in accuracy can make the whole kitchen look better. Once you understand how to reface kitchen cabinets doors, you can give tired cabinets a fresh, durable finish that looks custom, feels satisfying, and adds real value to your home.

About
Nick Hall has spent the last seven years working at the intersection of kitchen design and home repair — first as a design assistant at a residential renovation studio, then as a freelance writer covering everything from cabinet layouts to leaky faucet fixes.
Her approach is simple: kitchens should look good and function well. That means she’s just as comfortable talking about color palettes and counter materials as she is walking readers through how to fix a wobbly cabinet hinge or troubleshoot a garbage disposal.
Nick has worked directly with homeowners on small-space kitchen makeovers, budget-conscious renovations, and the kind of everyday repairs that don’t need a contractor — just the right instructions. She writes from experience, not theory, and tests most of the fixes and tips she shares before publishing them.
When she’s not writing, Nick is usually hunting for mid-century kitchen finds at estate sales or helping friends plan their own renovations. She lives in Columbus, Ohio.