
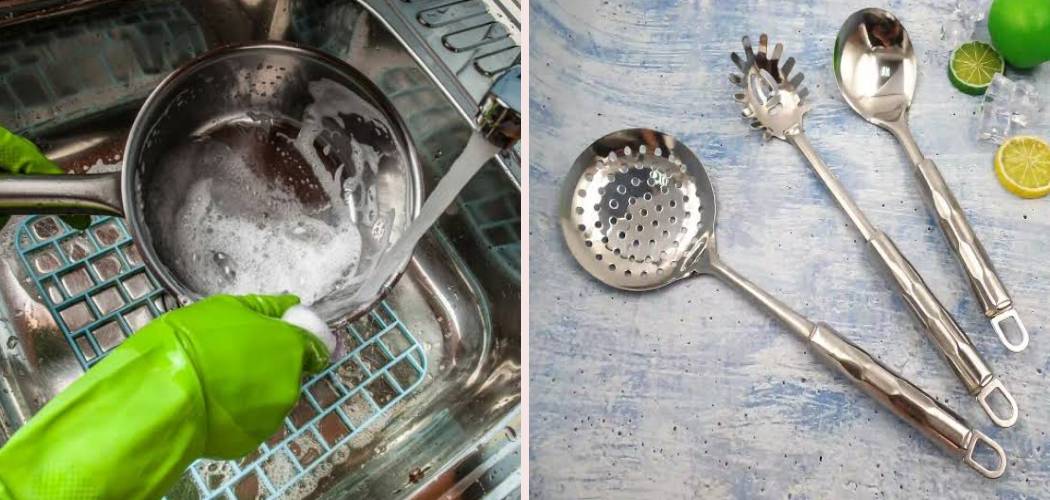
Stainless steel spoons, forks, and ladles look brilliant when they’re new, but everyday cooking takes a toll. Grease builds up on the handles, water spots dull the shine, and fingerprints seem to appear the moment you set a clean piece down.
The good news? Stainless steel is one of the easiest materials to care for once you know the right tricks. You don’t need fancy cleaners or expensive tools, just a few household basics and a little know-how.

Whether you’re polishing tongs after a big dinner or scrubbing a spatula caked with dried-on food, the right approach makes all the difference. This guide shows you exactly how to clean stainless steel kitchen utensils so they stay bright, spotless, and ready for your next meal.
Why Cleaning Stainless Steel Kitchen Utensils Matters
Stainless steel resists rust and stains better than most materials, but it isn’t invincible. Leave grease and dried-on food sitting too long, and you’ll fight stubborn buildup, dull streaks, and even tiny rust spots where the protective layer wears thin.
Regular cleaning keeps your spatulas, ladles, and tongs hygienic and looking sharp. It also protects the finish, so your tools last for years instead of fading into a scratched, cloudy mess.
For campers and outdoor beginners, this skill is pure gold. When you cook over a fire or a portable stove, your utensils collect soot, grease, and grit fast, and you often have limited water to work with. Knowing how to clean them quickly with simple supplies keeps your gear sanitary, lightweight, and reliable on every trip.
Tools and Materials You’ll Need
Gather everything before you start so the job goes smoothly. Most of these items are probably already sitting in your cupboard.
- Mild dish soap – cuts grease without harming the finish
- Hot water – loosens dried-on food and stuck-on grime
- A soft sponge – cleans gently without scratching
- A non-abrasive scrubber – tackles tougher buildup safely
- Baking soda – lifts stains and gentle scrubs away grease
- White vinegar – dissolves water spots and restores shine
- A microfiber cloth – buffs out streaks and fingerprints
- A clean drying towel – prevents new water spots after rinsing
- A bottle of stainless steel polish (optional) – adds extra shine for special pieces
Steer clear of steel wool, harsh bleach, and gritty cleansers, since these scratch the surface and invite rust spots. With these basics ready, you’re set to clean every piece you own.
Step-by-Step Guide on How To Clean Stainless Steel Kitchen Utensils
Step 1 – Rinse Off Loose Food Right Away
Start as soon as you finish cooking. Hold your stainless steel spoons, forks, and ladles under hot running water and let the stream wash away loose crumbs, sauce, and grease before they harden.
Use your fingers or a soft sponge to nudge off any sticky bits clinging to the edges. The sooner you rinse, the less scrubbing you’ll face later.
Hot water works better than cold here because it melts grease on contact. You’ll feel the slick film loosen and slide away under your fingertips.
Don’t let utensils pile up dirty in the sink overnight. Dried-on food bonds tight to metal and turns a five-second rinse into a ten-minute battle. A quick pass now saves you real effort.
Step 2 – Wash Gently With Mild Dish Soap
Now for the proper wash. Add a small squeeze of mild dish soap to your damp soft sponge and work up a light lather. Wipe every surface of each spatula, ladle, and fork, paying attention to the spots where grease loves to hide.
Get into the curves of spoons and between the tines of forks, since these crevices trap food easily. You’ll feel the surface turn squeaky and smooth as the soap lifts away the grime.

Knowing how to clean stainless steel kitchen utensils starts with this gentle, thorough wash. Rinse your sponge often so you’re working with clean suds, not pushing dirt around. Keep the motion steady and cover the handle right down to the tip.
Step 3 – Tackle Dried-On Food With Baking Soda
Some messes need extra muscle. For crusty, dried-on food or stuck-on grease, make a simple paste by mixing baking soda with a few drops of water until it feels thick and spreadable.
Spread the paste over the stubborn spots and let it sit for a few minutes. The baking soda gently loosens the grime without scratching the finish, which is exactly what you want.
Then grab your non-abrasive scrubber and work in small circles. You’ll feel the buildup break apart and lift away as the gritty paste does the heavy lifting.
This trick is a lifesaver for ladles and spatulas that handled sticky sauces. Rinse the paste off with hot water once the surface feels clean and smooth again.
Step 4 – Remove Water Spots With White Vinegar
Hard water leaves cloudy spots and chalky streaks that soap alone won’t shift. To fix this, dampen a microfiber cloth with white vinegar and wipe down each utensil.
The vinegar’s mild acidity dissolves mineral deposits fast, cutting through water spots and dull film. You’ll watch the cloudy haze melt away, leaving a clear, bright surface behind.
For heavy spotting, let the vinegar sit on the metal for a minute before wiping. Don’t worry about the sharp smell, it fades the moment you rinse.
This step is especially handy if your tap water runs hard and leaves marks on everything. After wiping, give each piece a quick rinse under hot water to clear off any vinegar residue before moving on.
Step 5 – Banish Rust Spots Before They Spread
Even good stainless steel can develop tiny rust spots, usually where the finish gets scratched or stays wet too long. Catch them early and they’re easy to erase.
Sprinkle a little baking soda directly onto the rust spot, then rub gently with a damp soft sponge or non-abrasive scrubber. Work in the direction of the metal’s grain, not against it.
You’ll see the orange specks fade as the baking soda lifts them away. For tougher spots, a dab of white vinegar boosts the effort nicely.
Avoid steel wool here, since it scratches the surface and invites even more rust later. Once the spot disappears, rinse the area well and dry it right away to stop new rust from forming.
Step 6 – Rinse Thoroughly Under Hot Water
Clear away every trace of soap, paste, and vinegar. Hold each utensil under hot running water and turn it slowly so the stream reaches the curves, the tines, and the full length of the handle.
Run your fingers over the surface as you rinse. You’re feeling for any slick soap film or gritty baking soda that might still cling to the metal.
Leftover residue dries into dull streaks and spots, so a complete rinse really matters. Hot water also helps the metal dry faster and cleaner than cold.
Take your time and rotate each piece fully. When the surface feels smooth and squeaks under your fingertips with nothing left behind, you’re ready to move straight to drying.

Step 7 – Dry Completely to Prevent New Spots
Drying is where many people slip up. Air-drying lets minerals in the water settle onto the metal, creating fresh water spots and streaks the moment everything dries.
Grab a clean drying towel and wipe each spoon, fork, ladle, and spatula completely. Get into the crevices and along the handles where droplets like to hide.
You’ll notice the metal turn bright and reflective as the moisture disappears. A microfiber cloth works wonders here, leaving zero lint behind.
This is also the simplest way to keep how to clean stainless steel kitchen utensils a quick job rather than a repeat battle. Dry tools resist rust, stay spotless, and look freshly polished. Never toss damp utensils into a drawer, since trapped moisture invites both spots and rust.
Step 8 – Polish for Extra Shine and Store Properly
Want that showroom sparkle? After drying, buff each piece with a dry microfiber cloth, wiping along the grain of the metal to chase away any lingering fingerprints or faint streaks.
For special pieces, add a tiny drop of stainless steel polish to the cloth and rub it in for an even brighter shine. A little goes a long way, so don’t overdo it.
You’ll see the surface gleam and catch the light beautifully once you’re done. Store your clean utensils in a dry drawer or a crock with good airflow, never crammed in damp.
Keeping them dry and uncrowded protects the finish and prevents new spots. With this simple routine, your tools stay bright and ready for years.
Critical Mistakes When Cleaning Stainless Steel Kitchen Utensils
Even careful cooks make a few errors that quietly damage their stainless steel. The biggest mistake is reaching for steel wool or gritty, abrasive cleansers. These scratch the protective finish, leaving dull marks that trap grime and open the door to rust spots. Always choose a soft sponge or a non-abrasive scrubber instead.
Another common slip is letting dirty utensils soak in the sink for hours, especially with food still clinging to them. Prolonged exposure to standing water, particularly hard water, encourages water spots and even pitting over time. A quick wash and rinse beats a long soak every time.
Skipping the drying step causes endless frustration too. When you let utensils air-dry, minerals settle on the surface and leave cloudy streaks and spots. Always towel-dry right after rinsing.
Many people also misuse bleach or harsh chemicals, thinking stronger means cleaner. These actually break down the finish and can leave residue near your food. Stick with mild dish soap, baking soda, and white vinegar.
Finally, scrubbing against the metal’s grain creates fine scratches. Always wipe and buff in the same direction the grain runs.
Expert Tips
Want your stainless steel to stay flawless? Always wipe and polish in the direction of the grain, those tiny lines you can see on the surface. Going with the grain hides micro-scratches and keeps the shine even.
Keep a microfiber cloth near your sink for quick buffing after every wash. Just a few seconds of drying and polishing prevents fingerprints and water spots from building up.
For a natural shine boost, rub a drop of olive oil onto a clean cloth and buff lightly. It leaves a protective sheen that resists smudges.
If you cook with acidic foods like tomatoes or citrus, rinse those utensils promptly, since acids can dull the finish over time. These small habits keep every spoon, fork, and ladle looking brand new for years.
Frequently Asked Questions
Can I put stainless steel utensils in the dishwasher?
Yes, most stainless steel utensils are dishwasher-safe, but hand-washing keeps them looking better longer. Dishwasher detergents are harsh, and the hot cycle can leave water spots or faint streaks. If you do use the dishwasher:
- Avoid mixing them with silver or aluminum, which can cause spotting
- Dry them with a towel right after the cycle ends
This prevents cloudy marks and keeps the shine bright.
How do I get rid of stubborn water spots?
White vinegar is your best fix for water spots. Dampen a microfiber cloth with vinegar and wipe the spotted areas, letting it sit a minute on heavy marks. The mild acid dissolves the mineral deposits left by hard water. Rinse with hot water afterward, then dry immediately with a clean towel. Drying right after every wash is the simplest way to stop new water spots from forming.
What causes rust spots on stainless steel?
Rust spots usually appear when the protective finish gets scratched or when utensils stay wet too long. Salt, acidic foods, and contact with rusty cookware can also trigger them. To prevent rust:
- Dry utensils completely after washing
- Avoid steel wool and abrasive scrubbers
- Don’t let them soak for hours
Catch spots early and gently rub them away with baking soda before they spread.
Is it safe to use baking soda on stainless steel?
Yes, baking soda is safe and very effective on stainless steel. It’s a gentle abrasive that lifts dried-on food, grease, and light stains without scratching the finish. Mix it with a little water to form a paste, spread it on the trouble spot, and scrub gently with a soft sponge. Always rub in the direction of the grain, then rinse thoroughly with hot water and dry completely.
How do I remove streaks and fingerprints?
Streaks and fingerprints wipe away easily with a dry microfiber cloth. Buff the surface gently, always following the direction of the grain, until the metal gleams. For tougher smudges, add a tiny dab of white vinegar or a drop of olive oil to the cloth. This cuts through oily fingerprints and leaves a clean, even shine without any cloudy residue behind.
Conclusion
Keeping your stainless steel tools spotless is easier than you might think. Start with a quick rinse under hot water, wash gently with mild dish soap and a soft sponge, and reach for baking soda when dried-on food won’t budge. A splash of white vinegar erases water spots, while careful drying and buffing with a microfiber cloth banish streaks and fingerprints for good.
The real secret is consistency. Dry every piece right after rinsing, store them in a dry, airy spot, and tackle rust spots the moment you see them. These small habits protect the finish and keep your spoons, forks, ladles, and tongs gleaming for years.
Now that you know how to clean stainless steel kitchen utensils the right way, you can keep every tool bright and sanitary, whether you’re cooking at home or over a campfire on your next adventure. Skip the steel wool, avoid long soaks, and make drying a habit. Treat your utensils with this simple care, and they’ll shine through countless meals to come.

About
Nick Hall has spent the last seven years working at the intersection of kitchen design and home repair — first as a design assistant at a residential renovation studio, then as a freelance writer covering everything from cabinet layouts to leaky faucet fixes.
Her approach is simple: kitchens should look good and function well. That means she’s just as comfortable talking about color palettes and counter materials as she is walking readers through how to fix a wobbly cabinet hinge or troubleshoot a garbage disposal.
Nick has worked directly with homeowners on small-space kitchen makeovers, budget-conscious renovations, and the kind of everyday repairs that don’t need a contractor — just the right instructions. She writes from experience, not theory, and tests most of the fixes and tips she shares before publishing them.
When she’s not writing, Nick is usually hunting for mid-century kitchen finds at estate sales or helping friends plan their own renovations. She lives in Columbus, Ohio.