
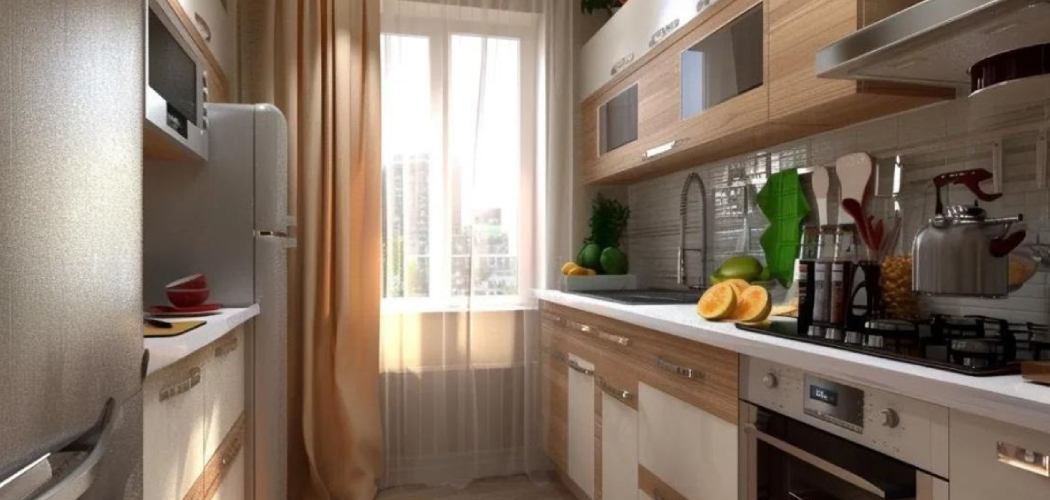
Open kitchen shelving can make your space feel lighter, warmer, and more personal. It gives you a place to mix storage with style, but it can also feel tricky when you are staring at an empty shelf and wondering what belongs there. If you have ever searched for how to decorate floating shelves in kitchen, you are not alone. Many beginners want shelves that look polished without becoming cluttered or hard to clean.
The good news is that decorating kitchen shelves is less about buying more things and more about creating balance, function, and visual breathing room. This guide will show you how to style your shelves step by step in a way that looks beautiful and works for daily life.

Why Decorating Kitchen Shelves Matters
Floating shelves do more than fill a blank wall. They shape how your kitchen feels and how smoothly it works. When styled well, they can turn everyday items like bowls, glasses, cutting boards, and jars into part of the room’s design. That means your kitchen can look finished without feeling stiff or overly staged.
Good shelf styling also helps you stay organized. When each item has a clear place, it becomes easier to grab what you use most and easier to keep surfaces tidy. Well-decorated shelves can also soften a kitchen full of hard materials like tile, stone, and metal. A few natural textures, layered shapes, and useful pieces add warmth fast. For beginners, this is one of the simplest ways to make a kitchen look more thoughtful and inviting.
Tools and Materials You’ll Need
- A tape measure to check shelf width, height, and spacing
- A small step stool if your upper shelves are hard to reach
- Everyday dishes such as plates, bowls, mugs, or glasses
- Decorative jars or canisters for dry goods or visual texture
- A few cookbooks with clean, attractive spines
- Wooden cutting boards or serving boards for warmth and height
- Small plants, herbs, or a vase with simple greenery
- A soft microfiber cloth for cleaning shelves before styling
- Storage baskets or containers if you want to hide smaller items
- One optional item: removable museum putty to help lightweight décor stay in place
Step-by-Step Guide on How to Decorate Floating Shelves in Kitchen
Step 1 – Clear Everything Off and Start Fresh
Before you style anything, take every item off the shelves. This gives you a clean visual reset and helps you see the wall, shelf spacing, and available room without distraction. Wipe down each shelf so the surface looks fresh and dust-free. Clean shelves instantly make styled objects look better.
As you remove items, sort them into simple groups. Keep daily-use pieces in one area, decorative pieces in another, and anything chipped, mismatched, or rarely used in a separate pile. This first edit matters more than most people think. A shelf looks calm and intentional when it holds only items that are useful, attractive, or both.
Starting from zero also helps you avoid the common habit of decorating around clutter. Instead of squeezing in random objects, you build a cleaner look with purpose.
Step 2 – Choose a Simple Color Story
One reason styled shelves look good in photos is color control. You do not need everything to match, but you do need the objects to feel connected. Pick two to four core tones for your shelf styling. For example, you might use white, wood, soft green, and black accents.
Look around your kitchen for clues. Your cabinet finish, backsplash, countertops, and hardware can guide your choices. If your kitchen already has a lot of visual detail, keep shelf colors quieter. If your kitchen is mostly neutral, a few soft accents can add life without making the shelves feel busy.
When learning how to decorate floating shelves in kitchen, color is often the detail that creates a calm, pulled-together result. Even simple dishes and jars look intentional when their tones work well together.
Step 3 – Anchor the Shelves with Functional Basics
Now begin placing your largest practical items first. Think stacked plates, bowls, glassware, or canisters. These pieces create the base of your arrangement and make the shelves useful, not just pretty. Start with the things you actually reach for during the week.
Place heavier-looking items near the ends or in balanced groups so the shelves feel visually stable. Stacks help a lot here. A short stack of plates, a pair of nested bowls, or three matching glasses can look neat without trying too hard. Leave room around each grouping so nothing feels crammed together.
This step keeps your design grounded in real kitchen use. Floating shelves work best when they hold a smart mix of form and function, not decorative objects alone. That balance is what makes the whole display feel natural.
Step 4 – Add Height with Vertical Pieces
Once your basics are in place, bring in a few tall or upright items to create shape. Good options include cutting boards, framed food art, a cookbook stood on end, or a slender vase. These vertical elements break up the horizontal line of the shelves and help the display feel layered.
Lean a wooden board against the wall behind a stack of bowls, or place a tall bottle beside a shorter ceramic piece. The contrast makes each object easier to notice. You want the eye to move across the shelf instead of seeing one flat row of similar heights.
Natural materials work especially well here. Wood brings warmth, while glass catches light and keeps things airy. A shelf with height variation feels more designed and less like a storage ledge.

Step 5 – Layer in Texture for Warmth
A beautiful shelf does not rely on color alone. Texture gives it depth. This is where you can add woven baskets, ceramic containers, linen-covered books, ribbed glass, or matte stoneware. These surfaces reflect light differently and make the arrangement feel richer.
Try mixing smooth and rough finishes. For example, pair glossy white dishes with a weathered cutting board, or place a soft green plant beside a clean glass jar filled with pasta. The contrast keeps the shelves from looking flat or sterile. In kitchens, texture also helps balance all the hard surfaces around the room.
If your shelves still feel cold, texture is usually the missing piece. It brings comfort and softness without adding visual noise. Small changes here can completely shift the mood of the space.
Step 6 – Use Odd-Number Groupings and Open Space
Grouping items in threes often looks more relaxed than placing everything in pairs. A small trio might include a canister, a plant, and a short stack of plates. Another might combine a cutting board, a bowl, and a bottle. Odd-number groupings tend to feel easier on the eye because they create subtle movement.
Just as important, leave empty space around some objects. Open space gives the shelf room to breathe and stops every inch from feeling filled. This is one of the biggest secrets behind magazine-worthy styling. Shelves look better when they are edited.
If you are figuring out how to decorate floating shelves in kitchen, resist the urge to keep adding pieces until the shelf feels full. Full is not the same as finished. A little breathing room makes everything you do display look more special.
Step 7 – Add a Touch of Life and Softness
Kitchens benefit from something living or organic. A small trailing plant, a potted herb, a stem in a simple vase, or even a bowl of fruit can soften the straight lines of shelving. These details add freshness and make the kitchen feel more inviting.
Keep this part practical and low-maintenance. If your shelves are near a sunny window, herbs like basil or thyme can work well. If not, choose something sturdy that tolerates indoor conditions. Even one small green element can wake up a shelf full of dishes and containers.
Softness also comes from shape. Round bowls, curved pitchers, and loose greenery offset square tiles and sharp cabinet edges. This mix helps the whole room feel more balanced and lived in.
Step 8 – Style for Real Use and Easy Maintenance
The final step is to test your shelves against daily life. Put the items you use most often at the easiest height to reach. Save higher shelves for lighter décor, extra serving pieces, or less-used items. A beautiful arrangement should never make cooking harder.
Stand back and look at the shelves from different angles in the room. Check for crowding, uneven spacing, and objects that feel out of place. Then live with the arrangement for a few days. You may notice that one stack is too tall, one jar is awkward to grab, or one shelf needs less on it.
The best shelf styling is not frozen. It shifts with the season, your habits, and what your kitchen needs most. When beauty and function support each other, your shelves stay appealing longer.

Common Mistakes
One common mistake is putting too many small items on the shelves. A row of tiny objects can quickly look fussy and dusty, especially in a kitchen where grease and cooking residue build up over time. It is better to use a few medium-size pieces that have presence and purpose.
Another mistake is ignoring function. Some people style shelves so heavily that nothing is easy to reach. If you use open shelving, at least part of it should support your routine. Plates, mugs, and bowls should be placed where they are simple to grab and return.
Many beginners also forget about contrast. When every item is the same height, color, or material, the shelves can feel flat. Mixing stacked dishes, upright boards, greenery, and a few varied finishes gives the eye more to enjoy without making the arrangement messy.
Poor spacing is another issue. Shelves packed edge to edge look stressful rather than stylish. Empty space is part of the design. It helps highlight the objects you love and keeps the display from feeling accidental.
Finally, do not decorate without considering the rest of the kitchen. Your shelves should connect to the room’s overall style. If your kitchen is modern and clean-lined, heavily rustic shelf décor may feel disconnected. Aim for consistency, not perfection.
Expert Tips
Start with usefulness, then build beauty around it. The most successful kitchen shelves hold at least a few items you use every week, because that keeps the styling honest and easy to maintain. Decorative touches should support the room, not compete with it.
Repeat materials and shapes to create rhythm. If you use one wooden board, try echoing that tone in a bowl or utensil holder nearby. Repetition helps shelves look designed without making them look overly matched.
Rotate by season instead of fully restyling. A small vase of spring stems, a bowl of lemons in summer, or a darker ceramic piece in fall can refresh the shelves with very little effort. This keeps the kitchen feeling current while preserving the foundation you already built.
Frequently Asked Questions
How many items should I put on each floating shelf?
There is no perfect number, but less usually looks better. Aim for a few grouped arrangements instead of filling every inch. Most shelves look balanced with two to four main groupings, depending on length. Leave visible empty space between them so the shelf feels open, clean, and easy to read.
What should I avoid putting on kitchen floating shelves?
Avoid overly fragile items, pieces you never use, and anything that creates visual clutter. Very small décor can also collect dust and look messy fast. In a kitchen, it is smart to skip objects that are hard to clean or too delicate for a space with heat, steam, and daily movement.
Can floating shelves be both decorative and practical?
Yes, and they usually look best that way. Use the shelves for everyday dishes, glasses, bowls, or canisters, then mix in a few decorative layers like a plant, cutting board, or vase. That combination keeps the shelves useful while still giving your kitchen warmth, personality, and style.
How do I make open kitchen shelves look less cluttered?
Limit your color palette, group similar items together, and avoid overcrowding the shelf. Stacks, matched jars, and repeated materials help create order. Open space matters just as much as the objects themselves. If something looks messy, remove one or two items first before changing everything.
How often should I restyle my kitchen floating shelves?
You do not need to restyle them often. A light refresh every few months is usually enough. You can swap in seasonal greenery, adjust one grouping, or remove anything that no longer feels useful. More important than frequent change is regular editing, cleaning, and keeping the shelves easy to use.
Conclusion
Learning how to decorate floating shelves in kitchen comes down to a few simple ideas: edit first, choose a clear color story, mix useful items with decorative layers, and leave enough open space for the shelves to breathe. You do not need expensive accessories or a designer’s eye. You just need a thoughtful mix of height, texture, shape, and function.
Start with what you already own. Plates, bowls, glass jars, cutting boards, and a small plant can go a long way when arranged with care. Focus on making the shelves work for your routine, not just for a photo. That is what makes the result feel warm, personal, and easy to live with.
If your first attempt does not look perfect, that is normal. Shelf styling gets easier once you begin moving pieces around and seeing what feels balanced in your own space. Start small, keep editing, and let your kitchen evolve one shelf at a time.

About
Nick Hall has spent the last seven years working at the intersection of kitchen design and home repair — first as a design assistant at a residential renovation studio, then as a freelance writer covering everything from cabinet layouts to leaky faucet fixes.
Her approach is simple: kitchens should look good and function well. That means she’s just as comfortable talking about color palettes and counter materials as she is walking readers through how to fix a wobbly cabinet hinge or troubleshoot a garbage disposal.
Nick has worked directly with homeowners on small-space kitchen makeovers, budget-conscious renovations, and the kind of everyday repairs that don’t need a contractor — just the right instructions. She writes from experience, not theory, and tests most of the fixes and tips she shares before publishing them.
When she’s not writing, Nick is usually hunting for mid-century kitchen finds at estate sales or helping friends plan their own renovations. She lives in Columbus, Ohio.