
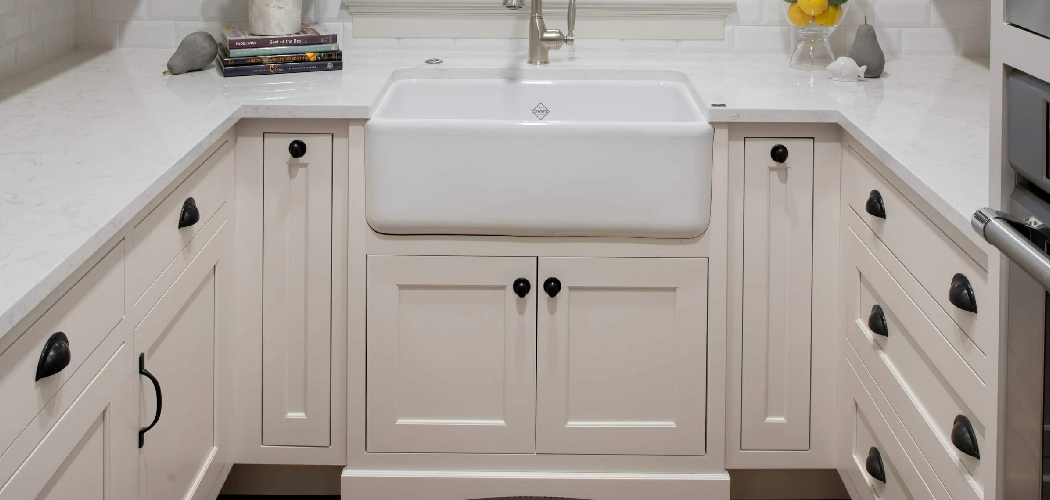
Setting your own base cabinets is one of the most rewarding projects a hands-on homeowner can take on. It looks intimidating from the outside, but once you understand the rhythm of measuring, leveling, and fastening, the whole job becomes surprisingly satisfying. You don’t need years of carpentry experience to get crisp, professional results.
If you can read a tape measure and hold a drill steady, you’re already most of the way there. Knowing how to install kitchen base cabinets gives you the confidence to remodel on your own terms and save a serious chunk of money in the process.
This guide walks you through every stage, from prepping your walls to setting the final cabinet level, so you can build a solid, square foundation that your countertop and entire kitchen will rest on for years.

Why Installing Kitchen Base Cabinets Matters
Base cabinets are the backbone of your entire kitchen. They hold your countertop, anchor your sink and appliances, and carry the daily weight of cooking, cleaning, and gathering. Get them level and secure, and everything above them lines up beautifully.
There’s real value in doing this yourself. You learn how walls and floors actually behave, you save on labor costs, and you gain skills that carry over to dozens of other home projects.
Those same skills travel surprisingly well, too. If you ever fit out a camper kitchen, a tiny home, or an outdoor cooking station, the principles of leveling, shimming, and fastening to a frame stay exactly the same. Mastering cabinets in your house first means you’ll feel confident tackling compact builds anywhere, indoors or off the grid.
Tools and Materials You’ll Need
Gathering your gear before you begin keeps the whole install smooth and prevents those frustrating mid-project trips to the hardware store. Most of these tools are common, and you likely own several already.
You’ll want a drill or impact driver, a long spirit level, a tape measure, and a pencil for marking. A stud finder helps you locate solid wall studs, while a handful of shims lets you correct for uneven floors. Keep your cabinet screws, a clamp or two, and a utility knife within reach. A ledger board, a scrap length of straight lumber, gives your upper row support, though base cabinets mainly rely on the floor and wall.
The one optional item worth grabbing is a laser level. It projects a perfectly straight reference line across your whole wall, making alignment faster and far more accurate than chalk alone.
Step-by-Step Guide on How To Install Kitchen Base Cabinets
Step 1 – Find the High Point of Your Floor
Before anything gets screwed down, you need to understand your floor. Almost no kitchen floor is perfectly flat, and that floor slope decides how your cabinets sit.
Set your level on the floor and slide it along the entire run where the cabinets will go. Watch the bubble carefully and mark the spot where the floor sits highest. That point becomes your reference for everything else.
You’ll feel slight dips and rises under the level as you move it, and that’s completely normal. Mark the high point clearly with your pencil. Working from this single spot keeps every cabinet aligned, so you shim the low areas up to match rather than fighting the floor the whole way through.
Step 2 – Mark Your Layout Lines
Now translate your plan onto the wall. Measure the height of your base cabinets, usually around 34 and a half inches, and make a mark at that height directly above your floor’s high point.
Use your level to draw a long, straight horizontal line across the wall at that mark. This line shows exactly where the top of every cabinet should land. A laser level makes this step nearly effortless if you have one.
Run your hand along the line and double-check it feels level end to end. Then grab your stud finder and slide it across the wall, marking each stud with a light vertical pencil line. These studs are where your screws will bite for a rock-solid hold.
Step 3 – Start With the Corner Cabinet
Corners set the tone for the entire run, so always begin there. Knowing how to install kitchen base cabinets the right way means establishing one perfectly placed anchor and building outward from it.
Slide your corner cabinet into position and lift its top edge up to your layout line. Tuck shims underneath wherever the floor dips so the cabinet sits snug against your reference mark.
Rest your level across the top, side to side and front to back, and adjust the shims until both bubbles sit dead center. You’ll hear the cabinet stop rocking once it’s properly supported. Take your time here, because every other cabinet will follow the lead of this first one.
Step 4 – Check for Level and Plumb
With your corner cabinet in place, confirm it’s truly level and plumb before you fasten anything. Level means flat across the top; plumb means perfectly vertical on the front face.
Hold your level against the cabinet’s front edge and watch the bubble settle. Adjust your shims gently, tapping them in or sliding them out a fraction at a time until everything reads true.
Press on the corners and feel for any wobble. A solid cabinet won’t shift under your hand. This patient checking is what separates a clean install from a frustrating one, since a cabinet that’s off here throws off your countertop, your doors, and the whole visual line of your finished kitchen.

Step 5 – Anchor the Cabinet to the Wall Studs
Once your corner cabinet sits level and plumb, it’s time to lock it in. Drive your cabinet screws through the sturdy back rail and directly into the wall studs you marked earlier.
Start one screw, but don’t fully tighten it. Recheck your level, because driving screws can pull a cabinet slightly out of position. Then sink the screws home until the cabinet feels firmly attached.
You’ll feel the screw grab hard as it bites into solid framing, a satisfying sign you’ve hit the stud. Avoid overtightening, which can warp the cabinet box or crush your shims. Snug and secure is the goal, with the cabinet still sitting exactly on your layout line.
Step 6 – Connect Adjacent Cabinets
Now build outward. Slide the next cabinet against your anchored corner unit, lift it to the layout line, and shim it level just like the first.
Clamp the two cabinet face frames together so their front edges sit perfectly flush. Run your finger down the seam and feel for any lip or gap. When the fronts line up cleanly, drill a pilot hole and screw the frames together.
Then fasten this cabinet to the wall studs the same way you did before. Repeat this process down the entire run, checking level on each box as you go. Keeping every face frame flush as you connect cabinets is what gives the finished row that smooth, continuous look that feels truly custom.
Step 7 – Add Filler Strips and Toe Kick Details
Few kitchen runs fit wall to wall perfectly, and that’s where a filler strip earns its keep. When a small gap remains beside a wall or appliance, measure it, cut a matching filler strip to width, and fasten it to the end of your cabinet.
Sand any cut edge smooth so it feels clean to the touch and blends with the finish. The strip hides the gap and gives your run a tailored appearance.
Next, check the toe kick along the bottom front. Confirm your shims don’t poke out past the cabinet base, and trim them flush with a utility knife. A tidy toe kick keeps the floor line crisp and prevents anyone from catching a toe on stray material later.
Step 8 – Final Check Before the Countertop
You’re almost there, so finish with a careful inspection. Walk the entire run with your level, resting it across the tops of all the connected cabinets to confirm one continuous flat surface.
Open and close each door and drawer to make sure nothing binds or rubs. Press on every cabinet to check for movement and tighten any screw that feels loose.
Wipe down the surfaces and clear away shim scraps and sawdust. Run your eye along the front faces to confirm they all sit flush and even. A level, square base gives your countertop a perfect surface to rest on, and that careful final pass is what makes the whole kitchen feel professionally built.
Critical Mistakes When Installing Kitchen Base Cabinets
The biggest mistake beginners make is ignoring the floor. Many people start their first cabinet at a random spot instead of finding the floor’s high point, which leaves them fighting an uneven run the entire way. Always locate that high point first and shim everything up to match it.
Another common error is fastening into drywall instead of solid framing. Drywall alone can’t hold the weight of loaded cabinets and a heavy countertop. Use your stud finder, mark every stud, and make sure your screws bite into wall studs, not just the board.
Rushing the leveling stage causes lasting headaches too. If a cabinet sits even slightly out of level or plumb, your doors won’t align and your countertop won’t seat correctly. Check both directions on every box and adjust your shims patiently before driving screws.
Finally, many DIYers overtighten their screws, crushing shims or bowing the cabinet box out of square. Snug is enough. And don’t forget to clamp face frames flush before joining cabinets, since a misaligned seam is obvious and hard to fix once everything is screwed together. Avoid these, and your install will look flawless.

Expert Tips
A few professional habits will lift your project from good to genuinely impressive. First, build a level platform on bad floors. Instead of stacking endless shims, screw a leveled lumber base to the floor and set your cabinets on top for a cleaner, stronger foundation.
Keep a small container of shims and screws within arm’s reach so you never break your rhythm hunting for parts. Label your cabinets with painter’s tape as you unbox them, matching each to your layout plan to avoid mix-ups.
When you fasten through the back rail, use washers under your screw heads on thinner panels to spread the load and prevent the screw from pulling through. And before the countertop goes on, snap a photo of your stud locations. Future you will thank present you when it’s time to anchor a backsplash or shelf.
Frequently Asked Questions
How Level Do Base Cabinets Really Need to Be?
They need to be as level as you can reasonably get them. Even a small slope causes doors to swing open or shut on their own and leaves gaps under your countertop. Aim for the bubble sitting dead center in both directions on every cabinet. Use shims generously to correct dips, and recheck after fastening, since driving screws can pull a cabinet slightly out of position.
Can I Install Base Cabinets on an Uneven Floor?
Yes, uneven floors are completely normal and manageable. The trick is finding the floor’s high point first, then shimming every other cabinet up to match it. For badly sloped floors, build a level lumber platform and set your cabinets on top. Either approach gives you a flat, continuous run. Just never let the floor dictate your cabinet height, or your countertop will end up crooked.
Do I Have to Screw Into Wall Studs?
Absolutely. Wall studs are the only reliable anchor for cabinets that carry weight from dishes, a sink, and a heavy countertop. Drywall alone will eventually fail and pull loose. Use a stud finder to mark each stud, then drive your screws through the cabinet’s back rail directly into that solid framing. Hitting studs is the single most important factor in a safe, lasting install.
What Are Filler Strips and When Do I Need Them?
Filler strips are narrow pieces that close awkward gaps in your cabinet run. You’ll need one when:
- A cabinet sits beside a wall and doesn’t reach it completely
- Two cabinets meet near a corner and need spacing for doors to clear
- An appliance gap leaves an uneven edge
Cut the strip to width, sand the edge, and fasten it to the cabinet for a clean, tailored finish.
Should I Install Base Cabinets Before the Countertop?
Yes, always set and secure your base cabinets first. The cabinets create the level, square surface that your countertop rests on. If the cabinets aren’t right, the countertop won’t seat properly and may crack or sit unevenly. Finish your entire base run, confirm everything is level and firmly anchored, then measure for the countertop so it fits your actual installed dimensions.
Conclusion
Installing your own base cabinets gives you something money can’t quite buy: the pride of building the heart of your kitchen with your own hands. With patient measuring, smart shimming, and screws driven into solid studs, you can create a foundation that stays straight and strong for decades.
Keep the essentials in mind. Find your floor’s high point first, draw a level layout line, start from the corner, and check level and plumb before fastening anything. Clamp your face frames flush, add filler strips where gaps appear, and finish with one careful inspection before the countertop arrives.
The skills you practice here reach far beyond a single room. You now understand how floors, walls, and frames work together, and that knowledge opens the door to countless future projects.
So trust your tape measure and take it one cabinet at a time. Once you’ve learned how to install kitchen base cabinets, you’ll look at every remodel with new confidence. Grab your tools, clear a free weekend, and give your kitchen the solid, custom foundation it deserves.
