

Ever opened your dishwasher to find forks still crusted with food and spoons stuck together in a wet clump? You’re not alone, and the fix is simpler than you think. The way you arrange your utensils makes a huge difference in how clean they come out.
Most poor results trace back to one thing: loading habits. Crowd everything together, and the dishwasher spray can’t reach every surface. Space things smartly, and you get sparkling, dry cutlery every time.
Learning how to load cutlery in dishwasher properly takes just a few minutes to understand, and it saves you from re-washing dishes by hand. No special skills required, just a little know-how.
This guide walks you through every step to sort, position, and load your utensils for the cleanest, safest results possible.

Why Learning to Load Cutlery in a Dishwasher Properly Matters
This skill pays off far beyond your kitchen sink. Campers and outdoor beginners who use compact dishwashers in RVs, cabins, or rental kitchens often work with tighter baskets and weaker water flow. Knowing how to position each piece means cleaner utensils even when conditions aren’t ideal.
For home cooks and kitchen-focused readers, the reward is daily. Proper loading means better detergent coverage, faster drying results, and fewer items you have to scrub again by hand. That’s real time saved with every load.
DIY-minded readers gain control, too. Once you understand how water flow reaches your forks, spoons, and knives, you can troubleshoot poor results yourself. You’ll protect your good flatware, improve hygiene, and stretch the life of your dishwasher, all without calling anyone for help.
Tools and Materials You’ll Need
You don’t need much to master this task. Most of what you need is already part of your dishwasher or sitting in your kitchen drawer.
- Your cutlery basket or third-rack tray, depending on your dishwasher model
- A quality dishwasher detergent for strong cleaning power and good drying results
- Rinse aid to cut water spots and help utensils dry faster
- A soft sponge or cloth for scraping off heavy food residue before loading
- Rubber gloves to handle sharp utensils safely while sorting
- A small brush to clean stuck-on bits from the basket itself
For one optional convenience item, grab a cutlery basket with a slotted or compartmentalized lid. It holds each piece separately, which boosts water coverage and keeps spoons from nesting together.
Step-by-Step Guide on How To Load Cutlery In Dishwasher
Step 1 – Sort Your Utensils Before Loading
Before anything touches the basket, take a moment to sort. Pull your forks, spoons, knives, and serving utensils into separate little piles on the counter.
This quick habit saves time and improves results. When like items group together, you can spread them evenly instead of dumping a tangled handful into one spot.
Set aside any baby utensils, sharp items, and silver-plated pieces for special handling, since these need extra care. Check each piece for heavy food residue, too.
Run your fingers along the tines and bowls. If you feel dried-on sauce or stuck egg, give it a quick rinse first. Sorting feels like an extra step, but it sets you up for a clean, efficient load every single time.
Step 2 – Choose the Right Spot: Basket or Tray
Now decide where your cutlery goes. Most dishwashers use one of two systems, and knowing yours shapes your whole loading pattern.
A traditional silverware basket sits in the bottom rack or door. You stand utensils upright in its compartments, mixing handle directions for better separation.
A third-rack cutlery tray lies flat across the top of the machine. You place each piece horizontally in its own slot, which keeps items from touching.
The tray usually delivers better drying results and more even detergent coverage, since nothing nests together. The basket holds more at once and handles bulky serving utensils with ease.
Knowing how to load cutlery in dishwasher starts with matching your method to your machine.
Step 3 – Load Forks and Spoons for Full Water Coverage
Start with your forks and spoons in the silverware basket. Here’s a question people always ask: should forks go tines up or down?
Tines up cleans better because water reaches the eating surface directly. The downside is safety and the risk of bending. Many people compromise by loading forks tines up and knives down.
For spoons, the golden rule is to avoid spoons nesting. Two spoons that stack together trap water and food between them, and they come out dirty.
Alternate the handle direction as you load. Place one spoon handle up, the next handle down. This simple loading pattern keeps the bowls separated so dishwasher spray hits every surface.
Step 4 – Place Knives Safely
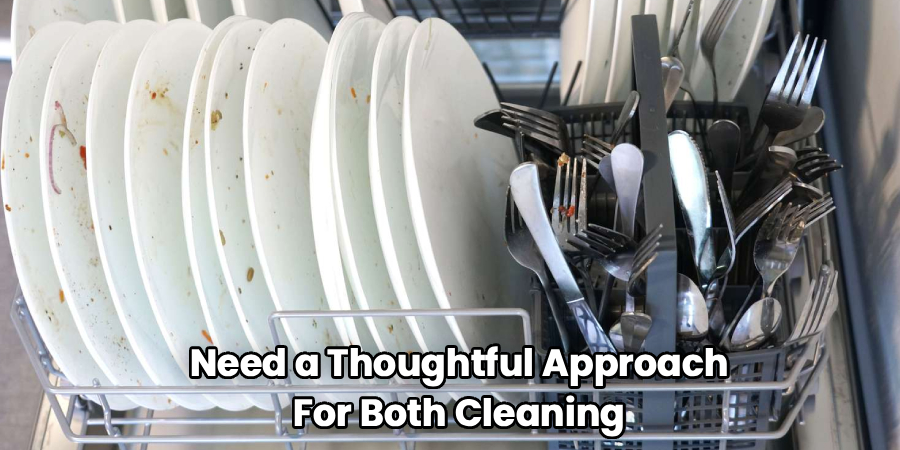
Knives need a thoughtful approach for both cleaning and safety. Sharp utensils pointing up can nick your fingers when you reach in to unload.
Load butter knives and table knives with handles up in the basket. This protects your hands and still lets water clean the blade well enough for everyday flatware.
Never put sharp kitchen knives or chef’s knives in the basket loose. The blades dull against other metal, and you risk a nasty cut. Lay these flat on the third-rack tray instead, or simply hand wash them.
If you’re using a cutlery tray, set each knife in its own slot with the blade facing away from where you’ll reach. Safe loading protects your hands and your blades together.
Step 5 – Arrange Serving Utensils and Large Items
Big serving spoons, ladles, tongs, and spatulas don’t fit neatly into small basket slots. They need their own strategy.
Lay these large pieces flat on the top rack or third-rack tray. Spread them out so they lie in a single layer without overlapping. This gives the dishwasher spray room to reach every curve.
If a serving spoon has a deep bowl, angle it so water doesn’t pool inside during the cycle. Pooled water means poor drying results and spots.
Keep handles from blocking the spray arm below. Give it a gentle spin with your hand to confirm it rotates freely. Large utensils take up space, so load them last once your smaller items are settled.
Step 6 – Handle Baby Utensils and Delicate Pieces
Baby utensils and delicate flatware deserve special attention for hygiene and protection. Their small size means they can slip through basket gaps and fall onto the heating element below.
Place baby spoons and forks in a closed-lid basket compartment or a dedicated small-items section if your machine has one. The lid keeps them secure and exposed to good water flow.
Silver-plated pieces need care, too. Don’t let them touch stainless steel during the wash, since the contact can cause a chemical reaction that stains both. Keep them in a separate group.
For anything truly precious or antique, hand wash it instead. The heat and detergent in a dishwasher can wear down delicate finishes over many cycles. When in doubt, protect it.
Step 7 – Manage Mixed Loads and Heavy Soil
Real kitchens produce mixed loads, all your cutlery types jumbled together after a big meal. The trick is balance.
Spread different items evenly across the basket rather than clustering all forks in one corner. Even distribution gives consistent detergent coverage to the whole load.
For heavily soiled cutlery, like utensils caked with dried sauce or sticky residue, position them in the most exposed spots. The center of the basket or the outer tray slots get the strongest dishwasher spray.
Scrape off chunks first, but skip the full pre-rinse. Modern detergents actually work better with a little food residue to cling to. Just don’t leave thick, dried-on messes that can clog the spray arm or coat your other pieces during the cycle.
Step 8 – Do a Final Check Before Starting
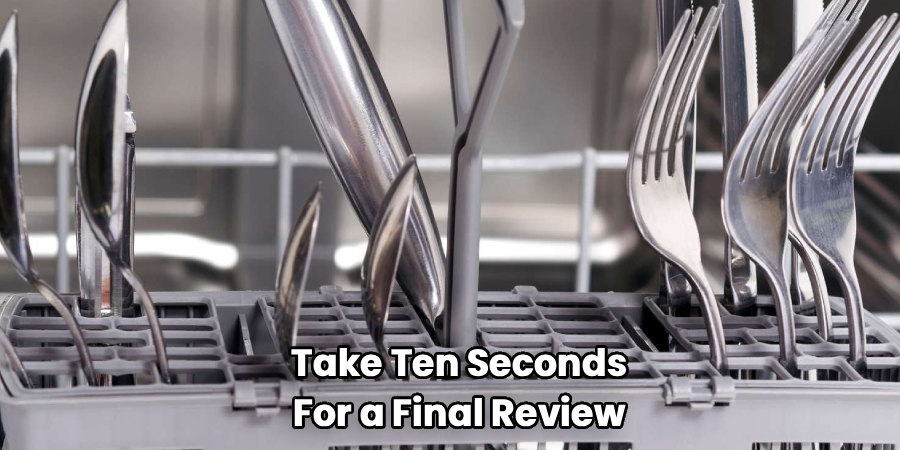
Before you close the door, take ten seconds for a final review. This small habit catches problems before they ruin your load.
Spin the lower spray arm with your hand. If a long utensil handle blocks it, reposition that piece so the arm turns freely.
Scan for any spoons nesting together or forks stacked flat against each other. Separate them now while it’s easy.
Glance at the basket for items poking through the bottom toward the heating element. Push them back into their slots.
Confirm your detergent dispenser is full and the rinse aid is topped up for the best drying results. A quick check like this means you open the door later to clean, dry, spotless cutlery instead of disappointment.
Critical Mistakes When Loading Cutlery in a Dishwasher
A few common habits quietly sabotage your results. The biggest one is overcrowding. When you cram in too many pieces, the water flow simply can’t reach every surface. Utensils block each other, detergent coverage drops, and you end up with food still clinging to forks. Resist the urge to fit one more piece; run a second load instead.
Another frequent slip-up is letting spoons nest together. Two spoons that stack trap water and grime between them, so they come out dirty and need rewashing. Always alternate handle directions to keep the bowls separated.
People also mix metals carelessly. Letting silver-plated pieces touch stainless steel during a wash can trigger a reaction that stains and pits both. Keep different metals in separate sections of the basket.
Loading all sharp utensils blade-up is a safety mistake worth avoiding. You risk cutting your hand when unloading, and the blades dull against other metal anyway. Point sharp items down or lay them flat on a tray.
Finally, many people over-rinse before loading. Scraping is smart, but a deep pre-rinse wastes water and can leave modern detergent with nothing to grab onto, weakening the clean.
Expert Tips
Want consistently spotless flatware? A few simple habits make all the difference.
Always run your dishwasher with a full but not crowded load. This balance maximizes water flow while still saving water and energy.
Keep rinse aid topped up. It dramatically improves drying results and prevents those annoying water spots on stainless steel.
Clean your cutlery basket and tray every couple of weeks. Bits of food residue collect in the bottom and can lower hygiene over time. A quick scrub with a small brush handles it.
Rotate the position of heavily soiled items so they catch the strongest dishwasher spray. And when you’re unsure whether something belongs inside, lean toward a hand wash for anything delicate, antique, or extremely sharp. Small, steady habits protect your cutlery and keep every load coming out clean.
Frequently Asked Questions
Should forks go tines up or down in the dishwasher?
Tines up generally cleans better because water reaches the eating surface directly, and it’s safer when you unload since prongs don’t poke up. However, some people prefer mixing directions to prevent nesting. A good compromise:
- Forks tines up for better cleaning
- Knives handles up for safety
- Alternate handles to stop pieces from clumping together
Can I put sharp kitchen knives in the dishwasher?
It’s best not to. Sharp chef’s knives and paring knives dull quickly when they bump against other metal, and loading them blade-up risks cutting your hand. The heat and detergent can also damage wooden handles. Hand wash your good knives instead, or lay them flat in a third-rack cutlery tray with the blade pointing safely away from you.
Why does my cutlery come out wet or spotty?
Wet, spotty cutlery usually comes down to three things: overcrowding, empty rinse aid, or spoons nesting together. Spread your utensils out for better water flow, keep the rinse aid dispenser full, and alternate handle directions so nothing stacks. Cracking the door open after the cycle ends also lets steam escape and improves drying results noticeably.
Is a cutlery tray better than a silverware basket?
Each has strengths. A third-rack cutlery tray lays pieces flat and separate, giving excellent detergent coverage and the best drying results. A traditional silverware basket holds more and handles bulky serving utensils better. If your dishwasher offers both, use the tray for everyday flatware and the basket for larger or oddly shaped items.
Do I need to rinse cutlery before loading it?
Usually not. Scrape off chunks of leftover food, but skip the deep pre-rinse. Modern detergents actually need a bit of food residue to work against, so a heavy rinse can weaken the clean. Just avoid leaving thick, dried-on messes that might clog the spray arm or redeposit on other items during the wash cycle.
Conclusion
Loading your cutlery the right way isn’t complicated, it just takes a little intention. Start by sorting your forks, spoons, and knives, then match your method to your machine, whether that’s a silverware basket or a third-rack cutlery tray.
From there, the principles stay simple. Keep pieces separated so water flow reaches every surface, alternate handle directions to stop spoons nesting, point sharp utensils down for safety, and avoid overcrowding so detergent coverage stays strong. A quick final check before you press start catches small problems before they cost you a rewash.
Treat delicate and silver-plated items with care, and hand wash anything truly precious. These small habits protect your flatware and lift your hygiene and drying results with every cycle.
Now that you know how to load cutlery in dishwasher the smart way, give it a try with your next load. Spend a few extra seconds arranging things thoughtfully, and you’ll open the door to clean, dry, spotless utensils that make the whole effort worth it.

About
Nick Hall has spent the last seven years working at the intersection of kitchen design and home repair — first as a design assistant at a residential renovation studio, then as a freelance writer covering everything from cabinet layouts to leaky faucet fixes.
Her approach is simple: kitchens should look good and function well. That means she’s just as comfortable talking about color palettes and counter materials as she is walking readers through how to fix a wobbly cabinet hinge or troubleshoot a garbage disposal.
Nick has worked directly with homeowners on small-space kitchen makeovers, budget-conscious renovations, and the kind of everyday repairs that don’t need a contractor — just the right instructions. She writes from experience, not theory, and tests most of the fixes and tips she shares before publishing them.
When she’s not writing, Nick is usually hunting for mid-century kitchen finds at estate sales or helping friends plan their own renovations. She lives in Columbus, Ohio.