
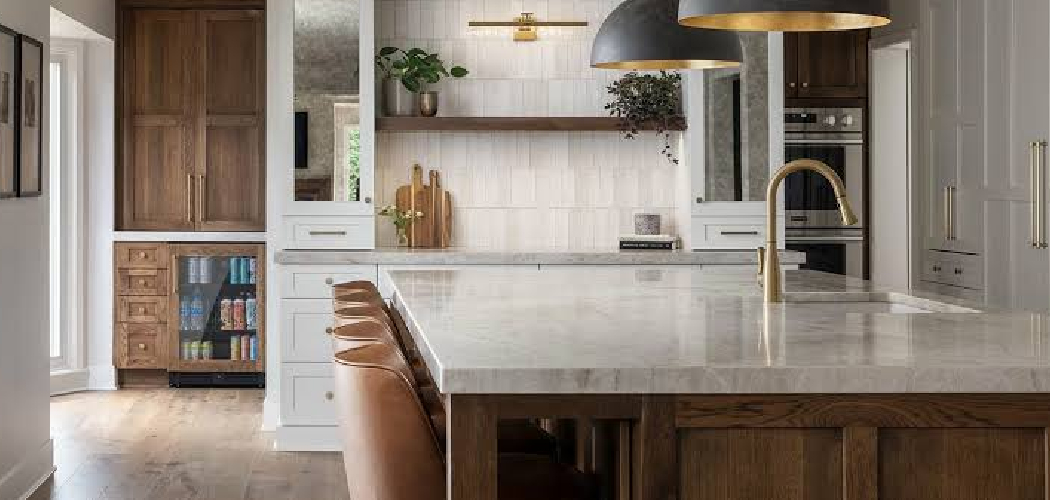

Stained wood cabinets can make a kitchen feel warm, but they can also look dark, dated, or worn after years of use. The good news is that you do not have to replace them to get a fresh look. With careful prep work, the right primer, and durable cabinet paint, you can turn old stained cabinets into a clean, updated feature.
Learning how to paint kitchen cabinets that are stained takes patience, but it is very beginner-friendly when you follow the right order. The key is not rushing the cleaning, sanding, priming, and curing stages.
This guide shows you how to prepare, paint, and reassemble stained kitchen cabinets for a smooth, long-lasting finish.
Why Painting Stained Kitchen Cabinets Is Worth Learning
Painting stained kitchen cabinets is one of the most budget-friendly ways to refresh an older kitchen. New cabinets can cost thousands of dollars, but paint, primer, and basic tools can create a major change for much less.
This skill helps homeowners who want to update their space without a full remodel. It can also help renters, as long as the landlord gives written permission first. For DIY beginners, cabinet painting teaches useful basics like surface prep, sanding, brush control, dry time, and finish care.
It also gives you more design control. You can lighten a dark kitchen, match a new backsplash, or make worn doors and drawers look cleaner without replacing solid wood cabinets that still work well.
Tools and Materials You’ll Need
Before you begin, gather everything you need so the project moves smoothly. Cabinet painting takes several days, and stopping midway to find supplies can lead to uneven results.
- Degreaser or TSP substitute for cleaning cabinet surfaces
- Screwdriver or drill for removing hardware, doors, and drawers
- Painter’s tape for protecting walls, hinges, and edges
- Drop cloths or plastic sheeting for floors and counters
- Sanding sponge or fine-grit sandpaper
- Liquid deglosser for glossy stained finishes
- Tack cloth or microfiber cloth for dust removal
- Stain-blocking bonding primer
- High-quality cabinet paint
- Angled brush and small foam or microfiber roller
- Paint tray and liners
- Optional convenience item: paint pyramids for lifting doors while they dry
Step-by-Step Guide on How to Paint Kitchen Cabinets That Are Stained
Step 1 – Remove Doors, Drawers, and Hardware

Start by taking off all cabinet doors, drawer fronts, knobs, pulls, and hinges. Work slowly so you do not strip screws or damage the wood. Place screws and hardware in labeled bags, then mark each door and drawer with painter’s tape so you know where it belongs later.
If you are learning how to paint kitchen cabinets that are stained for the first time, this step may feel tedious, but it prevents confusion during reassembly. Cabinet doors can look almost identical, yet tiny differences in hinge placement matter.
Set the doors on a flat work surface with good airflow. The space should feel clean, dry, and easy to move around in.
Step 2 – Clean Away Grease and Grime
Kitchen cabinets collect more residue than you may notice. Cooking oil, steam, fingerprints, and dust create a thin film that can stop primer from sticking. Before sanding or painting, scrub every surface with a strong degreaser or TSP substitute.
Pay close attention to areas near the stove, around handles, and along cabinet frames where hands touch often. The cloth may feel slick at first, then drag slightly as the grease lifts away. That change tells you the cleaner is working.
Rinse with clean water if your product requires it, then let the wood dry fully. Never paint over damp or greasy cabinets, even if they look clean from a distance.
Step 3 – Sand or Degloss the Stained Finish
Stained cabinets often have a clear protective coat, such as polyurethane or varnish. Paint does not grip well to that slick surface unless you rough it up. Use a sanding sponge with fine grit to scuff the cabinet boxes, doors, and drawer fronts.
You do not need to sand down to bare wood. Your goal is to dull the shine and create a surface that primer can grab. The finish should look cloudy instead of glossy when you are done.
If the cabinets have detailed trim, raised panels, or hard-to-reach edges, a liquid deglosser can help. Use it with gloves and good ventilation, and follow the product directions closely.
Step 4 – Repair Damage and Remove Dust

After sanding, inspect the stained wood cabinets for dents, cracks, open seams, or old hardware holes. Fill small flaws with wood filler, then let it dry as directed. Sand those repaired spots smooth so they blend into the surrounding surface.
Run your hand across the cabinet doors and frames. The surface should feel even, not gritty or raised. Any bump you feel now may show through the final paint.
Remove sanding dust with a vacuum brush attachment, then wipe everything with a tack cloth or slightly damp microfiber cloth. Dust can cause rough patches, roller marks, and tiny specks in the finish, so take your time here.
Step 5 – Apply a Stain-Blocking Bonding Primer
Primer is the bridge between the stained surface and your cabinet paint. For stained cabinets, choose a stain-blocking bonding primer. This helps seal the old finish, improves adhesion, and reduces the risk of tannin bleed, which can show up as yellow or brown stains through fresh paint.
Use an angled brush for corners, grooves, and trim. Then use a small roller for flat areas. Work in thin, even coats instead of trying to cover everything heavily at once.
The primer may look streaky after the first coat, and that is normal. Let it dry fully according to the label before lightly sanding and deciding if a second coat is needed.
Step 6 – Choose the Right Cabinet Paint
A major part of how to paint kitchen cabinets that are stained is choosing paint that can handle daily use. Regular wall paint is usually too soft for cabinets. Look for cabinet paint, enamel paint, or a durable trim paint made for high-touch surfaces.
Satin, semi-gloss, and durable low-sheen finishes are common choices. Semi-gloss cleans easily, while satin can look softer and more modern. If you want a smooth finish, choose a self-leveling formula that helps brush lines settle as it dries.
Stir the paint gently and avoid shaking in extra bubbles. Good paint should feel creamy, not watery, and should spread without dragging across the primed surface.
Step 7 – Paint Thin, Even Coats
Begin with the cabinet frames, then move to doors and drawers. Use a brush on edges, corners, and detailed profiles. Follow with a small roller on flat panels to reduce visible brush finish and create a smoother look.
Thin coats work better than thick coats. Heavy paint can sag, drip, pool in corners, and leave sticky spots that take too long to dry. Let the first coat dry fully before adding the next one.
Lightly sand between coats with a fine sanding sponge if the surface feels rough. Wipe away dust before painting again. Two coats are usually enough, but dark stain or dramatic color changes may need more coverage.
Step 8 – Let the Paint Cure Before Reassembly
Paint may feel dry to the touch within hours, but dry time and cure time are not the same. Dry paint can be handled lightly. Cured paint has hardened enough to resist scratches, sticking, and daily wear.
Give doors and drawers as much cure time as the paint label recommends before reinstalling hardware. If you rush, the finish may dent under knobs, peel near edges, or stick where doors touch the frame.
Reattach hinges, pulls, and knobs carefully. Close doors gently for the first few days. Once everything is back in place, the kitchen should feel brighter, cleaner, and more polished without the cost of new cabinets.
Common Mistakes When Painting Stained Kitchen Cabinets
One common mistake is skipping the degreasing step. Stained kitchen cabinets may look clean, but cooking residue can hide on the surface. If you paint over grease, the primer and paint may peel, bubble, or scratch off easily.
Another mistake is sanding too little or too much. If you leave the glossy topcoat untouched, the primer may not bond well. If you sand too aggressively, you can damage veneer, soften sharp edges, or create uneven spots that show through the finish.
Many beginners also use the wrong primer. A basic primer may not block tannin bleed from stained wood, especially with oak, cherry, or darker finishes. A stain-blocking bonding primer gives you better protection and a more reliable base.
Rushing dry time is another problem. Cabinets need time between primer, paint coats, and reassembly. If you reinstall doors too soon, the finish can stick, dent, or peel around hardware.
Finally, applying thick coats often leads to drips and roller marks. Thin, even layers take longer, but they create a smoother and stronger finish.
Expert Tips
Set up a simple painting station before you open the paint can. Use sawhorses, a covered table, or paint pyramids so doors can lie flat while drying. Good lighting matters because it helps you spot drips, missed edges, and uneven coverage before the paint sets.
Paint the backs of cabinet doors first, then the fronts. This way, the most visible side gets the cleanest final finish. Keep your brush strokes going with the wood grain or panel direction whenever possible.
If your cabinets have strong wood grain, such as oak, expect some texture to remain unless you use grain filler. Paint changes the color, but it does not always erase the natural surface pattern.
Frequently Asked Questions
Do I have to sand stained cabinets before painting?
Yes, you usually need to sand or degloss stained cabinets before painting. The goal is not to remove all the stain. You only need to dull the glossy protective coating so primer can bond. A fine sanding sponge works well for most surfaces. For detailed trim or very slick finishes, liquid deglosser can help prepare areas that are hard to sand evenly.
What primer should I use on stained wood cabinets?
Use a stain-blocking bonding primer made for glossy or previously finished surfaces. This type of primer helps paint stick and also blocks tannins from bleeding through the finish. Tannin bleed can create yellow or brown marks, especially on darker stained wood. For best results, apply thin coats and let the primer dry fully before painting.
Can I paint stained cabinets without stripping them?
Yes, you can paint stained cabinets without stripping them if the existing finish is sound. You need to clean, scuff sand or degloss, prime, and paint. Stripping is usually only needed if the old finish is peeling, flaking, sticky, or badly damaged. Most beginner cabinet painting projects do not require removing the stain down to bare wood.
What kind of paint gives cabinets a smooth finish?
A high-quality cabinet paint, enamel paint, or durable trim paint gives the best results. Look for a self-leveling formula because it helps reduce brush marks and roller texture. Use a small foam or microfiber roller on flat surfaces and an angled brush for corners. Thin coats, light sanding between coats, and proper dry time also help create a smooth finish.
How long should painted cabinets cure before normal use?
Many cabinet paints dry within a few hours, but curing can take several days to a few weeks. Cure time depends on the paint type, temperature, humidity, and coat thickness. During this period, treat the cabinets gently. Avoid slamming doors, scrubbing surfaces, or tightening hardware too hard. Once cured, the finish becomes more durable and easier to clean.
Conclusion
Painting stained cabinets takes more than opening a can of paint, but the process is very manageable when you follow each step in order. Remove the doors and hardware, clean off grease, sand or degloss the shiny finish, repair damage, and use a stain-blocking bonding primer before applying cabinet paint.
The prep work matters most. It helps prevent peeling, tannin bleed, rough texture, and weak adhesion. Thin coats, proper dry time, and patient curing give your cabinets a stronger, smoother finish that can stand up to daily kitchen use.
Once you understand how to paint kitchen cabinets that are stained, you can update an older kitchen with confidence and save money at the same time. Take your time, work cleanly, and let each layer do its job. Your finished cabinets can look brighter, fresher, and far more modern.

About
Nick Hall has spent the last seven years working at the intersection of kitchen design and home repair — first as a design assistant at a residential renovation studio, then as a freelance writer covering everything from cabinet layouts to leaky faucet fixes.
Her approach is simple: kitchens should look good and function well. That means she’s just as comfortable talking about color palettes and counter materials as she is walking readers through how to fix a wobbly cabinet hinge or troubleshoot a garbage disposal.
Nick has worked directly with homeowners on small-space kitchen makeovers, budget-conscious renovations, and the kind of everyday repairs that don’t need a contractor — just the right instructions. She writes from experience, not theory, and tests most of the fixes and tips she shares before publishing them.
When she’s not writing, Nick is usually hunting for mid-century kitchen finds at estate sales or helping friends plan their own renovations. She lives in Columbus, Ohio.