
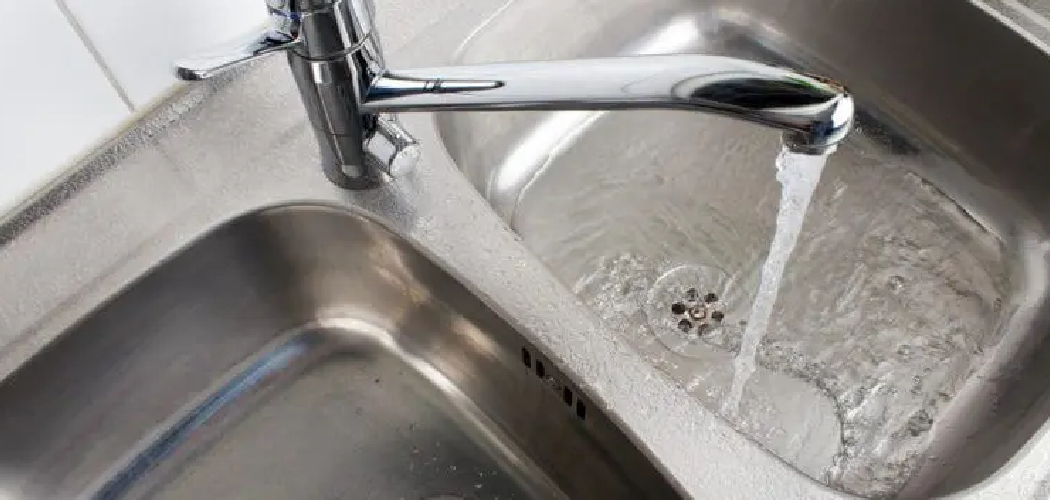

A sudden drip under your sink can turn into a small flood faster than you’d think. Maybe a faucet won’t stop running, or you spot a slow leak creeping across the cabinet floor. In moments like these, knowing how to shut off water to kitchen sink saves you from soaked towels, water damage, and a frantic call to a plumber.
The good news? This is one of the easiest plumbing skills you’ll ever pick up. You don’t need fancy training or expensive gear, just a little confidence and a few minutes of your time.
Whether you’re swapping out a faucet, fixing a leak, or simply preparing for an emergency, this guide walks you through every step clearly so you can take control of your kitchen with ease.
Why Learning to Shut Off Water to a Kitchen Sink Matters
This skill stretches way beyond your home kitchen. Once you understand how shutoff valves work, you become far more self-reliant when something goes wrong with water.
Picture campers and outdoor beginners living in RVs or compact trailers. Those tiny kitchenettes rely on the same basic plumbing, and a quick shutoff can prevent a leak from ruining floors and cabinets on the road. Knowing where the supply line connects gives you real peace of mind miles from any repair shop.
Back home, the benefit is just as big. You skip the cost and wait of calling a plumber for minor fixes. You also react fast during an emergency, stopping water before it spreads. That confidence protects your floors, your budget, and your sense of control over your own space.
Tools and Materials You’ll Need
You won’t need much for this job, and chances are most of these items are already in your home. Gather everything first so you’re not scrambling mid-task.
- Flashlight or headlamp: Under-sink cabinets are dark, and you’ll want clear sight of the valves.
- Adjustable wrench: Helps loosen stiff or corroded valves and supply line fittings.
- Old towels or rags: For wiping drips and keeping the cabinet floor dry.
- Bucket or shallow pan: Catches any water still sitting in the pipe or faucet.
- Pliers: Useful for gripping a stubborn valve handle.
- Work gloves: Protect your hands from grime and sharp edges.
- Penetrating oil (optional): A real lifesaver if a valve is stuck from corrosion.
Lay these out near the under-sink cabinet, and you’ll move through the steps smoothly without interruptions.
Step-by-Step Guide on How To Shut Off Water To Kitchen Sink
Step 1 – Clear Out the Under-Sink Cabinet
Before you touch anything, give yourself room to work. Open the cabinet doors and pull out cleaning supplies, trash bins, and anything else stored beneath the sink.
You’ll often find a crowded, cramped space down there, so clearing it makes the valves much easier to reach. Set everything aside on the floor or counter where it’s out of your way.

Take a quick look at the cabinet floor too. If you spot moisture or a faint musty smell, you may already have a slow drip worth investigating.
A clean, empty space lets you move freely and see clearly. This small bit of prep keeps you from knocking over bottles or fumbling in the dark once you start.
Step 2 – Grab Your Flashlight and Locate the Valves
Now shine your flashlight into the back of the cabinet. You’re looking for two small shutoff valves, usually mounted where the supply lines meet the wall or floor.
These are often called an angle stop or compression valve, and they sit on the supply line tubes running up to your faucet. One controls the hot water valve, and the other handles the cold water valve.
You’ll typically see oval or football-shaped handles, sometimes a small round knob instead. They’re often tucked low and toward the back, so good lighting really helps.
Take a moment to trace each line with your eyes. Following the pipe from the faucet down makes it crystal clear which valve controls what.
Step 3 – Identify the Hot and Cold Lines
Before turning anything, figure out which valve does what. The hot water valve almost always sits on the left side, while the cold water valve sits on the right.
If you’re unsure, follow each supply line up to the faucet. The warmer pipe usually connects to the hot side, especially if someone ran the tap recently.
Learning how to shut off water to kitchen sink starts with this simple identification, because it tells you exactly what you’re stopping. If you only need to fix the cold side, you can leave the hot running and vice versa.
Run your fingers gently along each line if it’s safe. A slightly warm pipe gives you an easy clue without any guesswork involved.
Step 4 – Turn the Valves Clockwise
Here’s the main event. Grip a valve handle firmly and turn it clockwise, the classic “righty-tighty” direction, until it stops.
You’ll feel resistance build as the valve closes and cuts the water pressure to that line. Don’t force it past the natural stopping point, since over-cranking can damage the seal inside.
For a round knob, keep turning until it won’t budge. For an oval handle, a quarter or half turn often does the trick.
Close both valves if you want to stop all flow to the faucet. If a handle feels stiff or stuck from corrosion, pause here rather than wrenching it hard, and we’ll handle that next.
Step 5 – Free a Stuck or Corroded Valve
Old valves can seize up after years untouched. If yours won’t turn, resist the urge to crank it with all your strength, as that can snap the valve or crack the pipe.

Instead, spray a little penetrating oil around the valve stem and wait a few minutes. You’ll often hear and feel it loosen as the oil works in.
Then try again with gentle, steady pressure, using pliers or a wrench for extra grip. Wrap a rag around the handle first to protect it from scratches.
Knowing how to shut off water to kitchen sink also means knowing when to stop. If the valve still won’t move, it may be time to use the home’s main shutoff instead.
Step 6 – Test That the Water Has Stopped
Don’t assume the job is done just because the valves feel closed. Walk over and turn on the faucet to check your work.
You should see the flow slow to a trickle and then stop entirely within a few seconds. A little leftover water in the pipe will drain out, so that initial dribble is normal.
If water keeps flowing steadily, the valve may not be fully closed or could be worn out. Head back and confirm you turned it all the way clockwise.
Listen closely too. A faint hiss or ongoing drip tells you the valve isn’t sealing properly, which means you’ll want a backup plan ready.
Step 7 – Use the Main Shutoff if Needed
Sometimes the under-sink valves just won’t cooperate. When that happens, your home’s main shutoff becomes your emergency shutoff hero.
You’ll usually find it near where the water line enters your home, often in a basement, garage, utility closet, or near the water heater. Look for a lever or round wheel valve on the main pipe.
Turn a lever a quarter turn so it sits crosswise to the pipe, or spin a round wheel fully clockwise. This stops water to the entire house, including your kitchen.
It’s a bigger step, but it’s your safest move during a serious leak. Keep a flashlight near this spot so you can find it fast in a pinch.
Step 8 – Drain the Faucet and Wrap Up
With the water off, relieve any remaining pressure before you start your repair. Open both the hot and cold faucet handles and let the leftover water drain into your bucket or sink.
You’ll hear the line gurgle and sputter as the last of it empties out. This step prevents a surprise splash when you disconnect a supply line or faucet part.
Once the dripping stops, you’re free to work safely. Place a towel beneath the connection points to catch any final drops.
When your repair is finished, simply turn the valves counterclockwise to restore the water. Run the faucet briefly to clear air and check for any new leaks.
Critical Mistakes When Shutting Off Water to a Kitchen Sink
Even a simple task has a few traps worth avoiding. The biggest mistake is forcing a stuck valve. When corrosion locks a handle in place, muscling it open can snap the stem or crack the pipe, turning a tiny problem into a flooded cabinet. Always loosen it gently with penetrating oil first, and stop if it won’t budge.
Another common error is skipping the test step. People close the valves, assume the water’s off, and start disconnecting parts, only to get sprayed in the face. Always run the faucet to confirm the flow has truly stopped before you touch anything.
Many beginners also forget to relieve the pressure in the line. Even with valves closed, water and pressure linger in the pipe and faucet. Opening the taps to drain that out saves you from an unexpected gush.
Confusing the hot and cold lines causes frustration too, especially when you only meant to shut one. Take a second to trace each supply line.
Finally, working in the dark leads to fumbling and missed leaks. A good flashlight makes the whole job faster, safer, and far less messy.
Expert Tips
Want this to go smoothly every time? Test your shutoff valves twice a year by turning them off and on. This keeps them from seizing up and tells you early if one needs replacing.
Snap a quick photo of your under-sink setup once you’ve located the valves. In an emergency, you’ll know exactly where to look without scrambling.
If a valve drips slightly even when closed, it’s likely worn and worth swapping for a fresh quarter-turn model. These newer valves are far more reliable than older compression styles.
Keep a small flashlight and an adjustable wrench taped inside the cabinet door. Having tools right there saves precious minutes during a leak.
And always know where your main shutoff is, since it’s your fastest defense when seconds count.
Frequently Asked Questions
What if there are no shutoff valves under my sink?
Some older homes skip individual valves entirely. If you can’t find any under the sink, your best option is the main shutoff that controls water to the whole house. Look near where the water line enters your home, often in the basement, garage, or utility area. After your repair, consider hiring a plumber to install proper angle stops, since they make future fixes much easier and safer.
How do I know which valve is hot and which is cold?
Position is your easiest clue:
- The hot water valve almost always sits on the left.
- The cold water valve sits on the right.
If you’re still unsure, trace each supply line up to the faucet, or gently feel the pipes after running the tap. The warmer line connects to the hot side. When in doubt, simply close both valves to stop all flow.
Why won’t my shutoff valve turn?
A valve that won’t budge is usually stuck from corrosion or years of disuse. Don’t force it, since that can crack the pipe or break the valve. Instead, spray penetrating oil around the stem, wait a few minutes, then try again gently with pliers or a wrench wrapped in a rag. If it still won’t move, use the main shutoff and consider replacing the old valve.
Will turning off the sink valves affect the rest of my home?
No, that’s the beauty of under-sink valves. They only control water to that specific faucet, so the rest of your home keeps running normally. You can shower, flush toilets, and use other taps while you work. Only the main shutoff stops water everywhere, which is why under-sink valves are so handy for small, isolated repairs.
How often should I check my kitchen shutoff valves?
Aim to test them about twice a year. Simply turn each valve off and back on to keep it moving freely and prevent corrosion from locking it up. While you’re down there, check for any drip, dampness, or rust on the supply line. Catching a small leak early saves you from a bigger headache and possible water damage later on.
Conclusion
Stopping water to your sink really comes down to a simple rhythm: clear the cabinet, find the valves, turn them clockwise, and test your work. Once you’ve done it a single time, it becomes second nature, and you’ll feel ready for whatever your kitchen throws at you.
Remember the key points. Use a flashlight to see clearly, never force a stuck valve, and always drain the faucet before starting a repair. Keep your main shutoff in mind as a reliable backup for bigger emergencies, and test your valves a couple of times a year so they’re ready when you need them.
The best part is how much money and stress you save by handling this yourself instead of waiting on a plumber. You’re protecting your floors, your cabinets, and your peace of mind.
Now that you know how to shut off water to kitchen sink with confidence, grab your flashlight, find those valves, and take charge of your kitchen like the capable DIYer you are.

About
Nick Hall has spent the last seven years working at the intersection of kitchen design and home repair — first as a design assistant at a residential renovation studio, then as a freelance writer covering everything from cabinet layouts to leaky faucet fixes.
Her approach is simple: kitchens should look good and function well. That means she’s just as comfortable talking about color palettes and counter materials as she is walking readers through how to fix a wobbly cabinet hinge or troubleshoot a garbage disposal.
Nick has worked directly with homeowners on small-space kitchen makeovers, budget-conscious renovations, and the kind of everyday repairs that don’t need a contractor — just the right instructions. She writes from experience, not theory, and tests most of the fixes and tips she shares before publishing them.
When she’s not writing, Nick is usually hunting for mid-century kitchen finds at estate sales or helping friends plan their own renovations. She lives in Columbus, Ohio.