
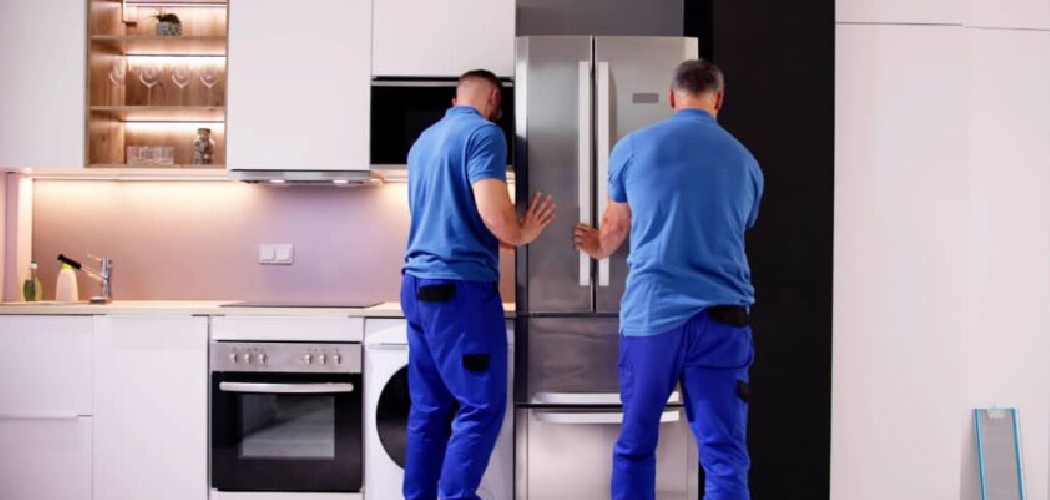
So you’ve got a spare fridge taking up space, and you need to tuck it away for a while. Maybe you’re moving, downsizing, or saving it for the cabin next summer. Whatever the reason, knowing how to store a refrigerator not in use can save you from nasty surprises like mold, foul odors, and a ruined compressor.
Here’s the thing: a fridge isn’t built to sit idle without a little prep. Skip the right steps, and you’ll open that door months later to a musty, mildew-filled mess. Do it properly, and your appliance stays fresh and ready to plug back in.
This guide walks you through every step, from cleaning and defrosting to choosing the right storage area, so your refrigerator survives its downtime in great shape.
Why Storing an Unused Refrigerator Properly Matters
Proper storage protects an appliance that costs hundreds to replace. When you store a fridge the right way, you avoid trapped moisture, lingering odors, and damage to the compressor that can leave it useless.
This skill comes in handy more often than you’d think. Campers and RV owners frequently park their rigs for months, and a poorly stored fridge inside turns into a smelly problem. Cabin owners face the same issue during long off-seasons.
For anyone juggling temporary living setups, garage storage, or a move between homes, these steps mean peace of mind. You won’t waste money on repairs or replacements down the road.
Learning to do this yourself also builds real confidence. No technician needed, no guesswork. Just a clean, dry appliance waiting patiently until you’re ready to use it again.
Tools and Materials You’ll Need
Gather your supplies before you start so you’re not running back and forth mid-task. Most of these items already live in your cleaning cupboard, which makes this an easy weekend job. Having everything ready means smoother work and a fridge that’s truly ready for long-term storage.
Here’s what to grab:
- Warm water and mild dish soap
- A soft cloth or sponge
- Baking soda for odor prevention
- Clean towels for drying and soaking up moisture
- A bucket or shallow pan to catch defrost water
- Painter’s tape or bungee cords to secure the doors slightly ajar
- A furniture dolly for safe moving
- A drop cloth or moving blanket to protect the exterior
- Optional: Moisture-absorbing packets to keep the interior extra dry during long storage
Step-by-Step Guide on How to Store a Refrigerator Not in Use
Step 1 – Empty and Clear Everything Out
Start by removing every last item from inside. Toss expired food, transfer anything you’re keeping to another fridge, and don’t forget the door bins where forgotten condiments love to hide.

Pull out the interior shelves, drawers, and any removable trays. Set them aside to wash separately, since they clean far better outside the unit.
Take a good look around as you go. You’ll likely spot sticky spills, crumbs, or a stray vegetable that’s seen better days. Clearing it all now prevents odors from settling in during the months ahead.
This first step feels satisfying once that empty interior stares back at you. A clean slate makes the rest of the process quick and keeps mildew from getting a foothold later.
Step 2 – Unplug and Defrost Fully
Pull the plug from the wall and let the fridge power down completely. If your model has a freezer, you’ll soon notice ice beginning to soften and drip.
Place towels and a shallow pan at the base to catch the melting water. Frost can release more liquid than you’d expect, so check the drip pan and floor every so often to avoid puddles.
Give the unit several hours, or even overnight, to defrost fully. Rushing this with a knife or sharp tool risks puncturing the lining, so let nature do the work.
You’ll know it’s done when the freezer walls feel bare and dry to the touch. Patience here pays off, because trapped frost turns into hidden moisture down the line.
Step 3 – Wash the Interior Thoroughly
Now mix warm water with a little mild dish soap and grab your soft cloth. Wipe down every surface inside, including the walls, ceiling, and the corners where grime gathers.
Wash those shelves and drawers in the sink, then dry them completely before setting them aside. Any leftover dampness invites mold during long storage.
For stubborn stains or stuck-on spills, a paste of baking soda and water lifts them gently without scratching. You’ll smell that fresh, clean scent replacing whatever lingered before.
Knowing how to store a refrigerator not in use starts with a spotless interior. A clean surface gives mildew nowhere to grow, so take your time and reach every nook before you move on.
Step 4 – Clean and Inspect the Door Seal
The rubber door seal does a lot of quiet work, and it deserves attention. Wipe it down with warm soapy water, paying close attention to the folds where crumbs and grime collect.
Run your finger along the gasket as you clean. You’re feeling for cracks, tears, or sticky spots that might cause trouble later. A damaged seal lets in air and moisture, which is the last thing you want during storage.

Dry the seal completely once it’s clean. Damp rubber can stick to the frame and tear when you open the door months later.
This small step keeps your seal flexible and your interior protected. A healthy gasket means the fridge stays sealed against humidity and unwanted odors.
Step 5 – Dry Every Surface Completely
This step matters more than almost any other. Even a little leftover dampness creates condensation inside a closed fridge, and that leads straight to mildew and musty smells.
Take a dry towel and go over the entire interior again. Press into corners, around the seal, and along the bottom where water tends to pool.
Leave the doors open for a few hours afterward to let the air finish the job. You want the inside to feel bone dry, with no cool, clammy spots remaining.
Don’t forget the drip pan underneath, which often holds hidden water. Pull it out, empty it, and dry it well. Thorough drying now is your best defense against the moisture problems that ruin stored appliances.
Step 6 – Add Odor Protection
A sealed fridge with no airflow traps smells fast, even when it’s clean. To keep things fresh, place an open box of baking soda inside before you close it up.
Baking soda absorbs lingering odors and any stray moisture that sneaks in. For extra protection during long storage, tuck a few moisture-absorbing packets on the shelves too.
Some folks like to set a small bowl of fresh coffee grounds inside, which leaves a pleasant scent rather than that stale, closed-up smell.
Whatever you choose, this little effort makes a big difference. When you open the door after months away, you’ll be greeted by neutral, fresh air instead of a wave of mustiness. Odor prevention is simple insurance you’ll thank yourself for later.
Step 7 – Prop the Doors Open and Position It Right
Never store a fridge with its doors shut tight. A sealed, unpowered interior becomes a breeding ground for mold within weeks.
Use painter’s tape, a bungee cord, or a rolled towel to keep each door slightly ajar. This allows air to circulate and keeps the interior dry and fresh.
Always store the unit in an upright position, just as it sits in your kitchen. Laying it on its side can shift the compressor oil and damage the cooling system.
If you’ve just moved it, let it stand upright for a full day before doing anything else. Good ventilation and proper positioning protect the parts that make your fridge work, so this step is worth every bit of attention.
Step 8 – Choose the Right Storage Area
Where you park your fridge matters as much as how you prep it. Pick a clean, dry storage area with stable temperatures, away from extreme heat or freezing cold.
A garage works, though check that it doesn’t flood or swelter in summer. Cabins and sheds are fine too, as long as the spot stays reasonably dry and well ventilated.
Keep the back of the unit a few inches from the wall so air can move around the coils. Drape a moving blanket over the top to guard against dust and scratches.
Mastering how to store a refrigerator not in use comes down to pairing good prep with the right spot. Choose wisely, and your appliance waits happily until you need it again.
Critical Mistakes When Storing an Unused Refrigerator
Even careful people make storage slip-ups, so let’s cover the big ones. The most common mistake is closing the doors completely. A shut, powered-off fridge has no airflow, so any trace of moisture turns into mold and a smell you won’t forget. Always prop those doors open, even just an inch.
Another frequent error is skipping the drying step. People wipe the interior, feel satisfied, and close it up while it’s still damp. That leftover moisture becomes condensation, then mildew. Take the extra time to dry every surface and let it air out before storage.
Laying the fridge on its side ranks high on the danger list too. This shifts the compressor oil and can wreck the cooling system. Keep it upright at all times, both during transport and in storage.
Storing it in a damp, flood-prone, or wildly hot spot causes trouble as well. Extreme conditions stress the seals and electronics. Pick a stable, dry storage area instead.
Finally, forgetting to clean out the drip pan leaves stagnant water sitting for months. That breeds odor and bacteria, so empty and dry it every single time.
Expert Tips
Want your stored fridge to come out as fresh as it went in? Tape the power cord neatly to the back of the unit so it doesn’t drag or get damaged during the move.
Snap a quick photo of the shelf and drawer arrangement before you remove them. When it’s time to reassemble, you’ll thank yourself for the reminder.
Place the fridge on a couple of wooden blocks or a pallet if the storage floor tends to get damp. This protects the base from moisture rising up from concrete.
Refresh the baking soda every couple of months if you can access the unit. And when you’re ready to use it again, plug it in and let it run empty for a few hours before loading food back inside.
Frequently Asked Questions
How long can a refrigerator sit unused in storage?
A properly prepped fridge can sit for months or even years without harm. The keys are a clean, dry interior, propped doors, and an upright position in a stable spot. Problems only arise when moisture, odors, or pests creep in. If you check on it occasionally and refresh the baking soda, your appliance stays in great shape for long-term storage.
Can I store a refrigerator in an unheated garage?
Yes, with a few cautions. Most fridges tolerate garage conditions, but watch for these issues:
- Extreme summer heat can stress the seals and components
- Freezing winter temperatures may affect certain models
- Damp or flood-prone floors invite rust and moisture
Keep it off bare concrete with blocks or a pallet, and drape a cover over it for dust protection.
Why do I need to leave the refrigerator doors open?
Leaving the doors slightly ajar allows air to circulate inside the unit. A sealed, powered-off fridge traps any leftover humidity, which quickly turns into mold, mildew, and a stubborn musty odor. Even after thorough cleaning and drying, that small gap is your best insurance. Use tape, a bungee cord, or a rolled towel to hold each door open during the entire storage period.
Is it okay to lay a refrigerator on its side for storage?
It’s best to avoid this entirely. Laying a fridge on its side can shift the compressor oil into the cooling lines, which may damage the system. If you absolutely must transport it that way, stand it upright for at least 24 hours before plugging it back in. This gives the oil time to settle properly and protects the compressor from harm.
How do I prevent odors while my fridge is stored?
Odor prevention starts with a spotless, fully dried interior. Once it’s clean, place an open box of baking soda inside to absorb stray smells and moisture. Moisture-absorbing packets help too during long storage. Keeping the doors propped open allows fresh air to circulate, which stops that stale, closed-up smell from building. Refresh the baking soda every couple of months if you can.
Conclusion
Storing a fridge the right way really comes down to a handful of simple habits. Empty it out, defrost fully, and wash every surface until it shines. Dry the interior completely, clean the door seal, and add baking soda for odor prevention. Then prop the doors open, keep the unit in an upright position, and choose a clean, dry storage area with good ventilation.
Steer clear of the common pitfalls too. Never seal the doors shut, never lay it on its side, and never store it while it’s still damp. These small choices protect your appliance from mold, moisture, and compressor damage that could cost you a fortune.
You don’t need a technician or any special skills to pull this off. With everything you’ve learned here, you’ve got the confidence to tackle the job yourself in a single afternoon. Now that you know how to store a refrigerator not in use, go prep that spare unit and enjoy the peace of mind that comes with doing it right.

About
Nick Hall has spent the last seven years working at the intersection of kitchen design and home repair — first as a design assistant at a residential renovation studio, then as a freelance writer covering everything from cabinet layouts to leaky faucet fixes.
Her approach is simple: kitchens should look good and function well. That means she’s just as comfortable talking about color palettes and counter materials as she is walking readers through how to fix a wobbly cabinet hinge or troubleshoot a garbage disposal.
Nick has worked directly with homeowners on small-space kitchen makeovers, budget-conscious renovations, and the kind of everyday repairs that don’t need a contractor — just the right instructions. She writes from experience, not theory, and tests most of the fixes and tips she shares before publishing them.
When she’s not writing, Nick is usually hunting for mid-century kitchen finds at estate sales or helping friends plan their own renovations. She lives in Columbus, Ohio.