
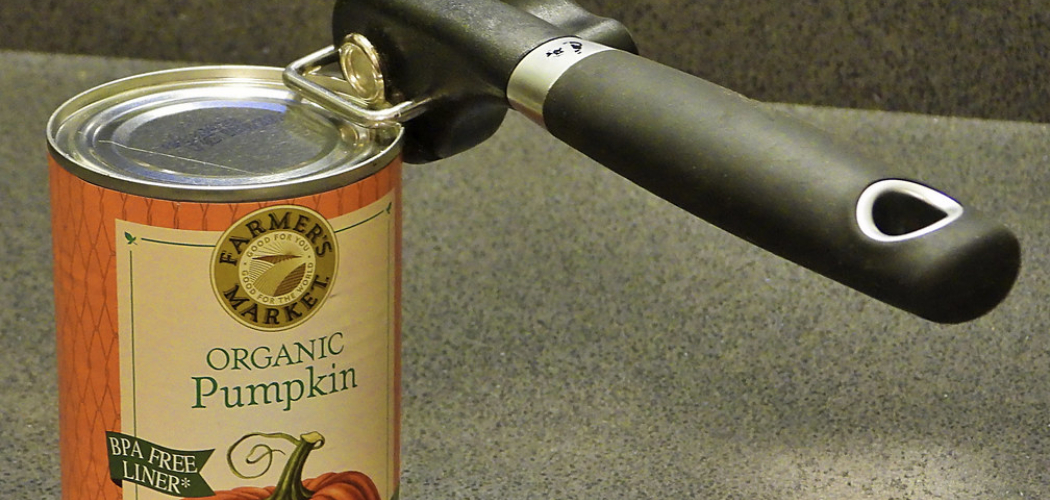
A can sits on your counter. Sealed. Stubborn. Heavier than it looks.
Most people grab a manual opener and start cranking. Their wrist aches. The lid catches. Jagged metal edges wait to nick a finger.
There’s an easier way. An electric can opener does the hard part for you. Press a lever, and the blade bites the lid. Watch the can spin on its own. No wrestling. No strain.
But here’s the thing. Knowing how to use electric can opener the right way makes all the difference between a clean lid and a slipped, sloppy mess. Done wrong, the can wobbles. The cut fails halfway.
This guide walks you through every step, so you open any can with confidence, safety, and zero fuss.
Why Using an Electric Can Opener Matters
You already have a kitchen full of tools. So why does this one earn its spot?
It saves your hands. No more sore wrists from twisting a stiff crank. If you have arthritis or weak grip, this tool gives you back your independence in the kitchen.
It saves time. One press, a few seconds of spinning, done. You move on to cooking instead of fighting metal.
It keeps you safe. A good electric opener leaves a smooth edge, not the razor-sharp rim a cheap manual one leaves behind. Fewer cuts. Less worry.
And it builds confidence. Once you master it, no can intimidates you. Soup. Beans. Tomatoes. Pet food. You handle them all in moments.
That control matters. Especially when dinner waits and your hands are full.
Tools and Materials You’ll Need
Set up your station before you start. A little prep keeps the whole job smooth.
- An electric can opener – countertop or handheld, plugged in or charged and ready
- A clean, flat surface – a steady counter gives the unit a solid base
- The can you want to open – label off if it gets in the way of the rim
- A damp cloth – to wipe the blade and lid area before and after
- A small bowl – to catch the detached lid safely
- Oven mitts or a towel – handy if the can is warm from storage near the stove
Optional but helpful: a magnetic lid holder. Many electric openers have one built in, but a separate magnet catches the lid so it never drops into your food.
Step-by-Step Guide on How to Use Electric Can Opener
Step 1 – Set Up Your Opener on a Flat Surface
Start with a stable base. A wobbly opener fights you the whole way.
Place your countertop model on a clean, level surface. Push it gently to test. If it slides, wipe the counter dry and try again. A firm grip on the surface keeps the unit from creeping as the can spins.
Plug it in and check that the cord reaches without strain. A stretched cord pulls the unit sideways mid-cut.
For a handheld model, charge it fully or load fresh batteries. You’ll feel the difference in power when it bites the lid.
Take a second to look at the blade and the drive wheel. They should be clean and free of old gunk. This is how to use electric can opener safely from the very first move.
Step 2 – Inspect the Can Before Opening
Look at your can before you open it. A quick check saves a mess.
Run your eyes over the rim. It should be smooth and round, with no dents pressing into the edge. A dented rim won’t sit right under the blade, and the cut may skip or stall.
Wipe the top with a damp cloth. Dust and grime love to gather there, especially on cans from the back of the pantry. You don’t want that falling into your food.
Set the can upright and steady in your hand. Feel its weight. A bulging or hissing can is a warning sign, so set those aside.
A clean, undamaged can lines up perfectly and cuts in one smooth pass.
Step 3 – Position the Can Correctly
This step decides everything. Get it right and the rest is easy.
Lift the lever or open the cutting arm on your opener. Slide the can’s rim under the blade until the edge sits snug against the cutting wheel.
Line up the blade so it rests just inside the lip of the can, not on the side wall. You want it to catch the top seam, where the lid meets the body.
Hold the can steady with your free hand. Keep it upright. A tilted can leads to a crooked, half-finished cut.
Look closely at the contact point. The blade should touch the metal at a clean angle. When it lines up right, you’ll feel it click into place under the lever.
Step 4 – Lower the Lever and Lock the Blade
Now you press the can into action. This part feels satisfying.
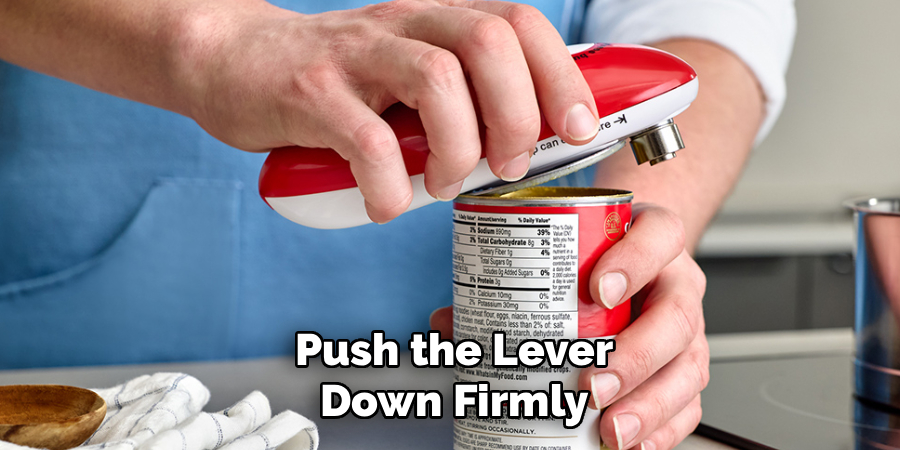
Push the lever down firmly until the blade pierces the lid. You’ll hear a soft pop and a short hiss as the metal gives way. That sound tells you the cut has started in the right spot.
Hold the lever down. On most countertop models, the lever stays locked once you press it, freeing both your hands. On handheld units, keep steady pressure on the trigger.
Don’t force it past the lock point. Gentle, firm pressure is all it takes. Cramming the lever risks bending the lid or jamming the gears.
Once locked, the drive wheel grips the rim. The can is ready to turn on its own.
Step 5 – Let the Can Rotate
Step back and let the machine work. This is the easy part.
The drive wheel turns the can while the blade glides along the rim. Watch it spin slowly, one smooth rotation. You’ll hear a steady, gentle grind as the blade cuts clean through the seam.
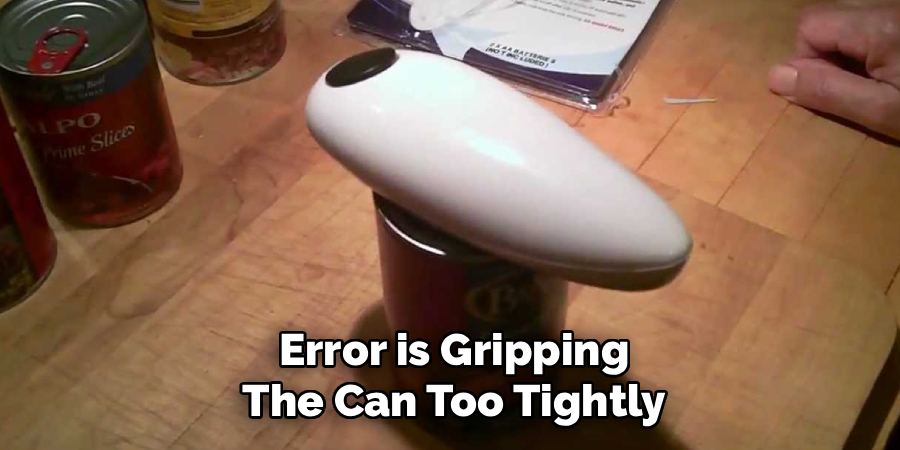
Keep one hand near the can, but let it move freely. Gripping too tight slows the spin and strains the motor. A light touch is all you need to keep it steady.
Listen to the sound. A smooth, even hum means the cut is going well. A grinding stutter means the blade slipped, so stop and reposition.
Most cans take five to ten seconds. Don’t rush it. Let the opener finish a full turn before you do anything else.
Step 6 – Stop at the Right Moment
Timing matters here. Stop too early and the lid hangs on. Stop too late and it spins loose.
Watch the cut line as the can turns. You’ll see the blade meet its starting point, closing the circle. That’s your signal.
On automatic models, the opener senses the full rotation and stops on its own. You’ll hear the motor cut out and feel the can settle.
On manual-lever models, release the lever the moment the cut completes. Lift it up gently to free the blade from the rim.
Don’t let the can keep spinning after the cut. Extra rotation can leave metal shavings or push the lid down into the food. One clean turn is all it needs.
Step 7 – Remove the Lid Safely
The lid is loose now. Handle it with care.
Many openers have a built-in magnet that lifts the lid clear for you. If yours does, the lid stays stuck to the magnet, away from your food. Just peel it off into a bowl.
No magnet? Use the tip of a butter knife or your fingertips on the smooth edge. Lift slowly. The cut edge is cleaner than a manual opener leaves, but stay cautious anyway.
Tilt the lid as you lift so any liquid drips back into the can, not onto your counter.
Drop the lid straight into a bowl or the recycling bin. Never leave it loose in the sink, where a reaching hand could catch the rim.
Step 8 – Clean and Store Your Opener
A clean opener lasts for years. A neglected one jams and rusts.
Unplug the unit or power it off first. Always. Then look at the blade and drive wheel, where food bits like to cling.
Wipe the blade with a damp cloth. For stuck-on residue, use a small brush dipped in warm, soapy water. Many cutting wheels pop off for a deeper rinse, so check your manual.
Dry every part fully before storing. A wet blade spots and dulls over time.
Wind the cord loosely, never tight around the base. A kinked cord wears out fast.
Store it in a dry spot, away from steam and splashes. A clean, dry opener is ready the moment you need it next.
Critical Mistakes When Using an Electric Can Opener
The most common mistake is rushing the setup. People slap the can under the blade without lining it up and wonder why the cut skips. The blade needs to sit just inside the lip, on the top seam. Misalign it and the opener grinds, stalls, or leaves the lid half-attached. Slow down for two seconds at the start and you save yourself a frustrating fight.
Another error is gripping the can too tightly while it spins. Your hand should guide, not clamp. A hard grip slows the rotation and strains the motor, which shortens the life of your opener. Let the drive wheel do the turning. Your job is just to keep the can upright.
Many people also forget to unplug before cleaning. That’s risky. A blade is sharp, and a powered unit can lurch if a button gets bumped. Always cut the power first, every single time, no exceptions.
Then there’s neglecting the blade. Old food dries on the cutting wheel and turns into a sticky, rusty mess. A dirty blade drags, dulls, and spreads grime into your next can. A quick wipe after each use prevents all of it.
Finally, don’t ignore a bulging can. Set it aside instead.
Expert Tips
A few small habits turn an everyday tool into a kitchen workhorse.
Wipe the can lid before you open it, every time. Dust on the rim falls straight into your food otherwise. One swipe with a damp cloth fixes it.
Open cans away from the edge of the counter. If the lid drops, it lands on the surface, not on your foot.
Keep the blade clean and check it monthly for dullness. A sharp blade cuts in one smooth pass, while a dull one chews and leaves rough edges.
For handheld models, charge them after each big batch of cooking. A weak battery struggles through thick steel cans and stalls mid-cut.
And listen while you work. Your opener tells you when something’s wrong. A smooth hum means all is well. A stutter or grind means stop and reposition.
Frequently Asked Questions
Why Won’t My Electric Can Opener Cut the Lid?
Usually it’s a positioning problem. The blade must sit just inside the rim, on the top seam, not on the side. A few quick fixes:
- Reposition the can so the edge sits snug under the blade
- Check the blade for dried food or dullness
- Make sure the lever locks fully into place
- Confirm the unit has power or a charged battery
Realign, press firmly, and it should cut clean.
Is an Electric Can Opener Safe to Use?
Yes, when handled with care. It’s often safer than a manual one because it leaves a smoother edge, not a jagged rim. Keep your fingers away from the blade. Always unplug it before cleaning. Use the magnet or a knife tip to lift the lid, never your bare fingers on the cut edge. Treat the blade with respect and you’ll avoid nicks every time.
How Do I Clean the Blade Properly?
Always unplug the unit first. Then wipe the blade and drive wheel with a damp cloth. For stuck-on bits, use a small brush with warm, soapy water. Many cutting wheels detach for a full rinse, so check your manual. Dry every part completely before storing, since a wet blade spots and dulls. A clean blade cuts smoother and lasts far longer.
Can an Electric Can Opener Open Any Can Size?
Most handle standard cans, from small tins to large family sizes. Very small cans, like tomato paste, can be tricky because the rim barely reaches the blade. Oddly shaped cans may not sit right either. Stick to round, standard cans for the smoothest results. For unusual shapes, a manual opener sometimes works better as a backup.
Why Does My Opener Leave Metal Shavings?
A few things cause this:
- The blade is dull and chewing instead of slicing
- The can kept spinning past one full rotation
- The blade sat too low on the side wall, not the seam
Replace or sharpen the blade, stop at one clean turn, and reposition higher on the rim. Sharp, well-placed blades leave no shavings behind.
Conclusion
An electric can opener rewards a steady hand and a few good habits. Set it on a flat surface. Inspect the can. Line up the blade on the seam. Lock the lever, let the can spin, and stop at one clean turn.
That’s the whole rhythm. Steady setup. Clean cut. Safe lid removal.
Your first try might feel slow. That’s fine. By your third can, your hands move on instinct. By your fifth, you won’t even think about it.
You now know how to use electric can opener like someone who’s done it for years. No sore wrists. No jagged edges. No cans left fighting you on the counter.
So plug yours in this week. Grab a can of beans or soup. Press the lever and watch it spin clean through the lid in seconds.
The tool does the hard work. You just guide it. And every meal that starts with a can gets a little easier from here.

About
Nick Hall has spent the last seven years working at the intersection of kitchen design and home repair — first as a design assistant at a residential renovation studio, then as a freelance writer covering everything from cabinet layouts to leaky faucet fixes.
Her approach is simple: kitchens should look good and function well. That means she’s just as comfortable talking about color palettes and counter materials as she is walking readers through how to fix a wobbly cabinet hinge or troubleshoot a garbage disposal.
Nick has worked directly with homeowners on small-space kitchen makeovers, budget-conscious renovations, and the kind of everyday repairs that don’t need a contractor — just the right instructions. She writes from experience, not theory, and tests most of the fixes and tips she shares before publishing them.
When she’s not writing, Nick is usually hunting for mid-century kitchen finds at estate sales or helping friends plan their own renovations. She lives in Columbus, Ohio.