
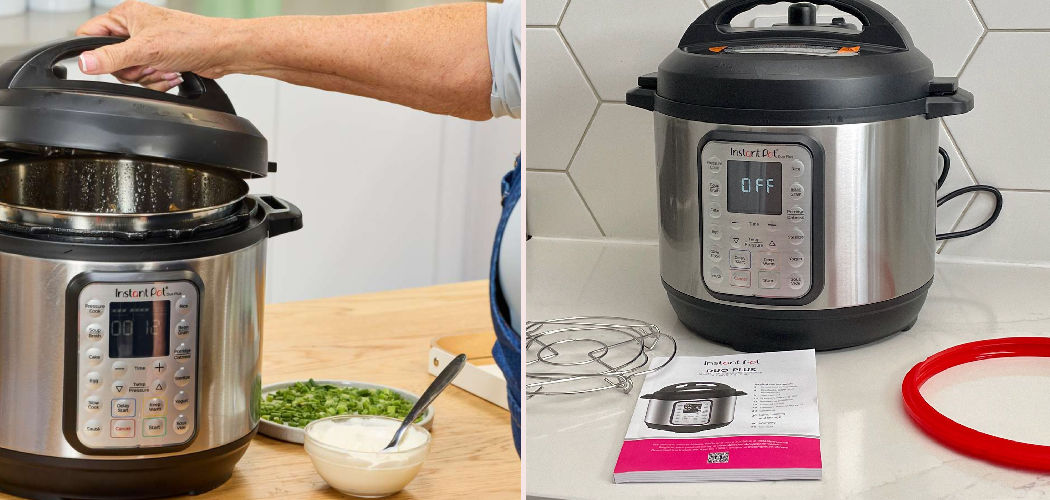
That shiny new appliance on your counter can feel a little intimidating at first. All those buttons, the locking lid, the hiss of steam. Take a breath, because once you understand the basics, you’ll wonder how you ever cooked without it.

Learning how to use Instant Pot Duo Plus opens up a whole world of fast, hands-off meals. You can cook rice, stews, soups, beans, and even yogurt with a few simple presses. No fancy skills required, just a willingness to try.
This appliance does the work of several gadgets at once, which means less clutter and fewer dishes. Best of all, it’s beginner-friendly once someone walks you through it. This guide breaks down every step so you can cook your first meal with total confidence.
Why Learning to Use Instant Pot Duo Plus Matters
This skill shines far beyond your home kitchen. Picture prepping meals before a big camping trip. You can cook a batch of chili or pulled pork ahead of time, freeze it, and reheat it easily at the campsite.
RV travelers love this appliance too. As long as you have power access, you can make a warm one-pot meal without juggling several burners in a tiny galley kitchen. That saves space, fuel, and cleanup time.
Cabin stays get easier as well. Instead of hauling pots and pans, you bring one device that pressure cooks, sautés, and keeps food warm. Outdoor beginners especially appreciate how forgiving it is.
When you’re far from your usual setup, simple and reliable cooking matters most. This pressure cooker delivers hot, satisfying meals wherever you can plug in.
Tools and Materials You’ll Need
You don’t need a drawer full of gadgets to get started. Most of what you need comes right in the box or already lives in your kitchen.
Here’s what helps the job go smoothly:
- The Instant Pot Duo Plus with its inner pot
- The sealing ring, seated properly in the lid
- A trivet or steam rack (usually included)
- Measuring cups for liquid and grains
- A wooden or silicone spoon for the sauté function
- At least one cup of water or broth for pressure cooking
- A heat-safe surface to rest the hot lid
Optional but handy: an extra sealing ring. Keeping a spare lets you swap one out for savory dishes and another for sweet ones, so last night’s curry doesn’t flavor this morning’s oatmeal.
Gather everything before you start. A little prep keeps your hands free and your cooking stress-free.
Step-by-Step Guide on How to Use Instant Pot Duo Plus
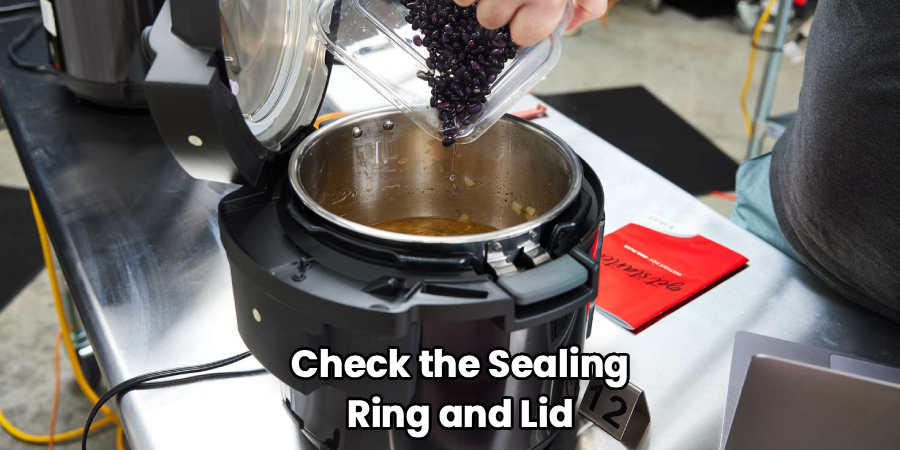
Step 1 – Check the Sealing Ring and Lid
Before anything cooks, give your appliance a quick safety check. Pop off the lid and look at the sealing ring inside it.
Press the ring gently into its groove all the way around. A loose or twisted ring lets steam escape, which means your pot won’t build pressure. Sniff it too, since silicone holds onto strong cooking odors from past meals.
Next, check the float valve on top of the lid. It should move up and down freely when you tap it. Clear away any food bits stuck around it.
This thirty-second routine prevents the most common frustrations. Learning how to use Instant Pot Duo Plus starts with trusting that your lid will seal correctly every single time.
Step 2 – Place the Inner Pot Inside
Now set the stainless steel inner pot into the base. This step sounds obvious, but skipping it is a classic beginner slip.
Wipe the outside of the pot dry first, then lower it into the housing. Give it a gentle quarter-turn so it settles flat against the heating element. You’ll feel it sit snugly when it’s seated right.
Never pour food or water directly into the base without the inner pot in place. Doing so damages the unit and creates a real mess.
Run your finger around the rim to confirm nothing blocks the connection. A clean, properly seated inner pot heats evenly and keeps your meal from scorching on the bottom.
Step 3 – Add Your Ingredients and Liquid
Time to build your meal. Add your ingredients to the inner pot, keeping things below the max fill line marked inside.
Pressure cooking needs liquid to create steam, so always include at least one cup of water or broth. Without enough liquid, the pot can’t reach pressure and may flash a burn warning instead.
Layer thicker items like meat on the bottom and lighter ones on top. Avoid stirring in starchy ingredients that settle and stick, since they can trigger that same burn notice.
You’ll notice the raw aromas of garlic, onion, or spices as you work. That fresh scent is your preview of the flavors waiting to develop under pressure.
Step 4 – Try the Sauté Function
For deeper flavor, brown your ingredients first. Press the sauté button and let the inner pot heat up for a couple of minutes.
You’ll hear a soft sizzle when you add oil and onions. Stir with a wooden or silicone spoon to avoid scratching the pot. This step builds a rich, savory base that pressure cooking alone can’t quite match.
Watch the food closely, since sauté runs hot and fast. Adjust the heat level on the control panel if things brown too quickly.
When your ingredients look golden and smell toasty, press cancel to stop the sauté program. Now you’re ready to add liquid and switch over to pressure cooking for the main event.
Step 5 – Seal the Lid Correctly
Place the lid on top and align the arrows. Turn it clockwise until you hear a chime or feel it click into the locked position.
Lid alignment matters more than beginners expect. If it’s even slightly off, the pot won’t seal and won’t build pressure. The control panel often shows a small lid icon when everything locks correctly.
Now find the steam release valve on top. Turn it to the sealing position so steam stays trapped inside. On many models it points away from “venting” toward “sealing.”
Double-check this valve, because a venting valve is the number one reason a pot never pressurizes. A properly sealed lid sets the stage for fast, even cooking.
Step 6 – Choose Your Cooking Program
Look at the control panel and pick your cooking program. The Duo Plus offers handy presets for rice, soup, beans, meat, and more.
Press your chosen preset, then adjust the time using the plus and minus buttons. You can also select manual pressure cooking and set any time you like for full control.
The display shows your selected minutes. After a short pause, the pot begins heating, and you’ll hear gentle gurgles as pressure builds inside.
A small float valve rises when full pressure is reached, and the timer starts counting down. This is the magic of how to use Instant Pot Duo Plus, letting the appliance do the cooking while you step away and relax.
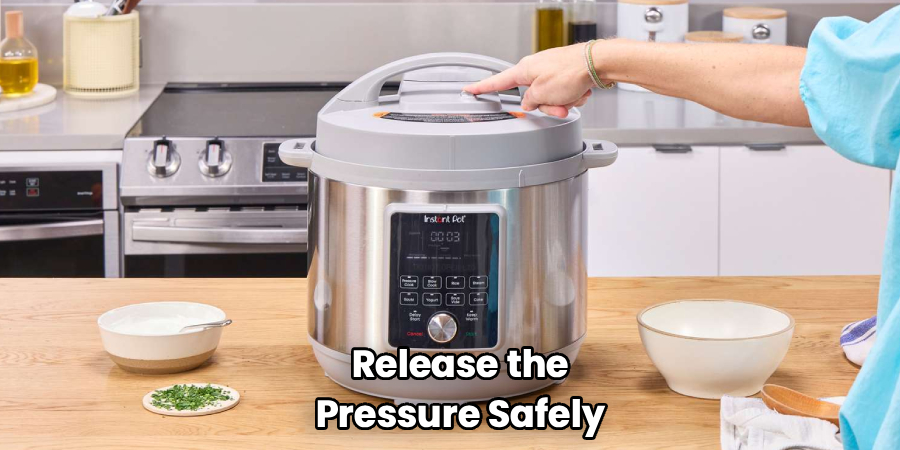
Step 7 – Release the Pressure Safely
When the timer beeps, you have two ways to release pressure. Natural release means waiting ten to twenty minutes while pressure drops on its own, which suits meats and soups.
Quick release means carefully turning the steam release valve to venting. A loud burst of steam shoots upward, so keep your hands and face well clear and use a long spoon if needed.
Never force the lid open. The float valve must drop completely first, signaling that the pressure is gone and it’s safe to unlock.
Choose your release method based on the recipe. Delicate foods like rice prefer a natural release, while crisp vegetables do better with a fast quick release to stop overcooking.
Step 8 – Open, Serve, and Clean Up
Once the float valve drops, twist the lid counterclockwise and lift it away from you. A wave of fragrant steam rises, carrying the aroma of your finished meal.
Tilt the lid so condensation drips back into the pot, not onto your counter. Give your dish a gentle stir and taste before serving.
When you finish eating, cleanup stays simple. Remove the inner pot and wash it with warm soapy water, then pull out the sealing ring and rinse it well to clear lingering cooking odors.
Wipe the lid, the rim, and around the float valve. A quick clean now keeps your appliance ready and odor-free for tomorrow’s one-pot meal.
Critical Mistakes When Learning to Use Instant Pot Duo Plus
The most common mistake is leaving the steam release valve in the venting position. When this happens, steam escapes instead of building pressure, and your food never cooks properly. Always turn the valve to sealing before you start, and double-check it after locking the lid.
Another frequent slip is forgetting the liquid. Pressure cooking depends on steam, so you need at least one cup of water or broth. Skip it, and you’ll likely see a burn warning flash across the control panel while your meal scorches on the bottom.
Many beginners also seat the sealing ring incorrectly. A twisted or partially inserted ring lets steam leak around the lid, which stops the pot from pressurizing. Press it firmly into its groove all the way around before every use.
People sometimes overfill the inner pot too. Going past the max fill line clogs the float valve and creates a messy, dangerous situation. Stick to the marked limit, and leave extra room for foods that expand, like rice and beans.
Finally, never rush a quick release with foamy foods. Soups and grains can spit hot liquid through the valve, so let those release naturally instead.
Expert Tips
Run a water test first. Pour two cups of water in the pot, seal the lid, and run a short pressure cycle. This teaches you how the steam release and float valve behave without risking a real meal.
Keep two sealing rings on hand. Silicone absorbs odors, so dedicating one ring to savory dishes and another to sweet ones keeps flavors clean.
Add a splash of liquid before any starchy or thick sauce to prevent the dreaded burn notice. Layer thick ingredients first and avoid stirring them in.
Use natural release for anything foamy or meaty, since it locks in moisture and prevents splatter. Save quick release for vegetables you want crisp.
Finally, wipe the rim and lid groove after each use. A clean seal means reliable pressure every time.
Frequently Asked Questions
How much liquid do I need for pressure cooking?
You need at least one cup of water or broth to create enough steam. Some larger models call for a bit more. Without enough liquid, the pot can’t build pressure and may trigger a burn warning. When in doubt:
- Use one cup for most recipes
- Add more for dry beans or grains
- Avoid thick sauces alone without thinner liquid mixed in
What’s the difference between natural and quick release?
Natural release lets pressure drop slowly on its own over ten to twenty minutes, which keeps meats tender and prevents splatter. Quick release means turning the valve to venting so steam escapes fast, stopping the cooking right away. Use natural release for soups, beans, and meats. Choose quick release for vegetables and pasta you want firm rather than soft.
Why won’t my lid seal or build pressure?
Usually the steam release valve sits in the venting position instead of sealing. Check that first. Next, make sure the sealing ring is pressed fully into its groove without twists. Also confirm the lid is locked by turning it until it clicks. Finally, you need enough liquid inside to generate steam. Fixing these four things solves nearly every sealing problem.
Can I cook frozen food directly in it?
Yes, and that’s one of the best features. You can drop frozen chicken or ground meat straight in without thawing first. Just add a little extra cooking time, usually a few minutes per pound. Make sure you include enough liquid, and break apart frozen blocks if you can so they cook evenly throughout.
How do I get rid of cooking odors in the sealing ring?
Silicone holds onto strong smells like garlic and curry. To freshen it up, try these simple fixes:
- Run a steam cycle with water and a cup of white vinegar
- Wash the ring in hot soapy water, then air-dry it in sunlight
- Keep a separate ring for sweet dishes
These steps keep flavors from carrying over between meals.
Conclusion
You now have everything you need to cook with confidence. Learning how to use Instant Pot Duo Plus comes down to a few key habits: check the sealing ring, seat the inner pot, add enough liquid, lock the lid, and set your steam release to sealing.
From there, the appliance does the heavy lifting. You pick a cooking program, walk away, and come back to a warm, fragrant one-pot meal. Whether you sauté first for deeper flavor or go straight to pressure cooking, the routine quickly becomes second nature.
Remember the safety basics too. Let the float valve drop before you open the lid, choose natural release for meats and quick release for crisp vegetables, and wipe everything clean afterward.
So plug it in and start with something simple, like a pot of rice or a hearty soup. Each meal builds your skill and your confidence. Before long, you’ll reach for this trusty appliance more than any other tool in your kitchen, and you’ll wonder how you ever managed without it.

About
Nick Hall has spent the last seven years working at the intersection of kitchen design and home repair — first as a design assistant at a residential renovation studio, then as a freelance writer covering everything from cabinet layouts to leaky faucet fixes.
Her approach is simple: kitchens should look good and function well. That means she’s just as comfortable talking about color palettes and counter materials as she is walking readers through how to fix a wobbly cabinet hinge or troubleshoot a garbage disposal.
Nick has worked directly with homeowners on small-space kitchen makeovers, budget-conscious renovations, and the kind of everyday repairs that don’t need a contractor — just the right instructions. She writes from experience, not theory, and tests most of the fixes and tips she shares before publishing them.
When she’s not writing, Nick is usually hunting for mid-century kitchen finds at estate sales or helping friends plan their own renovations. She lives in Columbus, Ohio.