
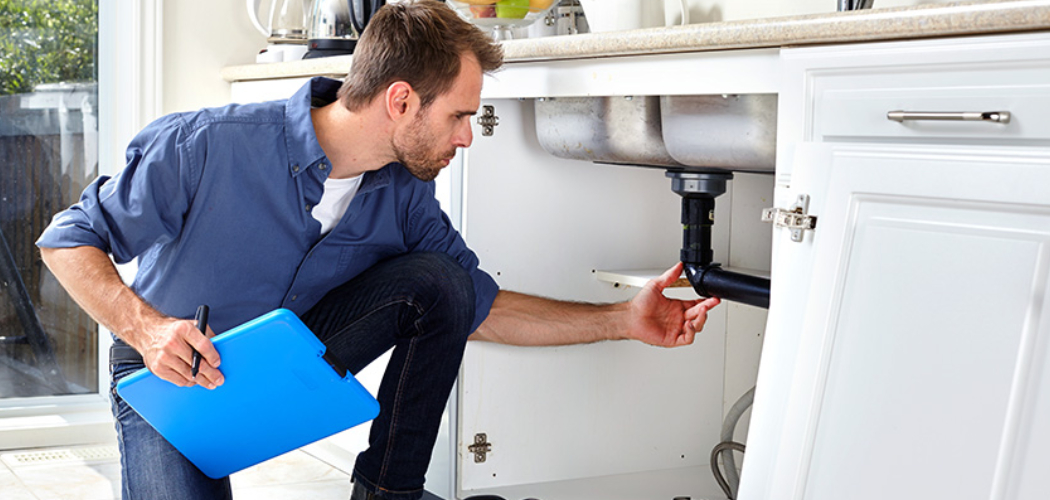
Cold air under a sink can turn a simple kitchen cabinet into a trouble spot. In winter, exposed pipes can sweat, lose heat fast, or even freeze. That risk gets higher in campers, RVs, cabins, and homes with outside-facing kitchen walls. If you have noticed chilly drafts, damp cabinet walls, or cold water lines, learning how to insulate under kitchen sink can help you protect your plumbing and improve energy efficiency.
The good news is that this is a beginner-friendly project. With a few basic tools, the right insulation, and a careful plan, you can make the area warmer, quieter, and better sealed. This guide will show you how to do the job safely and correctly.

Why Insulating Under a Kitchen Sink Matters
Insulating the space under a kitchen sink does more than keep things warm. It helps reduce the chance of frozen pipes, cuts down on drafts, and can stop moisture from building up inside the cabinet. That matters in any home, but it is especially useful for campers, RV owners, and outdoor beginners who deal with changing weather and thin wall construction.
In mobile setups, every small gap can let in cold air. A sink cabinet often sits against an exterior wall, which makes it one of the first places to feel the cold. Adding insulation and sealing air leaks helps protect your water system when temperatures drop overnight. It can also make your space more comfortable and reduce wear on plumbing parts over time.
Tools and Materials You’ll Need
- Tape measure
- Utility knife
- Work gloves
- Safety glasses
- Flashlight or headlamp
- Clean rag or paper towels
- Mild cleaner for wiping cabinet surfaces
- Expanding spray foam for small gaps
- Caulk and caulk gun for tight seams
- Foam board insulation or reflective insulation
- Pipe insulation sleeves for hot and cold water lines
- Adhesive or foil tape rated for insulation use
- Marker or pencil for tracing cuts
- Optional: a small shop vacuum for cleaning dust and debris in tight corners
Step-by-Step Guide on How to Insulate Under Kitchen Sink
Step 1 – Empty and inspect the cabinet
Start by removing everything from under the sink. Pull out cleaners, bins, spare sponges, and anything else that blocks your view. Shine a flashlight into the back corners and along the base. You are looking for water stains, soft wood, mold, loose pipes, and open gaps where cold air may be getting in.
Run your hand near pipe entries and the cabinet back panel. You may feel a light draft, especially on a cold day. Listen for a faint whistle if wind is pushing through a crack. Before you add insulation, make sure the area is dry and structurally sound. Insulation should never cover an active leak. If you see drips, fix those first so you do not trap moisture behind your new materials.
Step 2 – Measure the spaces carefully
Once the cabinet is clean and visible, measure each area you plan to insulate. Check the back wall, side walls, floor of the cabinet, and any narrow strips around plumbing lines. Write down the height and width of each section. Cabinets often look square, but many have small irregular spaces that need custom cuts.
Take your time here. Good measurements help you waste less material and get a tighter fit. This part of how to insulate under kitchen sink is simple, but it sets up the whole project. If you rush, your insulation may leave gaps where cold air still slips in. Mark where shutoff valves, drain lines, and supply pipes pass through so you can cut around them without forcing the material into place.
Step 3 – Seal gaps and air leaks first
Insulation works best after you stop the airflow. Look closely around pipe openings, seams in the cabinet, and corners where the wall meets the floor. Small cracks can let in a surprising amount of cold air. Use caulk for thin seams and spray foam for larger holes. Apply it slowly so it does not expand too far and crowd the plumbing.
As the sealant goes in, you may notice the cabinet already feels less drafty. That is a good sign. Let the material cure based on the product directions before moving on. Do not block access to shutoff valves or cover any parts you may need to service later. If the sink cabinet backs up to an outside wall, pay extra attention there. That wall usually carries the most cold into the space.
Step 4 – Cut insulation panels to fit
Now cut your insulation to match the measurements you took. Foam board is a common choice because it is firm, easy to trim, and useful in tight cabinet spaces. Reflective insulation can also work well, especially in RVs or campers where space is limited. Use a marker to trace each section, then score with a utility knife and snap the board cleanly.

Test each piece before attaching it. It should sit flat without bowing or pressing hard against pipes. You want a snug fit, not a forced one. When you slide a panel into place, notice how the cabinet begins to feel more enclosed and solid. That change means you are building a barrier against temperature swings. Leave enough room around plumbing parts so you can still inspect them later if needed.
Step 5 – Install insulation on cabinet walls
Attach the cut insulation panels to the cabinet walls using adhesive or insulation-safe tape. Press each piece firmly into position and hold it for a few seconds so it bonds well. Start at the back wall, then move to the sides. If you are working in a small cabinet, kneel comfortably and go section by section instead of trying to place everything at once.
Keep the layout neat and practical. The goal is to cover cold surfaces while preserving access to plumbing. If you need to work around curves or awkward shapes, trim small sections rather than forcing a large panel to bend. In many cases, this is where how to insulate under kitchen sink becomes easier than expected. Once the panels are up, the cabinet usually looks cleaner, tighter, and much better protected from cold air.
Step 6 – Wrap the supply pipes
Next, insulate the hot and cold water supply lines. Pipe insulation sleeves are usually made from foam and come pre-slit, so you can open them and press them over the pipe. Cut the sleeve to length, then secure the seam if needed with tape. Cover as much exposed pipe as you can reach without interfering with shutoff valves or joints.
This step helps reduce heat loss from the hot line and lowers the freeze risk on the cold line. It can also cut down on condensation, which often leaves cabinets damp. As you fit the sleeves, check that they sit smoothly and do not bunch up around bends. A clean wrap works better and looks better. If two pipes run close together, insulate each one separately rather than bundling them into one thick wrap.
Step 7 – Insulate around the drain area with care
The drain pipe needs a little more attention. It does not usually need the same full wrap as supply lines, but the surrounding wall and pipe-entry gaps still matter. If there is a large hole where the drain passes through the cabinet or wall, seal the edges carefully without locking the pipe in place. You want to reduce airflow while still allowing future repairs.
Avoid packing insulation tightly around the P-trap or any part that may need frequent access. The sink drain area should remain serviceable. Think of this step as controlled protection, not total enclosure. In cold weather setups, especially in campers or cabins, this balance matters a lot. You are trying to hold warmth in the cabinet while keeping all the plumbing visible enough to monitor for leaks, corrosion, or loose fittings.
Step 8 – Check access, airflow, and final fit
Before you call the project done, open and close the cabinet doors and look at everything again. Make sure valves turn freely, drain parts are visible, and nothing presses too hard against the pipes. If a panel shifts or lifts at one edge, trim it and reattach it. A neat fit lasts longer and makes future maintenance less frustrating.
Stand back for a moment and feel the difference. The cabinet should seem less drafty and more enclosed. If you are working in a camper or seasonal space, this final review is especially important because vibration and movement can loosen materials over time. Wipe away debris, return your stored items carefully, and leave enough open space so air can circulate gently. A packed cabinet can trap moisture and make problems harder to spot.

Common Mistakes to Avoid
One common mistake is insulating before checking for leaks. If the cabinet already has dripping fittings, damp wood, or mold, adding insulation can trap moisture and make the damage worse. Always inspect the area first and fix plumbing issues before sealing anything up.
Another mistake is skipping air sealing and going straight to insulation. Insulation slows heat transfer, but open gaps still let cold air rush in. If you ignore those cracks around pipes and wall joints, the cabinet may stay cold no matter how much material you add.
Many beginners also use the wrong insulation in tight spaces. Thick batts can crowd the cabinet, collect moisture, and interfere with plumbing access. Rigid foam board, reflective insulation, and pipe sleeves are usually a better match for the limited space under a sink.
A fourth mistake is covering shutoff valves or hard-to-reach connections. You need to be able to reach these parts quickly if a leak starts. Keep service points visible and easy to access.
Finally, some people pack the cabinet too full after finishing the job. That makes inspection harder and can press against pipes or insulation. Leave a little breathing room so you can spot problems early and keep the space dry.
Expert Tips
If you live in a cold climate, check the sink cabinet during the first hard freeze after you finish. Feel the inside wall and the pipes. If they still seem very cold, add more air sealing around pipe openings or install a small temperature sensor inside the cabinet so you can monitor conditions.
For campers, RVs, and cabins, choose materials that handle movement and changing humidity well. Foil tape often holds better than standard household tape, and closed-cell foam resists moisture better than soft fibrous products. It also helps to label the shutoff valves before you put everything back. In an emergency, that small step saves time and stress.
Frequently Asked Questions
Can I use regular fiberglass insulation under a kitchen sink?
You can, but it is usually not the best choice for this space. Fiberglass can sag, hold moisture, and get in the way in a small cabinet. Under-sink areas work better with rigid foam board, reflective insulation, and foam pipe sleeves because they are easier to cut, cleaner to handle, and better suited to tight spots around plumbing.
Do I need to insulate both the cabinet and the pipes?
Yes, in most cases you should do both. The cabinet insulation helps block cold surfaces and drafts, while pipe insulation protects the water lines directly. If you only insulate the pipes, the cabinet may still get very cold. If you only insulate the walls, exposed pipes can still lose heat too quickly during freezing weather.
Is spray foam safe to use around plumbing pipes?
Spray foam is generally safe for sealing gaps around plumbing when you use it correctly. Apply it around openings, not over joints that may need repair later. Use a small amount at first because it expands as it cures. Always check the product label and avoid blocking shutoff valves, cleanouts, or other service points.
How do I know if cold air is getting into the sink cabinet?
You may notice a draft when you place your hand near pipe openings or along the back wall. Other signs include very cold cabinet surfaces, pipes that sweat, damp corners, or items under the sink feeling colder than the rest of the kitchen. A flashlight and a careful inspection usually help you spot the most likely entry points.
Will insulating under the sink prevent pipes from freezing completely?
It lowers the risk, but it does not guarantee full protection in extreme cold. Insulation slows heat loss and helps the cabinet stay warmer, especially when combined with air sealing. In severe weather, you may still need added protection such as keeping indoor heat steady, opening cabinet doors, or using safe pipe-heating solutions if conditions demand it.
Conclusion
Insulating the space under your kitchen sink is a practical project that pays off in comfort, efficiency, and peace of mind. By checking for leaks, measuring carefully, sealing drafts, adding wall insulation, and wrapping exposed supply lines, you create a better barrier against cold weather. The work is straightforward, and most beginners can handle it with simple tools and a patient approach.
This job matters even more in campers, RVs, cabins, and homes with exterior kitchen walls, where cold air finds its way in fast. A well-insulated sink cabinet helps protect pipes, reduce condensation, and make the whole area more reliable during winter. If you have been putting off this project, now is a good time to start. Once you learn how to insulate under kitchen sink, you will have a useful skill that helps protect your plumbing season after season.

About
Nick Hall has spent the last seven years working at the intersection of kitchen design and home repair — first as a design assistant at a residential renovation studio, then as a freelance writer covering everything from cabinet layouts to leaky faucet fixes.
Her approach is simple: kitchens should look good and function well. That means she’s just as comfortable talking about color palettes and counter materials as she is walking readers through how to fix a wobbly cabinet hinge or troubleshoot a garbage disposal.
Nick has worked directly with homeowners on small-space kitchen makeovers, budget-conscious renovations, and the kind of everyday repairs that don’t need a contractor — just the right instructions. She writes from experience, not theory, and tests most of the fixes and tips she shares before publishing them.
When she’s not writing, Nick is usually hunting for mid-century kitchen finds at estate sales or helping friends plan their own renovations. She lives in Columbus, Ohio.