
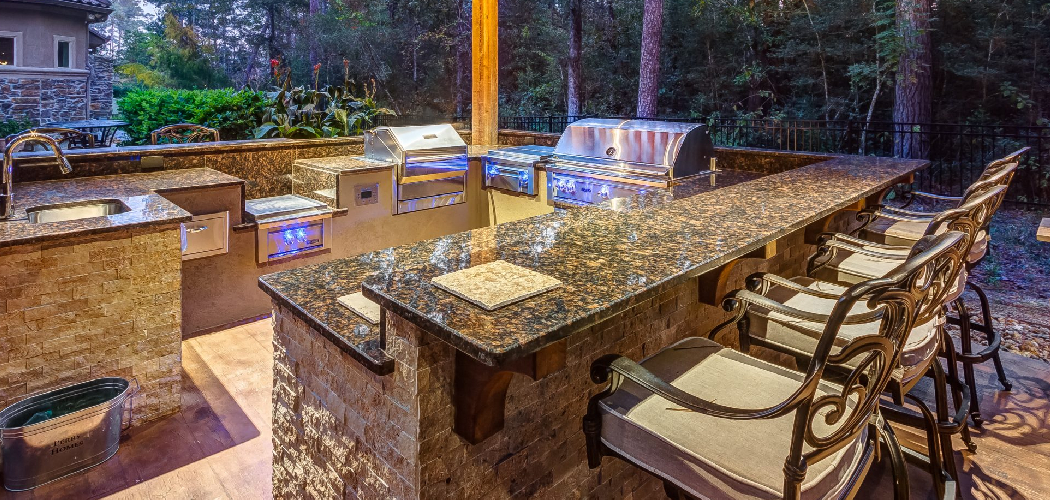
An outdoor kitchen should feel inviting, not like a heat trap that sends everyone back inside. Sun exposure, hot cooking surfaces, poor airflow, and heat from grills can turn even a well-designed setup into an uncomfortable place to prep food and gather with friends. If you are learning how to cool an outdoor kitchen, the good news is that you do not need a full remodel to make a big difference.

A few smart changes can lower heat, improve airflow, and help your space feel safer and more enjoyable during warm weather. This guide will walk you through the most practical ways to keep your outdoor kitchen cooler, more comfortable, and easier to use.
Why Cooling Your Outdoor Space Matters
A cooler outdoor kitchen is not just about comfort. It also helps you cook more safely, protect your appliances, and get more use from the space you invested in. When heat builds up around a grill island, countertop, or covered patio, it can wear you out fast and make simple tasks like chopping vegetables or checking food feel harder than they should.
For beginners, learning to control heat makes outdoor cooking less stressful. You can spend more time enjoying the smell of food on the grill and less time wiping sweat from your face or rushing back indoors. A well-cooled space also helps guests stay comfortable, which turns your outdoor kitchen into a place people want to linger, eat, and relax.
Tools and Materials
Before you start, gather a few items that help you block heat, improve circulation, and manage hot surfaces:
- Outdoor-rated ceiling fan or wall-mounted fan
- Shade sail, pergola cover, or patio umbrella
- Outdoor thermometer
- Heat-resistant grill mat
- Vent hood or range hood rated for outdoor use
- Stainless steel or light-colored prep surfaces
- Weather-resistant curtains or privacy panels
- Misting fan or portable evaporative cooler
- Extension cord rated for outdoor use, if needed
- Optional: Infrared thermometer for checking surface temperatures
These tools do not all need to be installed at once. Start with the items that solve your biggest heat problem first, then build from there.
Step-by-Step Guide on How to Cool an Outdoor Kitchen
Step 1 – Identify Where the Heat Is Coming From
Start by standing in your outdoor kitchen at the hottest part of the day. Pay attention to where the sun hits, which surfaces feel hot to the touch, and where air seems to stop moving. You may notice that the grill area feels much warmer than the prep station, or that heat gets trapped under a solid patio cover.
This first check gives you a clear plan. Sometimes the biggest issue is direct sunlight on counters. Other times it is radiant heat from the grill or poor ventilation around built-in appliances.
Use a basic outdoor thermometer to compare different spots. If one corner feels stuffy and another catches a breeze, that tells you where airflow is working and where it is failing. Before you decide how to cool an outdoor kitchen, you need to know whether the main problem is sun, surface heat, trapped air, or all three.

Step 2 – Add Shade Over the Hottest Zones
Once you know where the heat builds up, block as much direct sun as possible. Shade is often the fastest and most affordable fix. A pergola with a cover, a retractable awning, a large umbrella, or a shade sail can reduce surface temperatures and make the area feel noticeably cooler within minutes.
Focus first on the prep area, seating area, and any place where people stand for long stretches. Grill zones still need safe clearance and ventilation, so never place fabric or low covers too close to flames or high heat.
Lighter-colored shade materials usually reflect more sunlight than darker ones. That matters on hot afternoons when every degree counts. Even partial shade can protect stone counters, stainless steel doors, and flooring from absorbing and radiating heat back into the space.
Step 3 – Improve Airflow With Fans
Air movement changes the feel of an outdoor kitchen almost instantly. Even when the temperature stays the same, a steady breeze helps sweat evaporate and reduces that heavy, stagnant feeling that builds under covers and roofs. Install an outdoor-rated ceiling fan if your kitchen has a permanent overhead structure.
If not, use a wall-mounted fan or pedestal fan designed for exterior use. Position fans to move hot air away from the cooking area rather than blowing directly into the grill. You want circulation, not a blast that disrupts flames or pushes smoke toward your guests.
Set one fan near the prep zone and another near the dining area if space allows. Cross-breezes work better than a single fan pointed at one spot. In many setups, airflow is the missing link that makes the whole kitchen feel usable again.
Step 4 – Vent Heat Away From the Cooking Area
Grills, pizza ovens, side burners, and smokers release more heat than many beginners expect. If those appliances sit under a roof or covered patio, that heat can collect fast. Proper ventilation helps pull hot air up and out before it settles around your head and shoulders.
An outdoor vent hood is one of the best upgrades for a built-in cooking area. Choose one rated for outdoor conditions and sized to cover the full cooking surface. If a hood is not possible, make sure the area above and around your grill has enough open space for heat to escape.
This is one of the most overlooked parts of how to cool an outdoor kitchen. People often add shade first, which helps, but then trap heat underneath it. Shade and ventilation need to work together if you want lasting comfort.
Step 5 – Choose Cooler Surface Materials
Your counters, cabinets, and flooring can either increase heat or help control it. Dark stone, dense concrete, and metal surfaces soak up sunlight and stay hot long after the sun shifts. Light-colored finishes tend to reflect more heat and stay easier to touch during summer use.
If you are updating your setup, consider pale stone, tile, or sealed concrete in soft neutral tones. Stainless steel is durable, but it can become hot in direct sun, so it works best in shaded areas. Wood accents can feel cooler than stone, though they need more upkeep outdoors.
You do not always need a full replacement. Simple changes like countertop covers, outdoor runners, or movable prep boards can make a work zone more comfortable. The goal is to reduce stored heat that keeps radiating back into the space.
Step 6 – Use Cooling Accessories for Extra Relief
Once you handle the big issues, bring in a few comfort upgrades. Misting fans can cool the air around seating and prep areas, especially in dry climates. Portable evaporative coolers may also help if your layout is semi-enclosed and well-ventilated.
Keep these tools away from open flames, electrical hazards, and food prep areas where excess moisture could become a nuisance. Use them where people gather rather than where grease, smoke, and direct cooking heat are strongest.
Cooling accessories are especially useful during peak summer afternoons or when you host a group. If you are still fine-tuning how to cool an outdoor kitchen, these add-ons can bridge the gap between basic comfort and a space that feels truly pleasant to use.
Step 7 – Cook Smarter During Hot Weather
The way you cook affects the temperature of the entire area. Long preheats, multiple burners, and high-heat methods can quickly raise the temperature around your kitchen. On very hot days, try shorter cooking sessions, batch prep indoors, or menu choices that rely on lower heat.
Use lids wisely to hold heat inside the grill instead of letting it pour out into the air. Prep ingredients in advance so you are not standing near the hottest zone longer than necessary. If your setup includes side burners, ask yourself if every one of them needs to be on at the same time.

You can also shift your cooking schedule. Early evening often feels much better than late afternoon. A cooler routine can do as much for comfort as any equipment upgrade.
Step 8 – Keep Heat From Building Up Under Cover
Covered outdoor kitchens are popular for good reason, but roofs and enclosed sides can trap warmth if they are not planned carefully. If your structure feels stuffy, look for ways to release hot air and reduce enclosed heat pockets. Open side panels, slatted walls, or vented roof details can help.
Weather-resistant curtains and screens should be used carefully. They provide shade and privacy, but if they block all breeze, they can make the space feel hotter. Try pulling them back during the hottest hours to improve ventilation.
Pay attention to ceiling height too. Low covers hold heat closer to where you stand and cook. Taller overhead structures usually feel cooler because rising hot air has more room to escape before it settles around you.
Step 9 – Maintain the Space So It Stays Cooler
A clean, well-maintained outdoor kitchen performs better in the heat. Grease buildup, clogged vents, dusty fan blades, and blocked airflow all make cooling systems work less effectively. Take time to inspect your kitchen every few weeks during the hottest season.
Wipe down metal surfaces that hold heat and glare in direct sun. Clean vent filters if you use a hood. Check fans for dirt and make sure they are still angled where you need airflow most. Even moving a storage cart or planter can open a blocked path for breeze.
Small maintenance habits keep your improvements working. Cooling is not just about installation day. It is about making sure shade, airflow, and ventilation continue to work together every time you cook outdoors.
Common Mistakes
One common mistake is adding shade without thinking about ventilation. A solid roof or cover may block direct sun, but it can also hold hot air over your grill and prep area. That leaves the space feeling heavier and more uncomfortable than before.
Another mistake is placing fans in the wrong position. If a fan blows straight into the grill, it can affect flame performance and push smoke into the seating area. Good airflow should move heat away from the cook, not spread it around unpredictably.
Many beginners also overlook surface temperature. They focus on air temperature alone, even though hot counters, dark flooring, and metal cabinet fronts can make the whole kitchen feel warmer. These materials absorb heat all day and release it slowly, especially in full sun.
A fourth mistake is cooking the same way in every season. High-heat grilling at noon in midsummer will make the area harder to manage than a shorter cooking session in the evening. Timing and technique matter more than people think.
Finally, some homeowners add too many cooling accessories before fixing the root problem. If the space has no shade, poor airflow, and trapped appliance heat, a misting fan alone will not solve much. Start with layout, sun, and ventilation first.
Expert Tips
Try layering your cooling strategy instead of relying on one fix. The best outdoor kitchens stay comfortable because they combine shade, airflow, and smart material choices. Even modest improvements in each area can create a big overall difference.
Use a thermometer to test results after every change. You may find that adding a fan drops the felt temperature near the prep zone, while shade makes the countertops far easier to use. Measure, adjust, and keep what works.
If you are planning a new build or renovation, think about heat before final placement. Positioning the kitchen to avoid harsh western sun can save you money and hassle later. Good orientation is one of the simplest ways to improve long-term comfort.
FAQ
What is the fastest way to make an outdoor kitchen feel cooler?
The fastest improvement is usually adding shade and airflow at the same time. A large umbrella, shade sail, or pergola cover blocks direct sun, while an outdoor-rated fan keeps air moving. Together, they can make the space feel cooler right away, even before you install more permanent upgrades like a vent hood or new surfaces.
Do misting fans work well in outdoor kitchens?
Misting fans can work very well, especially in dry climates where water evaporates quickly. They help lower the air temperature around seating and prep spaces. Just keep them away from open flames, electrical connections, and areas where too much moisture could affect food prep or make surfaces slippery.
Can a covered patio make an outdoor kitchen hotter?
Yes, it can if the structure blocks hot sun but traps rising heat underneath. This happens often with low solid roofs and limited side openings. A covered patio works best when it also allows strong airflow, uses proper grill ventilation, and gives heat a clear path to escape upward and outward.
What materials stay cooler in an outdoor kitchen?
Light-colored surfaces usually stay cooler than dark ones because they reflect more sunlight. Pale stone, tile, and some sealed concrete finishes are often easier to work around in summer heat. Stainless steel is durable, but it can get very hot in direct sun, so shade makes a big difference there.
When is the best time to use an outdoor kitchen in summer?
Early evening is often the most comfortable time because the strongest sun has passed and surfaces begin to cool down. Morning can also work well for prep or light cooking. If you must cook in late afternoon, use shade, fans, and shorter cooking sessions to reduce heat stress.
Conclusion
Keeping an outdoor kitchen cool comes down to a few smart moves: block direct sun, improve airflow, vent cooking heat, and pay attention to the materials that store warmth. You do not need to solve everything at once. Start with the biggest source of heat, make one useful change, and build from there.
As you practice, you will notice which upgrades give you the most comfort for the least effort. A fan in the right place, better shade, or a change in cooking time can transform the whole experience. If you have been wondering how to cool an outdoor kitchen, the best approach is simple: reduce heat at the source, help it escape, and make the space easier to use in every season.
Take a walk through your setup today and identify one fix you can make before your next cookout.

About
Nick Hall has spent the last seven years working at the intersection of kitchen design and home repair — first as a design assistant at a residential renovation studio, then as a freelance writer covering everything from cabinet layouts to leaky faucet fixes.
Her approach is simple: kitchens should look good and function well. That means she’s just as comfortable talking about color palettes and counter materials as she is walking readers through how to fix a wobbly cabinet hinge or troubleshoot a garbage disposal.
Nick has worked directly with homeowners on small-space kitchen makeovers, budget-conscious renovations, and the kind of everyday repairs that don’t need a contractor — just the right instructions. She writes from experience, not theory, and tests most of the fixes and tips she shares before publishing them.
When she’s not writing, Nick is usually hunting for mid-century kitchen finds at estate sales or helping friends plan their own renovations. She lives in Columbus, Ohio.