
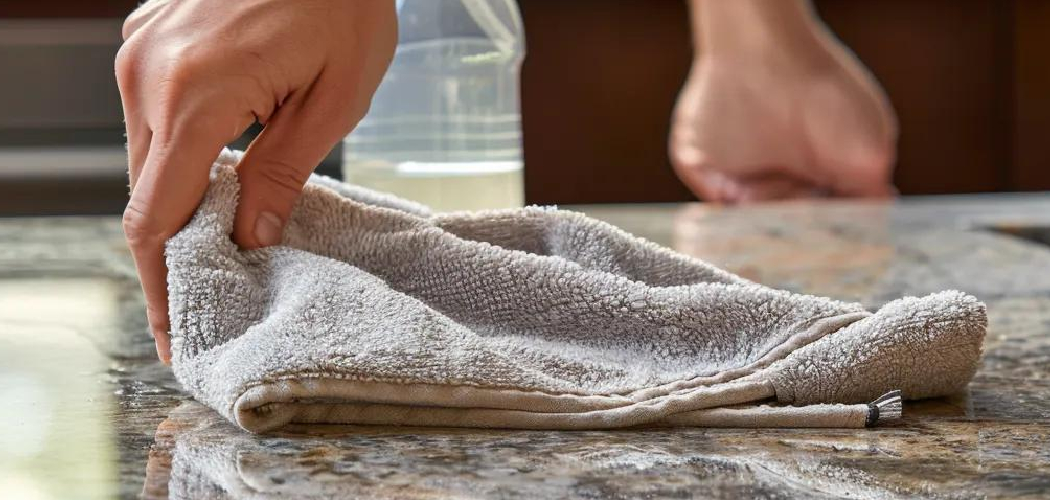
A clean kitchen counter does more than make your space look neat. It helps prevent cross-contamination, keeps odors down, and gives you a safer place to prep food every day. If you are learning how to clean kitchen counter surfaces for the first time, the process is simpler than it may seem, but the right method matters. Different materials react in different ways, and a quick wipe is not always enough to remove grease, crumbs, and bacteria.

In this guide, you’ll learn what supplies to gather, how to clean step by step, what mistakes to avoid, and how to keep your counters in good shape long term.
Why Cleaning Your Counter Matters
Your kitchen counter is one of the hardest-working surfaces in your home. It catches food splatters, crumbs, raw ingredient residue, sticky spills, and the dust that settles through the day. When you clean it well, you lower the chance of germs spreading from one meal to the next and make everyday cooking feel easier and more pleasant.
Regular cleaning also helps protect the finish of your countertop. Grease can dull the surface, acidic spills can stain some materials, and standing moisture can wear down seams or edges. A simple routine keeps your kitchen fresher, helps food prep feel more inviting, and saves you from tougher deep-cleaning jobs later.
Tools and Materials You’ll Need
Before you start, gather a few basic supplies. You do not need anything fancy, but using the right tools will help you clean well without scratching or damaging the surface.
- Microfiber cloths for wiping, drying, and buffing
- Mild dish soap for everyday cleaning
- Warm water for loosening grease and dried-on residue
- A spray bottle for mixing a gentle cleaning solution
- A soft sponge or non-abrasive scrub pad for sticky spots
- Paper towels for quick messes or drying in a hurry
- Baking soda for stubborn grime and deodorizing
- A clean dry towel for the final wipe
- Optional: a small plastic scraper for dried spills that are hard to lift
Step-by-Step Guide on How to Clean Kitchen Counter
Step 1 – Clear the Surface Completely
Start by removing everything from the counter. Move appliances, utensil holders, cutting boards, spice jars, and any clutter that blocks the full surface. Even small items can trap crumbs and grease underneath, so this step makes a big difference.
Once the counter is empty, take a close look at what you are dealing with. You may notice sticky rings near the coffee maker, a film of cooking oil near the stove, or dried sauce by the backsplash. This quick inspection helps you clean with more purpose instead of wiping blindly. It also gives you a chance to spot stains, worn sealant, or seams that need a gentler touch.
Step 2 – Brush Away Loose Crumbs and Debris
Before adding water or cleaner, remove dry debris first. Use a dry microfiber cloth or paper towel to sweep up crumbs, coffee grounds, grains of sugar, and any dust that has collected along edges and corners. If you skip this, those particles can turn into a gritty mess once they get wet.

Pay special attention to the area around small appliances and the line where the counter meets the wall. Crumbs often hide there and can make a clean surface feel rough even after wiping. This is also a good time to lift and shake out mats or trays. A smooth, debris-free counter gives you a better start and keeps your cloth from just pushing dirt around.
Step 3 – Mix a Gentle Cleaning Solution
For most counters, a simple mix of warm water and a few drops of mild dish soap is enough. Pour it into a spray bottle or dip a damp cloth into a bowl of the solution. The goal is to clean the surface without soaking it. Too much water can seep into seams, especially around laminate edges or poorly sealed joints.
If you are practicing how to clean kitchen counter surfaces safely, remember that stronger is not always better. Harsh cleaners can strip shine, leave streaks, or even damage natural stone. Keep the solution light and fresh-smelling, not heavy or foamy. A mild mix cuts grease, lifts fingerprints, and helps loosen food residue while staying gentle on most everyday countertop materials.
Step 4 – Wipe in Sections From Back to Front
Spray a small section or dampen your cloth, then wipe from the backsplash forward. Working in sections helps you clean evenly and stops you from missing spots. Use smooth, overlapping strokes so the surface feels consistent from one end to the other.
As you wipe, you may feel the cloth drag over greasy areas or snag on dried drips. That change in texture tells you where more attention is needed. Flip your cloth often so you are always using a clean side. If the cloth gets too dirty, rinse it out and continue. This step should leave the counter looking visibly cleaner, even if a few sticky patches still remain for spot treatment.
Step 5 – Treat Stuck-On Messes Carefully
Some spills need more than a basic wipe. If you find dried batter, sauce, syrup, or grease buildup, press a warm damp cloth over the area for a minute or two. This softens the mess and makes it easier to lift without scraping hard.
For stubborn residue, sprinkle a little baking soda on a damp sponge and rub gently in small circles. You want light pressure, not force. If needed, use a plastic scraper at a low angle to ease up dried bits. Avoid metal tools or rough scrubbers because they can scratch the finish. The surface should feel smooth again once the residue comes off, with no tacky spots left behind.
Step 6 – Disinfect When Needed
Cleaning removes dirt, but disinfecting is a separate step. If your counter has touched raw meat, eggs, unwashed produce, or a leaking grocery bag, use a food-safe disinfecting product after cleaning away the visible mess. Always check the label so you know how long the surface needs to stay wet to work properly.
This is an important part of how to clean kitchen counter areas used for food prep, especially in a busy home. Do not spray and wipe right away unless the product says you can. Letting it sit for the right contact time helps reduce bacteria more effectively. Afterward, if the label recommends rinsing, wipe with clean water so the surface is ready for safe kitchen use again.
Step 7 – Dry the Surface Thoroughly
Once the counter is clean, dry it with a fresh microfiber cloth or soft towel. This step is easy to overlook, but it matters. Drying removes streaks, prevents water spots, and helps protect surfaces that do not handle standing moisture well.
Move your hand across the counter as you dry it. A properly cleaned surface should feel smooth, not sticky, gritty, or filmy. Make sure to dry around seams, caulk lines, and the area near the sink where water likes to collect. If the counter still looks dull in places, go back with a slightly damp cloth and then dry again. A careful finish makes the whole kitchen look brighter and more polished.

Step 8 – Return Items and Set Up for Easy Maintenance
After the counter is fully dry, put back only the items you use often. Try not to crowd the surface. Leaving a little open space makes your kitchen feel cleaner and makes daily wipe-downs faster. It also reduces the number of places where crumbs and grease can hide.
Before replacing appliances, wipe their bases too. Many counters get dirty again quickly because grime under the toaster or coffee maker goes right back onto the clean surface. If you want to make upkeep easier, keep a folded microfiber cloth and a small bottle of mild cleaner nearby. That way, spills can be handled while they are still fresh and simple to remove.
Common Mistakes
One common mistake is using the wrong cleaner for the countertop material. Bleach, strong degreasers, and acidic products may seem effective, but they can discolor laminate, dull stone, or wear down protective sealers. Always match the product to the surface instead of assuming one cleaner works for everything.
Another mistake is wiping around clutter instead of clearing the counter first. When appliances and containers stay in place, grease and crumbs build up underneath them. The counter may look clean at a glance, but hidden messes keep odors, stains, and sticky patches around longer than you think.
Many beginners also use too much water. A soaked cloth can push dirty liquid into seams, around sinks, and along edges where moisture causes damage over time. A damp cloth works better and gives you more control.
Scrubbing too aggressively is another problem. Rough pads and hard pressure can scratch the finish, especially on softer materials. Gentle soaking and repeated light passes usually work better than force.
The last mistake is skipping the drying step. If water sits on the surface, it can leave marks, attract fresh dust, and make the counter feel less clean. A quick dry buff gives you a better result and helps preserve the finish.
Expert Tips
Clean spills as soon as they happen. Fresh messes wipe away fast, while dried spills often need soaking and extra effort. This small habit saves time and keeps stains from setting, especially if your counter is light-colored or porous.
Use two cloths instead of one when possible. Wipe with a damp cloth first, then follow with a dry one. This simple method improves shine and cuts down on streaks. It also helps you notice any spots you missed.
Pay attention to the areas you touch most. The edge near the sink, the section by the stove, and the space around handles or appliance bases usually collect the most grime. If you clean those high-use zones daily, the whole counter will stay in better shape between deeper cleanings.
Frequently Asked Questions
How often should I clean my kitchen counter?
You should wipe your kitchen counter at least once a day and after any food prep. If you cook often, quick cleanups after each meal help prevent grease, crumbs, and bacteria from building up. A deeper clean several times a week works well for most homes, especially around the sink and stove.
Can I use vinegar on all countertop surfaces?
No. Vinegar is too acidic for some materials, especially natural stone like granite, marble, and quartzite. It can dull the finish or weaken sealants over time. It may be safe on some sealed or non-stone surfaces, but mild dish soap and warm water are usually the safer all-purpose choice.
What is the best cloth to use for cleaning counters?
A microfiber cloth is usually the best option. It lifts crumbs, grease, and residue well without scratching most surfaces. It also absorbs water efficiently, which helps with both cleaning and drying. Keep a few clean cloths on hand so you can switch them out when one becomes too dirty.
How do I remove sticky residue without scratching the counter?
Start with a warm damp cloth pressed over the sticky area for a minute or two. That softens the residue so it lifts more easily. If needed, use a little dish soap or baking soda on a soft sponge. For dried spots, a plastic scraper is safer than a metal blade or rough scrub pad.
Do I need to disinfect the counter every time I clean it?
Not always. Routine cleaning with soap and water is enough for everyday crumbs, dust, and light spills. Disinfect when the counter has come into contact with raw meat, egg, dirty packaging, or anything that may carry harmful bacteria. Clean first, then disinfect, because disinfectants work best on surfaces without visible dirt.
Conclusion
Keeping your counter clean is one of the simplest ways to make your kitchen safer, fresher, and easier to use. The basic process is clear: remove items, clear debris, wipe with a gentle cleaner, treat stuck-on messes, disinfect when needed, and dry the surface well. When you follow those steps consistently, you protect both your countertop and your food prep area.
If you are just learning how to clean kitchen counter surfaces, focus on building a simple routine rather than chasing perfection. A few minutes each day can prevent grease, stains, and odors from building into a bigger problem. Pay attention to your counter material, use gentle tools, and handle spills early.
Start with one full clean today, then keep a cloth and mild cleaner close by for easy daily maintenance. That small effort will help your kitchen stay cleaner, brighter, and more pleasant every time you cook.

About
Nick Hall has spent the last seven years working at the intersection of kitchen design and home repair — first as a design assistant at a residential renovation studio, then as a freelance writer covering everything from cabinet layouts to leaky faucet fixes.
Her approach is simple: kitchens should look good and function well. That means she’s just as comfortable talking about color palettes and counter materials as she is walking readers through how to fix a wobbly cabinet hinge or troubleshoot a garbage disposal.
Nick has worked directly with homeowners on small-space kitchen makeovers, budget-conscious renovations, and the kind of everyday repairs that don’t need a contractor — just the right instructions. She writes from experience, not theory, and tests most of the fixes and tips she shares before publishing them.
When she’s not writing, Nick is usually hunting for mid-century kitchen finds at estate sales or helping friends plan their own renovations. She lives in Columbus, Ohio.