
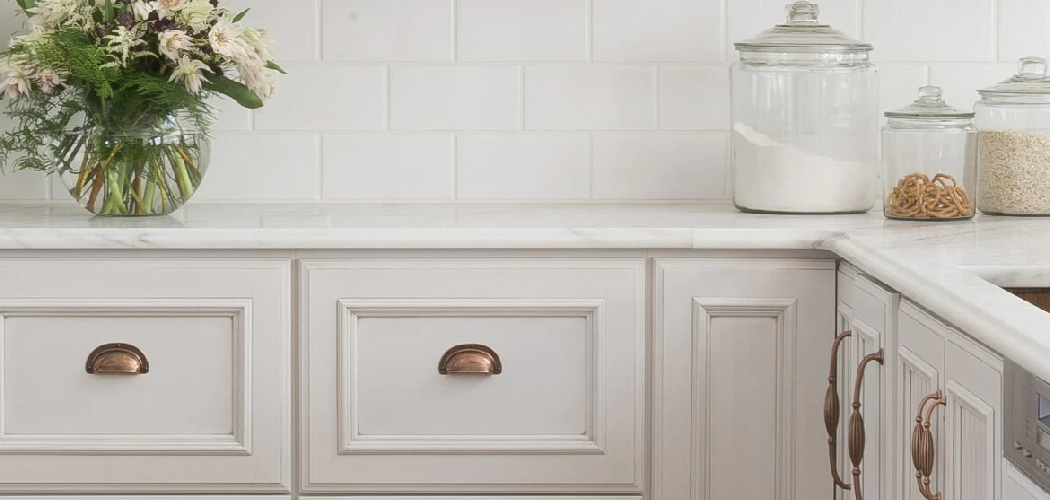
A cabinet glaze can make plain kitchen cabinets look richer, warmer, and more detailed without the cost of a full remodel. It settles into corners, profiles, and brush marks to create depth, which is why so many homeowners love the aged, custom look it brings. If you are new to refinishing, the process may seem intimidating at first, but it is very manageable when you break it into clear stages.

Learning how to glaze kitchen cabinets gives you a practical way to refresh your space, highlight woodwork, and add character with simple tools and patient prep. This guide will walk you through each step so you can glaze your cabinets with confidence and get a clean, professional-looking finish.
Why Glazing Your Cabinets is Worth It
Glazing is one of the easiest ways to give cabinets more personality without replacing them. Unlike flat paint alone, glaze adds shadow, contrast, and dimension. It can make raised panels stand out, soften a bright paint color, and give stock cabinets a more custom feel.
For beginners, glazing is worth learning because it is flexible and forgiving. You control how heavy or subtle the effect looks by adjusting how much glaze you wipe away. That means you do not need years of finishing experience to get beautiful results. If your kitchen feels plain or dated, a well-applied glaze can add warmth and visual texture while keeping the project budget-friendly.
Tools and Materials You’ll Need
Before you start, gather everything in one place so the job moves smoothly and you are not searching for supplies with sticky hands.
- Screwdriver or drill for removing cabinet doors and hardware
- Painter’s tape
- Drop cloths or rosin paper
- Degreaser or trisodium phosphate substitute
- Clean microfiber cloths or lint-free rags
- Fine-grit sanding sponge or sandpaper
- Tack cloth
- Bonding primer if your cabinets are not already painted or sealed properly
- Cabinet paint or base coat in your chosen color
- Cabinet glaze or glazing medium mixed with stain or paint tint
- Soft brushes for detail work
- Foam brush or high-quality paintbrush
- Clear protective topcoat, such as polyurethane or polycrylic
- Optional: a worktable or sawhorses to make door glazing easier and more comfortable
Step-by-Step Guide on How to Glaze Kitchen Cabinets
Step 1 – Remove Doors, Drawers, and Hardware
Start by taking off all cabinet doors, drawer fronts, hinges, knobs, and pulls. Label each door and its matching opening with painter’s tape so you can put everything back in the right place later. This small step saves a lot of frustration during reassembly.
Lay doors flat on a protected surface in a well-ventilated area. Keep screws and hardware in labeled bags. Working on flat surfaces helps you control drips and wipe lines more easily. It also gives you better access to corners, grooves, and trim details, which is where glaze creates the most visual impact.

Step 2 – Clean Every Surface Thoroughly
Kitchen cabinets collect grease, dust, cooking residue, and hand oils, even when they look clean. If you glaze over that buildup, the finish may streak, smear, or fail to stick properly. Use a strong but surface-safe degreaser and wipe every inch of the cabinets, especially near handles and around stove-side doors.
After cleaning, go back with a damp cloth to remove leftover residue, then let the surfaces dry fully. Run your fingers across the cabinet face. It should feel clean and dry, not slick or sticky. This part is not glamorous, but it is one of the biggest factors in getting a smooth, even result that lasts.
Step 3 – Sand the Finish Lightly
Once the cabinets are clean and dry, scuff the surface with a fine-grit sanding sponge or sandpaper. You do not need to strip the old finish down to bare wood unless it is peeling or badly damaged. The goal is to dull the sheen and create a surface that primer, paint, or topcoat can grip.
Focus on edges, corners, and raised profiles where glossy coatings tend to resist new finishes. After sanding, wipe away dust with a tack cloth or slightly damp microfiber rag. A clean, powder-free surface helps the glaze settle evenly later. If the cabinet texture feels smooth but no longer shiny, you are ready for the next step.
Step 4 – Apply Primer and Base Coat if Needed
If your cabinets are bare wood, stained, or coated with a finish that may block adhesion, apply a bonding primer first. Once the primer dries, paint the cabinets with your chosen base color. Soft white, cream, gray, taupe, and muted green are popular because glaze shows up beautifully over them.
Let the base coat cure fully before moving on. This matters more than many beginners realize. If the paint is still soft, the glaze can pull it up when you wipe. When learning how to glaze kitchen cabinets, patience during drying time often makes the difference between a crisp antique look and a muddy finish. Touch the surface lightly; it should feel firm and dry, not cool or tacky.
Step 5 – Test the Glaze Before You Commit
Before glazing the full kitchen, test your glaze on the back of a door or on a scrap board painted with the same base coat. Brush on a small amount, then wipe it back with a clean rag. This quick test shows you how dark the glaze looks, how fast it sets, and how much pressure you need to create the style you want.
A heavier glaze left in corners gives a dramatic, old-world look. A lighter wipe creates a soft, subtle finish. Pay attention to how the glaze catches in grooves and molding. You want contrast, not dirtiness. This practice round helps you build confidence and prevents surprises once you start on the visible cabinet fronts.
Step 6 – Brush on the Glaze in Small Sections
Now begin applying glaze to the front of each cabinet door in small, manageable sections. Use a soft brush to work it into panel edges, grooves, corners, and decorative trim. The glaze will look strong at first, and that is normal. You are not aiming for perfection during application because most of the final look comes from how you wipe it back.
Work on one door or drawer front at a time. If you cover too much area at once, the glaze can start drying before you shape the finish. This is the hands-on stage where many people really understand how to glaze kitchen cabinets, because you can see the depth appear as the darker tone settles into the details. Keep your motions calm and steady.
Step 7 – Wipe Back for the Right Aged Look
After brushing on the glaze, use a clean lint-free rag to wipe away the excess. Wipe lightly across flat areas while leaving more glaze in recessed details and along edges. This creates the soft shadowing that gives cabinets an antique or distressed character.
Try different wiping motions depending on the look you want. A gentle straight wipe gives a clean, tailored finish, while a softer circular wipe can create a more weathered effect. Stand back every few minutes and look at the door from a normal viewing distance. Cabinets often look darker up close than they do across the room. Aim for consistency from piece to piece, not identical wipe marks.
Step 8 – Let the Glaze Dry and Seal the Finish
Once you like the look, let the glaze dry fully according to the product instructions. Drying times vary based on humidity, temperature, and the type of glaze used. Do not rush this stage. If you apply a clear coat too soon, you may smear the glaze and lose the detail you just worked hard to create.
When the glaze is dry, apply a protective topcoat. This helps guard the cabinets against moisture, grease, and everyday wear. Use a clear, non-yellowing finish if your base coat is light. Apply thin, even coats and let each one dry properly. The final surface should feel smooth, sealed, and durable, with the glaze effect still clearly visible underneath.
Step 9 – Reassemble and Inspect the Final Look
After the topcoat cures, reinstall the hinges, knobs, pulls, and drawer fronts. Return each labeled piece to its original location. Take your time during reassembly so the fresh finish does not get scratched by metal hardware or rushed handling.
Once everything is back in place, step into the room and view the cabinets in natural daylight and evening light. You may notice that the glaze adds more depth around panel edges and creates gentle contrast that changes throughout the day. If one door looks too light or too dark, you can usually adjust future projects by changing your wipe technique. For a first-time refinishing job, careful prep and patient drying are what make the finished kitchen feel polished.

Common Mistakes When Glazing Cabinets
One of the most common mistakes is skipping proper cleaning. Grease and cooking residue can hide in plain sight, and glaze will cling unevenly to that buildup. The result is a blotchy finish that looks accidental rather than decorative. A strong cleaning step gives you a much better starting point.
Another mistake is glazing before the base coat has fully cured. Fresh paint may feel dry to the touch but still be soft underneath. When you wipe the glaze, you can drag the paint and create bald spots, streaks, or muddy color. Waiting longer than you think you need usually pays off.
Many beginners also use too much glaze at once. A thick coat can overwhelm the cabinet details and make the finish look dirty. It is easier to build depth gradually than to fix an overly dark door. Work in small areas, then wipe back slowly until the effect looks balanced.
A final problem is forgetting the topcoat. Glaze alone is decorative, but it needs protection in a busy kitchen. Without a sealer, the finish can wear down near handles, attract grime, or become hard to clean. A clear protective coat locks in your work and helps the cabinets hold up to daily use.
Expert Tips
For the most natural look, match the glaze color to the mood of the kitchen. Warm brown or umber glaze works well over cream and beige cabinets, while gray or charcoal glaze pairs nicely with cool white and soft gray paint. Keep the contrast gentle unless you want a bold antique effect.
Always keep several clean rags nearby. As one gets saturated, switch to a fresh cloth so you do not smear excess glaze back onto the surface. Good lighting also matters more than most people expect. Use bright task lighting while you work, then check the finish from a few feet away.
If you are nervous, start with the least visible doors first. By the time you reach the most noticeable cabinets, your hand will feel steadier and your wiping technique will be more consistent.
Frequently Asked Questions
Can you glaze cabinets without painting them first?
Yes, but it depends on the existing finish. If the cabinets are stained wood and properly sealed, you may be able to apply glaze over a prepared surface to deepen the detail. Still, glaze usually shows best over a painted base coat because the contrast is easier to see. Clean and lightly sand first so the finish can bond well.
What color glaze works best on white cabinets?
Brown, taupe, gray, and espresso-toned glazes are all popular on white cabinets. The best choice depends on the style you want. Warm glazes create a soft antique look, while cool gray glazes feel more modern and subtle. Test a small sample first, because lighting can change how strong the contrast appears.
How long does cabinet glaze take to dry?
Dry time varies by product, temperature, and humidity, but many glazes need several hours to dry and longer before sealing. Some may require overnight drying for best results. Always check the label and avoid touching the surface too soon. A fully dry glaze helps prevent smearing when you add the clear topcoat.
Do glazed cabinets need a protective topcoat?
Yes, especially in a kitchen. Cabinets deal with steam, grease, fingerprints, and daily cleaning, so a topcoat helps preserve the finish. A clear sealer protects the glaze from wear and makes the surface easier to wipe down. Choose a finish that suits your base color and does not yellow over time.
Is glazing cabinets a good DIY project for beginners?
Yes, it can be a very beginner-friendly project if you move slowly and test your finish first. The process is more forgiving than many people expect because you can wipe away excess glaze before it dries. Strong prep work, patience, and a sample test are the keys to getting a result that looks clean and intentional.
Conclusion
Glazing cabinets is a smart way to add depth, character, and a custom look without taking on a full kitchen renovation. The process works best when you clean thoroughly, prep the surface well, test your finish, and glaze in small sections. If you stay patient during drying and sealing, even a first-time project can look polished and professional.
The nice thing about learning how to glaze kitchen cabinets is that you stay in control of the final style. You can keep the effect soft and subtle or make it richer and more dramatic depending on how much glaze you leave behind. Start with one door, trust the process, and build confidence as you go. With the right tools and a careful hand, you can transform ordinary cabinets into a feature that gives your whole kitchen more warmth and detail.

About
Nick Hall has spent the last seven years working at the intersection of kitchen design and home repair — first as a design assistant at a residential renovation studio, then as a freelance writer covering everything from cabinet layouts to leaky faucet fixes.
Her approach is simple: kitchens should look good and function well. That means she’s just as comfortable talking about color palettes and counter materials as she is walking readers through how to fix a wobbly cabinet hinge or troubleshoot a garbage disposal.
Nick has worked directly with homeowners on small-space kitchen makeovers, budget-conscious renovations, and the kind of everyday repairs that don’t need a contractor — just the right instructions. She writes from experience, not theory, and tests most of the fixes and tips she shares before publishing them.
When she’s not writing, Nick is usually hunting for mid-century kitchen finds at estate sales or helping friends plan their own renovations. She lives in Columbus, Ohio.