
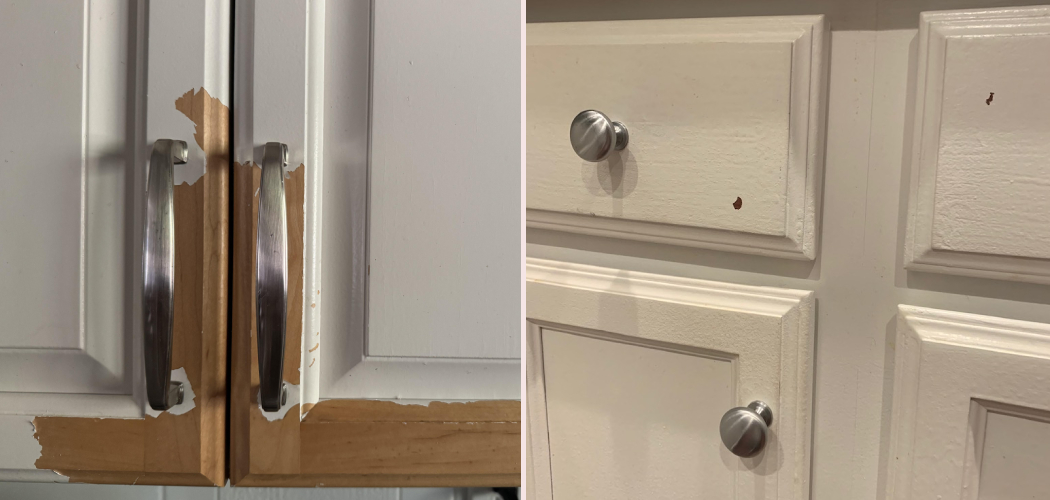
Old cabinet paint can make a whole kitchen feel tired, even when the cabinets themselves are still solid and worth saving. If you want a smoother finish, cleaner wood grain, or a fresh start before repainting, learning how to strip paint off kitchen cabinets is a practical skill that can save money and improve the final result.

This job takes patience more than special talent. With the right setup, a good paint stripper, and a careful process, even a first-time DIYer can remove layers of old finish without damaging the wood underneath. In this guide, you’ll learn when stripping makes sense, what tools to gather, the steps to follow, common mistakes to avoid, and how to get cabinets ready for their next finish.
Why Strip Paint Off Kitchen Cabinets
Stripping paint off cabinets gives you more control over the final look. If the current finish is thick, chipped, uneven, or peeling, painting over it often locks those flaws in place. Removing the old layers helps you start with a cleaner surface, which can lead to a smoother repaint, a better stain result, and a more durable finish.
It also helps you inspect the cabinet material itself. Once the paint is gone, you can spot dents, water marks, old repairs, and grain patterns that were hidden before. That matters if you are deciding whether to repaint, stain, or seal the wood naturally. For beginners, this skill also builds confidence because it teaches prep, patience, and surface care—three things that improve almost any cabinet refinishing project.
Tools and Materials You’ll Need
Before you begin, gather everything in one place so you can work safely and keep the process moving.
- Chemical paint stripper or gel remover suitable for wood
- Protective gloves that resist chemicals
- Safety goggles
- Respirator or mask rated for fumes and dust
- Drop cloths or plastic sheeting
- Painter’s tape
- Screwdriver or drill for removing doors and hardware
- Metal or plastic scraper with a smooth edge
- Putty knife for detail work
- Steel wool or stripping pads
- Medium and fine grit sandpaper
- Sanding block or orbital sander
- Clean rags or shop towels
- Bucket of water or manufacturer-recommended neutralizer
- Mild cleaner or degreaser
- Vacuum with brush attachment
- Trash bags or metal container for waste
- Optional: Small detail brush for grooves, corners, and carved trim
Step-by-Step Guide on How to Strip Paint Off Kitchen Cabinets
Step 1 – Remove Doors, Drawers, and Hardware
Start by taking off every cabinet door, drawer front, handle, knob, and hinge. Place screws and hardware from each cabinet in labeled bags so you do not waste time later trying to match pieces. This small bit of organization makes reassembly much easier, especially if your kitchen has different hinge sizes or handle placements.
Set each door on a stable work surface covered with a drop cloth. If possible, move the project to a garage, workshop, or shaded outdoor area with strong airflow. A stripping product gives off fumes, and sanding creates fine dust, so ventilation matters from the start. Wipe each surface with a degreaser to remove kitchen oils, since grease can block the stripper and make the paint lift unevenly.
Step 2 – Test a Small Area First
Before you coat the whole cabinet, test your stripper on a small hidden spot. Different cabinets have different paint types, sealers, and wood species underneath, so a quick test tells you how aggressive the product needs to be. It also shows how long the stripper should sit before the paint starts to bubble and loosen.
Brush on a thin layer and wait according to the product directions. As the finish softens, scrape gently and watch how the wood responds. If the paint comes off in sticky ribbons and the surface underneath stays smooth, you are on the right track. This test area also helps you practice pressure and timing, which is useful when learning how to strip paint off kitchen cabinets without gouging corners, edges, or decorative trim.
Step 3 – Apply the Paint Stripper Evenly
Once the test looks good, apply the stripper to a full section of the cabinet. Use a brush to spread a thick, even coat rather than brushing it out like paint. A generous layer stays wet longer and gives the chemicals time to soften several paint layers at once, which can save you effort later.
Work in manageable sections instead of covering everything at once. Flat door panels are a good place to begin because they are easy to monitor. You will usually see the surface wrinkle, blister, or swell slightly as the old coating breaks down. Avoid touching it too soon. Let the product do the heavy work while you keep the area ventilated and your gloves clean. Rushing this stage often leads to hard scraping and accidental damage.
Step 4 – Scrape Off the Softened Paint
When the paint looks loose and bubbled, begin scraping with steady, light pressure. Hold the scraper at a shallow angle and push with the grain if the wood is visible. You want the paint to slide away in soft strips, not to chatter across the surface or dig into the cabinet face.

Keep a rag nearby to wipe buildup from the scraper edge. Sticky paint can smear back onto the wood if the blade gets crowded. For grooves, profile edges, or recessed panels, switch to a putty knife, stripping pad, or steel wool. This part can feel messy, with softened paint clinging like warm glue, but that is normal. If you meet resistance, stop and apply more stripper rather than forcing the tool through stubborn spots.
Step 5 – Repeat on Detailed Areas and Stubborn Layers
Most cabinets need more than one pass, especially if they have been painted several times over many years. Raised panels, trim, bead details, and corners often trap old finish in thin ridges. A second application loosens what the first pass leaves behind and reduces the need for aggressive sanding later.
Brush fresh stripper only where needed and let it sit long enough to work. Then return with detail tools and a patient hand. This is the stage where many beginners truly learn how to strip paint off kitchen cabinets, because success depends on reading the surface. Some areas release cleanly, while others need extra dwell time, a softer tool, or a slower scrape. Pay attention to texture and resistance, and let the material guide your pace.
Step 6 – Clean and Neutralize the Surface
After the paint is off, clean the cabinet surface based on the stripper manufacturer’s directions. Some products need water, while others require mineral spirits or a neutralizing wash. This step matters because leftover chemical residue can interfere with primer, paint, or stain later.
Use clean rags and work in small sections so you do not spread dissolved residue around. The surface may feel slick, tacky, or slightly waxy at first, but it should become cleaner as you wipe. Get into corners and edges where stripper tends to collect. Once cleaned, let the cabinets dry fully. Depending on humidity and the product used, that can take several hours or overnight. Dry wood is easier to sand and gives you a more accurate picture of the surface condition.
Step 7 – Sand the Cabinets Smooth
Sanding removes tiny paint traces, smooths raised grain, and levels out minor roughness left by scraping. Start with medium grit sandpaper and use light, even passes. You are refining the surface, not reshaping the cabinet. On flat areas, a sanding block helps keep pressure balanced and reduces the risk of dips.
Move to a finer grit for the final pass, especially if you plan to paint with a satin or semi-gloss finish that will highlight flaws. You may notice a dry, chalky feel at first, followed by a smoother texture as the surface evens out. Vacuum the dust often so it does not clog the paper or hide scratches. Detailed profiles may need hand sanding only, since powered sanders can flatten sharp edges and decorative lines.
Step 8 – Inspect, Repair, and Prep for the New Finish
With the old coating removed, inspect each door and frame in bright light. Look for hairline cracks, dents, loose joints, water stains, or small patches of leftover paint near seams and corners. This is the right moment to fix minor flaws before primer or stain locks them in.
Fill nail holes or small dents with wood filler if needed, then sand those areas smooth after they dry. Wipe every surface with a clean, damp cloth or tack cloth to remove the last traces of dust. When the cabinets feel clean, dry, and even to the touch, they are ready for primer, paint, or stain. Good prep may feel slow, but it is what makes the next finish look crisp, smooth, and worth the effort you put in.

Common Mistakes
One common mistake is skipping the cleaning step before applying stripper. Kitchen cabinets collect grease, cooking residue, and hand oils over time. If you spread stripper over that buildup, the product may sit on top instead of reaching the paint evenly, which leaves patchy results and forces extra work.
Another mistake is scraping too hard. When paint does not lift easily, many beginners press down harder with the scraper. That often leaves gouges, scratches, or chipped corners that show through the next finish. It is better to reapply stripper and wait longer than to force the paint off.
Poor ventilation is another issue that should not be ignored. Paint removers can produce strong fumes, and sanding old finishes creates dust you do not want to breathe. Open windows, use fans, and wear proper protection from the start.
Many people also rush into sanding before the cabinet is fully cleaned and dry. Residue can gum up sandpaper and smear softened finish across the surface. Finally, some DIYers fail to label hardware and doors during removal. That simple oversight can turn reassembly into a frustrating puzzle, especially in larger kitchens with many similar cabinet fronts.
Expert Tips
Work on one cabinet door at a time if this is your first stripping project. That slower pace helps you learn timing, product behavior, and tool pressure without feeling overwhelmed. You will get cleaner results and make fewer mistakes.
Choose a gel stripper for vertical surfaces or detailed cabinet faces because it clings better and drips less. Keep your scraper edges smooth and free of nicks, since even small defects can scratch wood. If you suspect very old paint layers, test carefully and use extra safety precautions before sanding heavily. Finally, do not judge the wood while it is still damp from cleaner or neutralizer. Let it dry fully, then inspect it in bright light before deciding on paint, stain, or clear finish.
Frequently Asked Questions
How long does it take to strip paint from kitchen cabinets?
It depends on the number of doors, the thickness of the old paint, and how detailed the cabinet design is. A small kitchen may take a full weekend, while a larger kitchen can take several days. Stripping is usually the slowest part, especially if the cabinets have multiple coats or carved trim.
Can I strip painted cabinets without removing them?
You can strip cabinet frames in place, but removing doors and drawer fronts makes the job much easier. Flat work surfaces are safer and help you apply stripper more evenly. You also reduce drips, awkward angles, and missed spots. For the best finish, remove anything you can and work in a ventilated area.
Is sanding alone enough to remove paint from cabinets?
Sometimes, but not usually if the paint is thick or layered. Sanding alone can take much longer and may clog paper quickly, especially on old oil-based finishes. It also struggles with grooves and recessed panels. A stripper handles heavy buildup first, and sanding then smooths the surface and removes the final traces.
What is the best type of paint stripper for wood cabinets?
A wood-safe gel or paste stripper is often the easiest choice for beginners. It stays in place better than thin liquid formulas and gives the chemicals more time to work. Look for a product designed for painted wood surfaces, and always check the label for dwell time, cleanup method, and safety instructions before use.
Should I repaint or stain cabinets after stripping them?
That depends on the wood quality and the look you want. If the wood has attractive grain and even color, stain can highlight its natural character. If the surface has repairs, mixed wood types, or blotchy patches, paint usually gives a more uniform result. After stripping, you can make that choice with much more confidence.
Conclusion
Stripping kitchen cabinets is not the fastest home project, but it is one of the most rewarding when you want a cleaner, longer-lasting finish. The key is to move in order: remove hardware, clean the surfaces, test the stripper, work in sections, scrape gently, clean off residue, sand lightly, and inspect before refinishing. Each stage builds on the one before it.
If you have been wondering how to strip paint off kitchen cabinets, the good news is that you do not need advanced skills to do it well. You need patience, safe habits, and the willingness to let the products and tools do their job. Start with one door, learn the feel of the process, and keep going. With steady work, your cabinets can go from thick and tired to smooth, clean, and ready for a fresh new finish.

About
Nick Hall has spent the last seven years working at the intersection of kitchen design and home repair — first as a design assistant at a residential renovation studio, then as a freelance writer covering everything from cabinet layouts to leaky faucet fixes.
Her approach is simple: kitchens should look good and function well. That means she’s just as comfortable talking about color palettes and counter materials as she is walking readers through how to fix a wobbly cabinet hinge or troubleshoot a garbage disposal.
Nick has worked directly with homeowners on small-space kitchen makeovers, budget-conscious renovations, and the kind of everyday repairs that don’t need a contractor — just the right instructions. She writes from experience, not theory, and tests most of the fixes and tips she shares before publishing them.
When she’s not writing, Nick is usually hunting for mid-century kitchen finds at estate sales or helping friends plan their own renovations. She lives in Columbus, Ohio.