
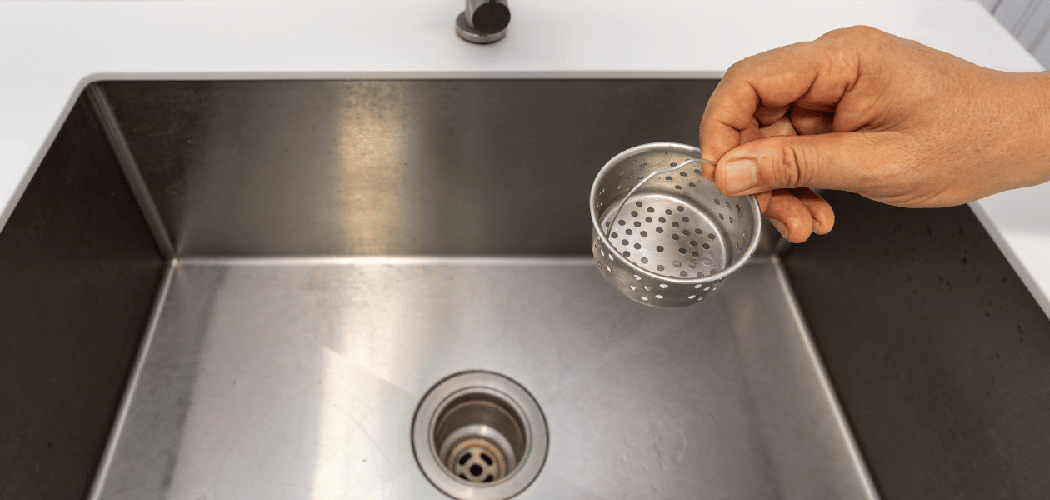
A kitchen sink strainer may look like a small part, but it plays a big role in keeping water flowing while catching food scraps before they head into the drain. If your old strainer leaks, looks rusty, or no longer seals well, replacing it is a simple upgrade that can freshen up your sink and prevent bigger plumbing problems. .
Learning how to install a kitchen sink strainer is a smart skill for any beginner because it saves money, builds confidence, and helps you handle basic sink repairs without calling a plumber.
This guide will walk you through each step so you can install a sink strainer cleanly, safely, and with a watertight seal.
Why Install a Sink Strainer Yourself
Installing a sink strainer on your own is one of the easiest plumbing jobs for a first-time DIYer. The parts are simple, the tools are basic, and the project usually takes less than an hour. When you do it yourself, you also get a better look at how your sink drain assembly works, which makes future repairs less intimidating.
It can also save you money. A plumber’s service call often costs far more than the strainer itself, especially for a small repair. By handling the job on your own, you can replace worn parts, stop minor leaks, and improve drainage without stretching your budget. You also gain the satisfaction of fixing something with your own hands and knowing the sink is sealed the right way.
Tools and Materials You’ll Need
Before you start, gather everything and place it within easy reach. That keeps the work area tidy and helps the job move smoothly.
- New kitchen sink strainer assembly
- Plumber’s putty
- Slip-joint pliers or channel-lock pliers
- Adjustable wrench
- Bucket or shallow pan
- Clean rag or paper towels
- Putty knife or plastic scraper
- Mild household cleaner
- Flashlight
- Optional: plumber’s tape for nearby threaded connections if needed
Choose a sink strainer that matches your sink opening and finish. Stainless steel strainers are a popular choice because they resist rust and hold up well in a busy kitchen. If your kit includes rubber gaskets, friction rings, and a locknut, keep those parts laid out in order so you can identify them quickly during installation.
Step-by-Step Guide on How to Install a Kitchen Sink Strainer
Step 1 – Clear the Area Under the Sink
Start by emptying the cabinet under your sink. Pull out cleaning bottles, sponges, and anything else that blocks your access. You want enough room to move both hands freely and see the drain pipes clearly. Place a bucket or shallow pan under the drain trap to catch any standing water.
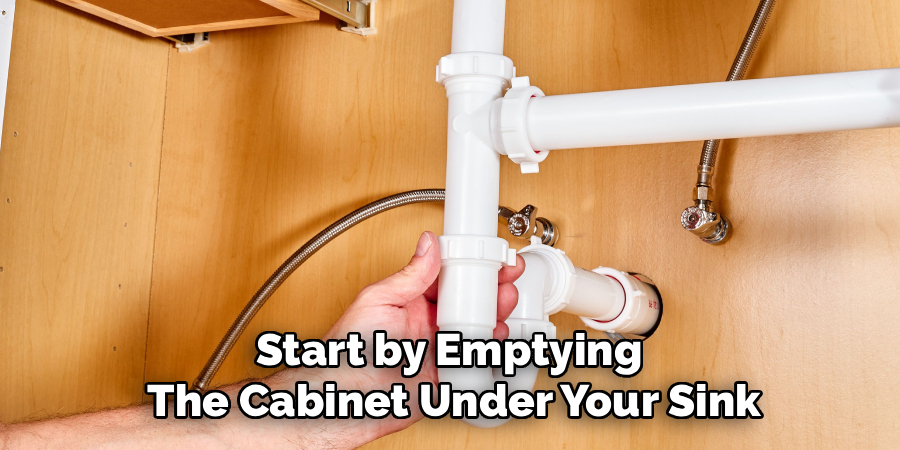
Turn on a flashlight or use a work light if the cabinet feels dim. Under-sink spaces are often cramped and shadowy, and better visibility makes every step easier. Touch the pipes and fittings so you get a sense of how everything is arranged before you loosen anything. This first look helps you work with more confidence once you begin taking parts apart.
Step 2 – Disconnect the Drain Connections
Loosen the slip nuts that connect the drain pipe to the sink strainer assembly. You can often turn them by hand, but pliers may help if they are stuck. As the fittings come loose, you may hear a soft drip into the bucket and catch that stale sink-water smell that often hides in the trap.
Set each piece aside carefully in the order you remove it. That makes reassembly much simpler later. If the pipes are greasy or coated with old residue, wipe them down with a rag. This is also a good time to check the tailpiece and nearby washers for wear. If anything looks cracked or brittle, replacing it now can prevent a second repair later.
Step 3 – Remove the Old Sink Strainer
From beneath the sink, loosen the large locknut that holds the old strainer in place. This part can be tight, especially if the old assembly has been in place for years. Grip it firmly with pliers and turn slowly. Once the nut, gasket, and friction ring come off, push the old strainer upward through the sink opening.
At the top of the sink, lift the strainer out and inspect the area around the drain hole. You may see dried plumber’s putty, grime, or hard mineral buildup clinging to the metal. If you are learning how to install a kitchen sink strainer, this is the point where patience matters most. A clean opening gives the new strainer the best chance to seal properly.
Step 4 – Clean the Sink Opening Thoroughly
Use a putty knife or plastic scraper to remove every bit of old putty from the sink opening. Run your fingers around the edge and make sure the surface feels smooth, not rough or sticky. Even a thin ring of leftover material can keep the new flange from sitting flat.
After scraping, clean the area with a mild household cleaner and dry it with a rag or paper towels. The metal should feel clean and look bright around the drain hole. Pay close attention to the underside lip of the opening too, since buildup can hide there. A fresh, dry surface helps the new putty grip well and creates the tight seal you want the first time.
Step 5 – Apply Plumber’s Putty to the New Strainer
Take a small amount of plumber’s putty and roll it between your hands until it forms a smooth rope. It should feel soft and easy to shape, almost like clay. Wrap that rope around the underside of the strainer flange, making a full circle with no gaps. Press the ends together so the putty forms one continuous ring.
Set the strainer into the sink opening and press down gently. You should feel it settle into place, and a little putty may squeeze out around the edge. That is normal and actually a good sign. When people ask how to install a kitchen sink strainer, the seal is usually where problems happen, so take your time and make sure the putty ring is even.
Step 6 – Assemble the Parts Under the Sink
Move under the sink and slide the rubber gasket onto the strainer body, followed by the friction ring if your kit includes one. Then thread the locknut onto the strainer. Tighten it by hand first so the assembly stays centered and the strainer basket above does not shift out of place.
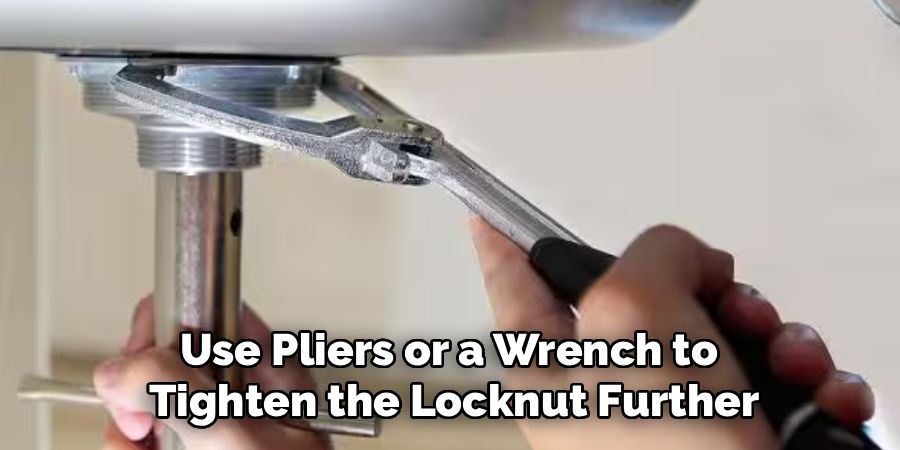
Once everything is aligned, use pliers or a wrench to tighten the locknut further. You want it snug, not forced. If you overtighten it, you can squeeze out too much putty or stress the sink opening. Check the top side often as you tighten. The strainer should sit flat and even, with a neat ring of excess putty around the flange.
Step 7 – Remove Excess Putty and Reconnect the Drain
Go back to the top of the sink and wipe away the extra plumber’s putty that has squeezed out around the flange. Use your fingers or a rag to create a clean edge. The flange should now look tidy and firmly seated, with no visible gaps between the metal and sink surface.
Under the sink, reconnect the tailpiece and drain piping to the new strainer assembly. Tighten the slip nuts securely, but do not crank them too hard. Plastic fittings can crack if you use too much force. As you reconnect everything, make sure the pipes line up naturally. If a pipe seems twisted or under tension, loosen it and realign it before tightening again.
Step 8 – Test for Leaks and Final Fit
Turn on the faucet and let a steady stream of water run into the sink. Watch the strainer from above and below. Then fill the sink halfway, let the water sit for a minute, and release it all at once. This stronger rush gives you a better test than a light trickle and reveals small leaks more quickly.
Feel around the locknut, gasket, and slip-joint connections with a dry hand or paper towel. If you find moisture, tighten the connection slightly and test again. A properly installed strainer should stay dry, even under a full draining load. Once everything remains leak-free, return the items to the cabinet and enjoy the clean look and smooth function of your newly installed sink strainer.
Common Mistakes
One common mistake is failing to clean the sink opening well enough before installing the new strainer. Old putty, grease, and mineral deposits can prevent the flange from sitting flat, which often leads to slow leaks. The surface needs to be smooth and dry before the new parts go in.
Another problem is using too little or too much plumber’s putty. Too little may leave gaps in the seal, while too much can create a messy installation and make tightening harder. You want a smooth, even ring that covers the flange without spilling everywhere.
Many beginners also overtighten the locknut under the sink. It seems like tighter should mean better, but too much force can warp the assembly, squeeze out too much putty, or damage the gasket. Snug is enough in most cases.
A fourth mistake is reconnecting the drain pipes at an awkward angle. If the tailpiece or trap is forced into place, the joints may leak later. The pieces should line up naturally with little strain.
Finally, some people skip the full leak test. A quick glance is not enough. Running water, filling the basin, and draining it fully helps you catch small problems before they turn into cabinet damage or mold.
Expert Tips
Warm plumber’s putty in your hands for a few seconds before rolling it. Soft putty is easier to shape and sits more evenly under the flange. If your home has a stone sink or a manufacturer warns against putty, check the instructions and use the recommended sealant instead.
Keep the strainer centered as you tighten the locknut below. A slight twist at the top can create an uneven seal, so pause and check alignment often. It also helps to tighten in small turns rather than one big pull.
After installation, inspect the area again a few hours later. Some tiny leaks show up only after repeated use. A dry paper towel wiped around each connection gives you a quick and reliable way to confirm that the seal is still holding.
Frequently Asked Questions
Do I need plumber’s putty for every sink strainer installation?
Most kitchen sink strainers use plumber’s putty under the flange to create a watertight seal. However, some manufacturers include a foam or rubber gasket designed to replace putty, and certain sink materials may require a different sealant. Always check the instructions that come with your strainer before you begin.
How tight should the locknut be under the sink?
The locknut should be tight enough to hold the strainer firmly in place and compress the gasket, but not so tight that it distorts the parts. Hand-tight plus a bit more with pliers is usually enough. If the flange stays level and no leaks appear during testing, the fit is likely correct.
Can I reuse my old sink strainer parts?
It is usually better to replace the full assembly rather than reuse old gaskets, nuts, or rings. Older parts may be worn, brittle, or warped, and that can lead to leaks even if the new strainer looks fine. A complete kit gives you the best chance of a clean, lasting installation.
What should I do if the strainer still leaks after installation?
First, identify where the leak is coming from. If water appears around the top flange, the putty seal may be uneven and you may need to remove the strainer and reseal it. If the leak is lower down, check the gasket alignment and tighten the drain connections slightly before testing again.
How long does it take to install a kitchen sink strainer?
For most beginners, the job takes about 30 to 60 minutes. The exact time depends on how easily the old strainer comes out and whether the drain fittings are in good shape. If the old putty is hard or the locknut is corroded, you may need extra time to remove and clean everything properly.
Conclusion
Installing a kitchen sink strainer is a small project that can make a big difference in the way your sink works. With a few basic tools, a fresh strainer assembly, and careful attention to the seal, you can stop leaks, improve drainage, and give your sink a cleaner finish. The key steps are simple: remove the old unit, clean the opening well, apply the seal correctly, tighten the parts evenly, and test everything thoroughly.
If this is your first plumbing repair, take your time and trust the process. You do not need advanced skills to get solid results. Once you learn how to install a kitchen sink strainer, you will feel more prepared to handle other basic kitchen plumbing jobs too. A careful install today can save you money, prevent water damage, and keep your sink working smoothly for years.

About
Nick Hall has spent the last seven years working at the intersection of kitchen design and home repair — first as a design assistant at a residential renovation studio, then as a freelance writer covering everything from cabinet layouts to leaky faucet fixes.
Her approach is simple: kitchens should look good and function well. That means she’s just as comfortable talking about color palettes and counter materials as she is walking readers through how to fix a wobbly cabinet hinge or troubleshoot a garbage disposal.
Nick has worked directly with homeowners on small-space kitchen makeovers, budget-conscious renovations, and the kind of everyday repairs that don’t need a contractor — just the right instructions. She writes from experience, not theory, and tests most of the fixes and tips she shares before publishing them.
When she’s not writing, Nick is usually hunting for mid-century kitchen finds at estate sales or helping friends plan their own renovations. She lives in Columbus, Ohio.