
Your kitchen tools work hard every single day. They chop, stir, flip, and scoop, yet they often get tossed into a drawer without a second thought.
Here’s the thing: a little care goes a long way. Learning how to clean and store kitchen tools properly keeps them sharp, safe, and ready whenever you need them. You’ll spend less time digging through clutter and more time actually cooking.
The best part? You don’t need fancy products or expert skills. With a few basics and a simple routine, anyone can keep their tools spotless and well organized.
This guide walks you through every step in plain, friendly language so you can clean your tools the right way and store them in a clutter-free kitchen you’ll love using.
Why Cleaning and Storing Kitchen Tools Matters
Clean, well-stored tools last so much longer. When you skip proper care, food residue builds up, moisture creeps in, and rust quietly ruins your favorite gadgets.
For homeowners and kitchen enthusiasts, good habits protect your investment. Quality stainless steel tools, wooden utensils, and silicone spatulas can serve you for years when you treat them right.
For DIY beginners, this skill builds real confidence. You learn how materials behave, why rust prevention matters, and how moisture control keeps everything hygienic.
There’s also the daily payoff. A clutter-free kitchen feels calmer and works faster. No more rummaging through a tangle of metal in a messy drawer.
Most importantly, clean tools mean safe food. Proper tool maintenance and food-safe storage keep harmful bacteria away from the meals you serve your family.
Tools and Materials You’ll Need
Gather your supplies before you start so the whole process flows smoothly. You’ll want gentle dish soap and a few microfiber cloths, which dry surfaces without leaving lint or scratches. Keep a soft sponge handy for everyday washing and a slim bottle brush for reaching inside narrow gadgets and tight corners.
A drying rack gives everything room to air dry fully, which is key for moisture control. Stock some baking soda and white vinegar too, since this duo tackles stuck-on grime and lingering smells naturally. Pick up food-safe mineral oil to nourish wooden handles and cutting tools so they never dry out and crack.
For storage, grab a few bins or drawer organizers, plus hooks or a utensil crock for your countertop. One optional convenience item, a set of labels, helps everyone in the house return tools to the right spot.
Step-by-Step Guide on How To Clean And Store Kitchen Tools
Step 1 – Sort Through Everything First
Before you clean a single spatula, empty your drawers and pull out every tool. Spread them across the counter so you can see exactly what you own.
You’ll probably spot duplicates, a few mystery gadgets, and tools you haven’t touched in years. That’s completely normal.
Sort everything into simple piles: keep, donate, and toss. Anything cracked, rusted beyond saving, or melted should go straight in the bin.
Notice how the cluttered pile slowly shrinks into something manageable. That clarity feels wonderful, doesn’t it?
This first sort sets you up for success. When you only keep tools you actually use, cleaning gets faster and storage becomes simple. You’ll feel lighter the moment that messy drawer turns into open, usable space.
Step 2 – Hand Wash The Delicate Tools
Some tools love the dishwasher, but many don’t. Wooden utensils, sharp knives, and certain nonstick pieces last far longer with gentle hand washing.
Fill your sink with warm, soapy water and grab your soft sponge. Wash each piece individually, paying attention to greasy residue that clings to handles and joints.
For knives, wipe the blade away from your fingers and never leave them soaking in cloudy water. That’s how cuts happen.
Use your bottle brush to scrub inside whisks, graters, and other tricky spots where food likes to hide. You’ll feel the grime lift away under the bristles.
Rinse everything in clean water. Notice how the metal gleams once that sticky film disappears. Clean tools simply feel better in your hand.
Step 3 – Tackle Stubborn Stains And Smells
Some messes refuse to budge with soap alone. That’s where baking soda and white vinegar earn their place.
For stuck-on food or stains, sprinkle baking soda onto a damp sponge and scrub gently. It works like a soft polish without scratching your stainless steel tools.
Lingering food smells in plastic containers or cutting boards? Wipe them down with white vinegar and let it sit for a few minutes. The sour scent fades fast, taking the old garlic and onion odors with it.
For deep cleaning, soak smelly items in a vinegar-water mix, then rinse well. Breathe in afterward and enjoy that fresh, neutral smell. Knowing how to clean and store kitchen tools means handling these stubborn spots before they become permanent.
Step 4 – Care For Wooden And Specialty Items
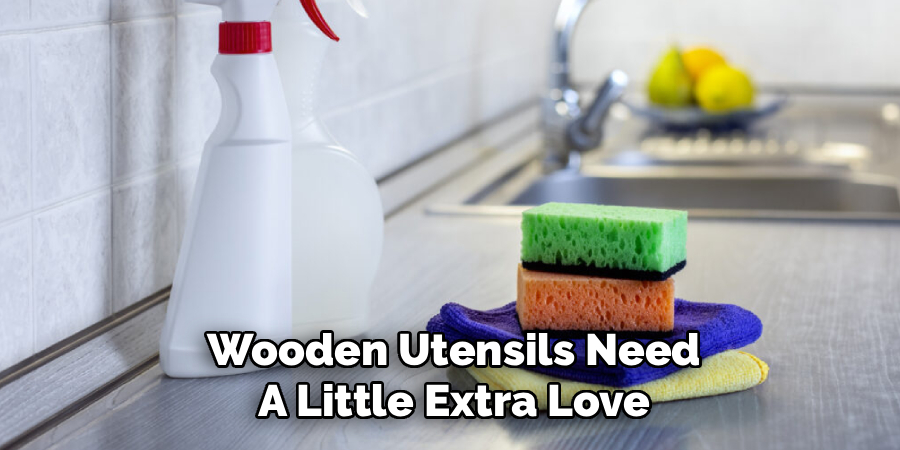
Wooden utensils need a little extra love. After washing, never leave them soaking, and never put them in the dishwasher, since heat and moisture crack the grain.
Run your fingers along a wooden spoon. If it feels dry, rough, or pale, it’s thirsty for oil.
Pour a small amount of food-safe mineral oil onto a microfiber cloth and rub it into the wood. Watch the color deepen and the surface turn smooth and rich again.
Let the oil soak in overnight, then wipe away any excess. This simple step prevents cracking and keeps your tools beautiful for years.
Treat cutting boards the same way every few weeks. Your wooden pieces will thank you with a lovely, lasting finish.
Step 5 – Dry Everything Completely
This step seems obvious, yet people rush it all the time. Trapped moisture is the number one cause of rust and grimy buildup.
After washing, set each tool on your drying rack with space between pieces so air flows freely. Air drying beats stacking everything in a soggy pile.
For metal tools, dry them by hand with a microfiber cloth right away. Pay attention to hinges, blades, and crevices where water spots love to linger.
Hold a piece up to the light. If you spot streaks or droplets, give it another quick wipe.
Bone-dry tools resist rust and store cleanly. Skipping this step undoes all your hard work, so take the extra minute. Your future self will appreciate the effort.
Step 6 – Plan Your Storage Zones
Now think about where everything should live. Smart storage starts with grouping tools by how often you reach for them.
Keep daily heroes, like your favorite spatula and wooden spoon, within easy arm’s reach. Store occasional gadgets, such as the meat thermometer, in deeper cabinet storage.
Picture your cooking flow. You want stirring tools near the stove and prep tools close to your cutting space.
Listen to your current setup. That annoying clatter of metal tools shifting in a cluttered drawer means things need better organization.
Map out a few zones before placing anything. A little planning now creates a kitchen that feels intuitive, where every tool has a logical home and nothing gets buried at the back of a drawer.
Step 7 – Set Up Drawers And Crocks
With zones planned, it’s time to organize. Drawer dividers turn a chaotic jumble into neat, tidy rows where everything stays put.
Slot your utensils into a drawer organizer so they no longer slide and tangle. Open and close the drawer a few times to test the layout.
For frequently used tools, fill a countertop crock and place it beside the stove. Standing utensils up keeps them visible and grabbable mid-recipe.
Protect your knives with a knife guard or a dedicated block. Never toss bare blades into a drawer, since that dulls edges and risks cut fingers.
Hang ladles and measuring cups on hooks if drawer space runs tight. A good utensil organizer makes the whole kitchen feel calm and controlled.
Step 8 – Maintain Your System
A clean, organized kitchen stays that way only with light, regular upkeep. The good news is that maintenance takes just minutes once your system works.
Wipe tools dry before returning them to their spot. Quick care prevents buildup and keeps moisture control on track.
Every few weeks, do a fast reset. Return strays to their zones and re-oil any wooden utensils that feel dry.
Add labels to bins or shelves so everyone in the house puts things back correctly. This small touch protects your hard work over time.
Once you understand how to clean and store kitchen tools as an ongoing habit, the relief of opening a fresh, organized space becomes your everyday normal. Tidy beats chaotic every single time.
Critical Mistakes to Avoid When Cleaning and Storing Kitchen Tools
The most common mistake is leaving tools wet before storing them. Trapped moisture invites rust and grimy buildup, especially on stainless steel tools and knife blades. Always dry everything completely, by hand or on a drying rack, before it goes into a drawer or crock. That single habit saves countless tools from an early death.
Another big slip is putting everything in the dishwasher. High heat and harsh detergents warp silicone spatulas, dull sharp blades, and crack wooden utensils over time. Delicate and specialty items deserve gentle hand washing instead. Check what each tool can actually handle before you load that rack.
Many people also neglect their wooden pieces entirely. Without regular food-safe mineral oil, the wood dries out, splinters, and eventually cracks. A quick oiling every few weeks keeps them smooth and lasting for years.
Then there’s overcrowding. Cramming too many tools into one drawer leads to that frustrating clatter, dull blades, and constant digging. Use drawer dividers and trim down duplicates so everything fits comfortably. Finally, skipping the knife guard is risky business. Bare blades dull fast and cause nasty cuts, so always protect them properly.

Expert Tips
Want a pro-level kitchen? Keep a small microfiber cloth near your sink and wipe tools dry the instant you wash them. This one habit prevents nearly all rust and water spots before they start.
Group tools by task, not just by type. Stirring tools near the stove and prep tools near your cutting board cut your movement in half during busy cooking.
Re-oil wooden utensils on the same day each month, so it becomes automatic. Pick the first Sunday and never forget again.
Invest in a quality utensil organizer rather than several cheap ones. Sturdy drawer dividers last for years and keep everything exactly in place.
Finally, store knives with a knife guard or in a block, never loose. Protected blades stay sharp longer and keep your fingers safe.
Frequently Asked Questions
How Often Should I Deep Clean My Kitchen Tools?
Give your tools a quick clean after every use, but plan a deeper session every few weeks. Deep cleaning tackles hidden buildup that daily washing misses.
- Daily: rinse and dry after each use
- Weekly: scrub handles and crevices with baking soda
- Monthly: soak smelly items in vinegar and re-oil wooden pieces
This simple rhythm keeps everything hygienic without feeling like a chore.
Can I Put Wooden Utensils In The Dishwasher?
No, please don’t. The dishwasher’s intense heat and long water exposure cause wooden utensils to swell, crack, and warp over time. Always hand wash them in warm, soapy water, then dry them right away. Every few weeks, rub in a little food-safe mineral oil to keep the grain smooth and protected. Treated well, good wooden tools easily last a decade or more.
How Do I Prevent Rust On Metal Tools?
Rust prevention comes down to moisture control. After washing your stainless steel tools, dry them completely with a microfiber cloth, paying close attention to hinges and crevices. Never store them damp or leave them soaking in the sink. Keep them in a dry drawer or crock with good airflow. If you spot early rust, scrub it gently with baking soda and dry thoroughly afterward.
What’s The Best Way To Store Sharp Knives?
Never toss bare knives loose into a drawer, since that dulls the edges and risks painful cuts. Instead, use a knife guard, a dedicated block, or a magnetic strip on the wall. These options protect the blade and your fingers at the same time. Store knives fully dry to avoid rust, and keep them separate from other tools so the cutting edges stay sharp and safe.
How Can I Keep My Drawers Organized Long-Term?
Start with drawer dividers to give every tool a defined home. Add labels so everyone in the house returns things correctly. Then do a quick reset every couple of weeks, returning strays to their zones. Trim duplicates whenever they pile up, since fewer tools mean easier organization. A little consistent upkeep keeps your clutter-free kitchen feeling tidy and intuitive for the long haul.
Conclusion
Caring for your kitchen tools is one of the simplest habits with the biggest payoff. Clean, well-stored tools last longer, work better, and keep your food safe, all for very little effort.
Remember the essentials. Sort through everything first, then hand wash delicate pieces and tackle stubborn stains with baking soda and vinegar. Nourish your wooden utensils with food-safe mineral oil, and always dry tools completely to stop rust in its tracks. Finish by planning smart storage zones with drawer dividers, a countertop crock, and a knife guard for safety.
The real reward goes beyond clean gadgets. You’ll save money, protect your favorite tools, and enjoy that wonderful relief of opening a calm, organized space every time you cook.
So roll up your sleeves and try it this weekend. Once you master how to clean and store kitchen tools, you’ll wonder how you ever lived with that cluttered drawer. Take it one step at a time, build the habit slowly, and enjoy your fresh, clutter-free kitchen. You’ve totally got this.

About
Nick Hall has spent the last seven years working at the intersection of kitchen design and home repair — first as a design assistant at a residential renovation studio, then as a freelance writer covering everything from cabinet layouts to leaky faucet fixes.
Her approach is simple: kitchens should look good and function well. That means she’s just as comfortable talking about color palettes and counter materials as she is walking readers through how to fix a wobbly cabinet hinge or troubleshoot a garbage disposal.
Nick has worked directly with homeowners on small-space kitchen makeovers, budget-conscious renovations, and the kind of everyday repairs that don’t need a contractor — just the right instructions. She writes from experience, not theory, and tests most of the fixes and tips she shares before publishing them.
When she’s not writing, Nick is usually hunting for mid-century kitchen finds at estate sales or helping friends plan their own renovations. She lives in Columbus, Ohio.