
That old toaster shoved in the back of your cabinet? The blender that stopped spinning last summer? You’re not alone if your kitchen has become a graveyard for gadgets you no longer use.
Tossing them in the trash feels easy, but it’s bad for the planet and often against local rules. The good news is that responsible disposal is simpler than you think.
Learning how to recycle small kitchen appliances helps you clear clutter, protect the environment, and even support people in need through donation.
You don’t need special skills or a technician. With a few basic tools and a little time, you can handle the whole job yourself.
This guide walks you through every step in plain, friendly language so you can recycle your old appliances safely and confidently.
Why Recycling Small Kitchen Appliances Matters
Old appliances don’t just take up space; they create real problems when handled the wrong way. Electronics contain metals and plastics that leak harmful chemicals into soil and water when dumped in landfills.
For homeowners, proper e-waste disposal keeps your home tidy and your conscience clear. You free up cabinet space and avoid fines from improper trash habits.
Kitchen enthusiasts often upgrade gear, which means a steady flow of old gadgets to manage. Knowing the right approach makes each swap stress-free.
For DIY beginners, appliance recycling builds confidence and useful skills. You learn safe handling, parts sorting, and how to read recycling center rules.
Most of all, responsible disposal gives back. Many working appliances find new homes through donation, while recyclable materials get a second life instead of poisoning the earth. Everyone wins when you do this right.
Tools and Materials You’ll Need
Gather a few basics before you start, and the whole process flows smoothly. Begin with a pair of reusable gloves to protect your hands from sharp edges and grime during safe handling. Keep a stack of microfiber cloths nearby to wipe away dust and loose crumbs before transport.
A small screwdriver set helps you open casings and handle simple cord removal or parts sorting. Have a few zip bags ready to hold tiny screws and detachable parts so nothing rolls away and gets lost.
Grab painter’s tape or labels to mark bags and note what came from where. A sturdy cardboard box or tote makes carrying everything to your local drop-off site easy and secure.
One optional convenience item, your phone charger, keeps you powered up while you check recycling center rules and drop-off details on the go.
Step-by-Step Guide on How To Recycle Small Kitchen Appliances
Step 1 – Sort And Assess Each Appliance
Start by gathering every old appliance into one spot on your counter. Line them up so you can see exactly what you’re working with.
Pick up each one and give it an honest repair assessment. Does the toaster still heat? Does the blender base, heavy in your hands, still hum to life? A quick test tells you a lot.
Working items might deserve a donation check rather than the recycling bin. Broken ones move straight to your disposal pile.
Look for faded labels and model numbers, since you’ll need them later. Note any cracked cords or rust spots too.
This simple sorting saves time and helps you decide the best path for each gadget. A clear plan makes everything that follows feel effortless.
Step 2 – Unplug And Clean Each Unit
Before you touch anything else, make sure every appliance is unplugged and fully cooled. Safety always comes first.
Now comes the satisfying part: cleaning. Pull out the toaster tray and shake those loose crumbs into the trash. You’ll be surprised how much hides in there.
Wipe down greasy surfaces and dusty vents with a microfiber cloth. Pay attention to crevices where grime collects, like blender gaskets and coffee maker spouts.
Slip on your reusable gloves for the messier units. Clean appliances are easier to handle and far more welcome at a donation center or local drop-off site.
A quick wipe-down also reveals hidden damage you might have missed. Take your time here; clean gear sorts and recycles much more smoothly.
Step 3 – Remove Cords And Detachable Parts
With each unit clean, focus on cord removal and breaking things down. Untangle those knotted cords with patience, since rushing only makes the mess worse.
Use your small screwdriver set to detach removable parts like blender jars, beaters, and filter baskets. Some snap off, while others need a gentle twist.
As you work, drop tiny screws and small pieces into your zip bags right away. Nothing rolls away and disappears under the fridge that way.
Label each bag with painter’s tape so you remember what belongs to which appliance. This habit is the heart of good parts sorting.
Knowing how to recycle small kitchen appliances often comes down to this careful breakdown. Separated parts are easier to sort by material and far more likely to get accepted.
Step 4 – Separate Metal And Plastic Components
Now sort your pieces by material, since recycling centers usually want them divided. This step makes a real difference in what gets accepted.
Set out two zones on your counter: one for metal and plastic components, another for mixed or electronic bits. Metal blades, steel housings, and aluminum parts go together.
Plastic jars, lids, and casings form their own group. Run your fingers over each piece to feel the difference; metal stays cool and heavy, while plastic feels lighter and warmer.
Keep electronic guts, like motors and circuit boards, separate. These need special e-waste disposal, not your curbside bin.
Sorting now means less confusion at the recycling center. Clear material groups speed up the whole drop-off and keep you on the right side of the rules.

Step 5 – Remove Personal Data And Labels
Some modern kitchen gadgets store information you’d rather not pass along. Smart coffee makers and Wi-Fi appliances may hold network details or app settings.
Reset any connected device to its factory settings before letting it go. Check the manual or the brand’s website if you’re unsure how.
Next, handle data label removal. Peel off stickers that show your name, address, or warranty registration details. A little warm water loosens stubborn adhesive.
Scratch out any handwritten notes on faded labels too. You want nothing personal leaving your home with these items.
This small step protects your privacy and gives you peace of mind. It only takes a minute, but it matters more than most people realize, especially with today’s connected kitchen tech.
Step 6 – Check Donation And Take-Back Options
Before recycling, pause for a donation check. Working appliances often have plenty of life left for someone else.
Call local shelters, thrift stores, and community centers to ask what they accept. Many happily take clean, functioning toasters, kettles, and blenders.
Look into manufacturer take-back programs too. Plenty of brands accept their own old products and recycle them responsibly, sometimes offering a discount on your next purchase.
Search online for nearby options, and jot down addresses and hours. Keep your phone charged so you can confirm details while you’re out.
Giving an appliance a second home beats recycling every time. It reduces waste, helps your community, and feels genuinely good. Always explore these paths before sending anything to be broken down for parts.
Step 7 – Find Your Local Recycling Center
For items that can’t be donated, locate the right local drop-off site. Not every center accepts electronics, so a little research saves a wasted trip.
Search for “e-waste recycling near me” or check your city’s waste management website. Many towns host special collection days just for electronics.
Read the recycling center rules carefully before you go. Some want appliances whole, while others prefer sorted materials, which is exactly why your earlier prep pays off.
Note any fees, since certain centers charge small amounts for electronic items. Confirm their hours too, because nothing’s worse than arriving to a locked gate.
Save the address in your phone for next time. Once you know your go-to spot, future trips become quick and routine.
Step 8 – Pack And Transport Safely
Time to load up. Place your sorted parts into the cardboard box or tote, layering heavier items like that blender base on the bottom.
Listen for the satisfying clunk of parts settling into place. Tuck your labeled zip bags along the sides so screws stay put during the drive.
Wrap any sharp blades in a cloth to prevent nicks when you unpack. Keep electronic pieces grouped so handover at the center stays simple.
Secure the box in your car so it won’t tip on sharp turns. A sliding tote spills everything you carefully organized.
At the drop-off, hand each group to staff or place it in the correct bin. That final step completes your responsible disposal, leaving you with a clearer kitchen and a lighter conscience.
Critical Mistakes to Avoid When Recycling Small Kitchen Appliances
The most common mistake is tossing appliances straight into the regular trash. Electronics contain metals and chemicals that pollute soil and water in landfills, and many areas actually ban this practice. Always seek proper e-waste disposal instead of the curbside bin.
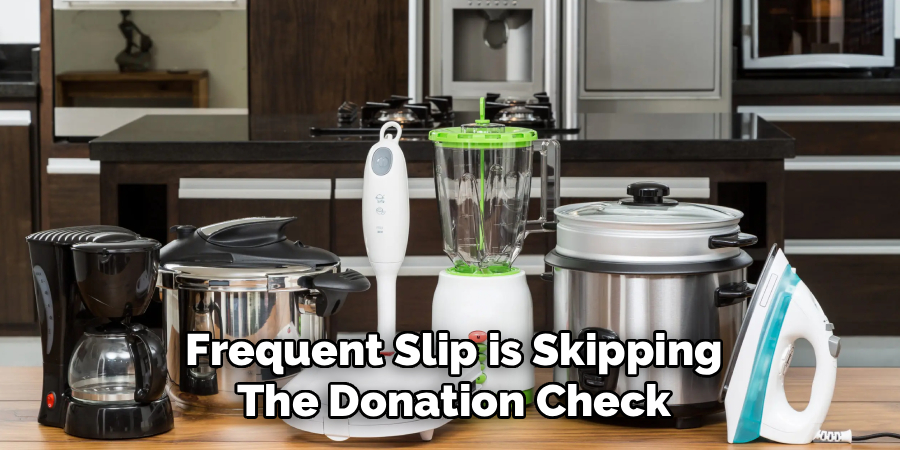
Another frequent slip is skipping the donation check. People often assume an old toaster is worthless, when it could serve a family or charity perfectly well. Test each item first, because a working appliance deserves a second home before it gets broken down.
Many beginners also forget to remove personal data and labels. Smart appliances store network settings and app logins, while stickers reveal your name and address. Reset connected devices and peel off identifying labels to protect your privacy.
Failing to check recycling center rules causes wasted trips too. Some centers reject whole units or require sorted materials, so a quick call ahead saves frustration. Finally, don’t ignore safe handling. Sharp blades and tangled cords cause cuts when you rush. Wear gloves, wrap blades in cloth, and take your time. A careful, patient approach keeps you safe and makes the whole process smooth.
Expert Tips
Want to make appliance recycling truly effortless? Keep a small “recycle later” box in a closet, and drop gadgets in as they break. You’ll handle everything in one efficient trip instead of scattered runs.
Snap a phone photo of each appliance before you take it apart. If you struggle to reassemble parts for donation, that picture becomes a lifesaver.
Save your local recycling center’s details in your contacts. Add their hours and accepted items in the notes, so you never guess again.
When buying new appliances, ask the retailer about take-back programs at checkout. Many haul away your old unit for free during delivery.
Finally, batch your parts sorting by material as you go, rather than all at once. A little organization upfront makes the final drop-off quick, painless, and genuinely satisfying.
Frequently Asked Questions
Can I Throw Small Appliances In The Regular Trash?
In most places, no. Small appliances count as electronic waste, and many cities ban them from regular trash because they contain harmful metals and chemicals. Throwing them out can pollute the environment and even earn you a fine. Instead, look for:
- A local e-waste recycling center
- A manufacturer take-back program
- A donation spot for working units
Always check your local rules first.
How Do I Know If An Appliance Can Be Donated?
Test it first. If the appliance powers on and works as intended, it’s likely a good donation candidate. Give it a thorough clean, then check that cords aren’t frayed and parts aren’t cracked. Call local thrift stores, shelters, or community centers to confirm what they accept. Clean, safe, working items are almost always welcome and give your old gear a happy second life.
Do I Need To Take Appliances Apart Before Recycling?
It depends on your recycling center’s rules. Some accept whole units, while others prefer sorted metal and plastic components. Calling ahead saves a wasted trip. If they want materials separated, use a small screwdriver set to remove cords and parts, then group them by material. When unsure, bring the appliance intact and let the staff guide you on their specific requirements.
What Should I Do With The Cords And Small Parts?
Keep them organized so nothing gets lost. After cord removal, coil cables neatly and bundle them together. Drop tiny screws and detachable pieces into labeled zip bags right away. Sort everything by material when possible, since metal and plastic often go to different bins. Most recycling centers accept cords as e-waste, but confirm their guidelines so each piece ends up in the right place.
Are Manufacturer Take-Back Programs Free?
Often, yes. Many brands run take-back programs at no cost, accepting their own old products for responsible recycling. Some even offer discounts or store credit toward your next purchase. A few may charge a small shipping fee for mail-in returns. Check the manufacturer’s website or call their support line to confirm details. It’s a convenient, eco-friendly option worth exploring before any other route.
Conclusion
Clearing out old gadgets doesn’t have to feel overwhelming. With a simple plan, you can handle the whole job yourself and feel great about it.
Remember the key steps. Sort and assess each appliance, then clean and unplug every unit. Remove cords and detachable parts, separate metal and plastic, and wipe out any personal data. Always run a donation check before recycling, find your local drop-off site, and pack everything safely for transport.
The rewards go far beyond a tidier kitchen. You protect the environment, support your community through donation, and gain real confidence in your DIY skills. Every gadget you handle the right way keeps harmful materials out of landfills.
So pick a weekend, gather your tools, and tackle that pile of forgotten gadgets. Once you understand how to recycle small kitchen appliances with these easy, practical steps, you’ll never dump electronics in the trash again. Take it one appliance at a time, enjoy the progress, and feel proud of doing right by your home and the planet. You’ve totally got this.
