
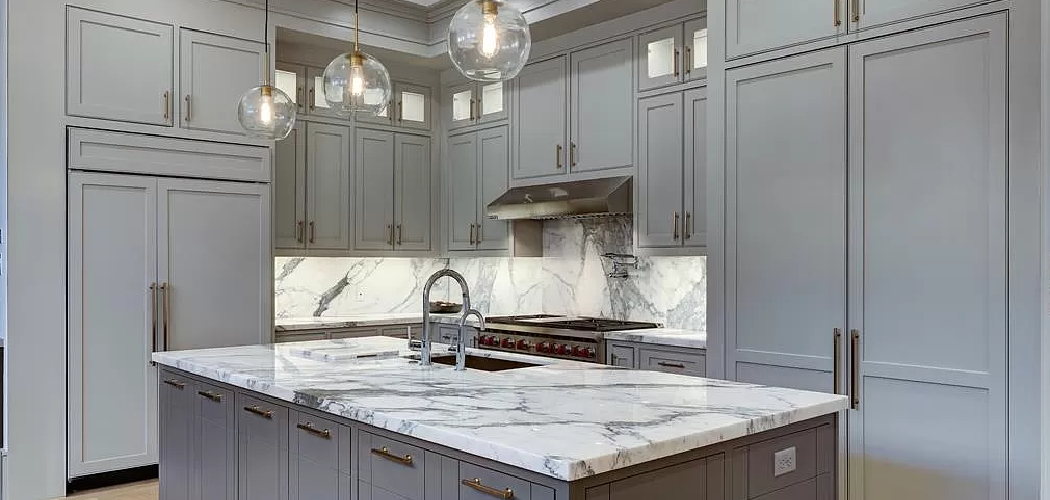
Adding crown moulding to kitchen cabinets can make a basic kitchen look finished, custom, and more expensive. It draws the eye upward, closes the gap between the cabinet tops and ceiling, and gives stock cabinets a built-in look. If you are a first-time DIYer, this project may seem tricky because of the angles, measuring, and cutting involved. Still, with patience and careful setup, it is very doable.
This guide will show you how to attach crown moulding to kitchen cabinets with simple steps, beginner-friendly tips, and clear advice you can follow from start to finish.

Why Add Crown Moulding to Kitchen Cabinets
Crown moulding does more than improve appearance. It helps your cabinets feel connected to the room, which gives the whole kitchen a cleaner and more polished style. Even modest cabinets can look upgraded once trim is installed well. If you plan to sell your home later, this small detail can also boost visual appeal.
For beginners, this is a useful project because it teaches core finish carpentry skills. You learn how to measure runs, mark corners, make accurate miter cuts, and fasten trim neatly. Those same skills carry over to other home projects like baseboards, ceiling trim, and built-in shelving. In short, cabinet crown moulding is a smart way to build confidence while improving your kitchen.
Tools and Materials You’ll Need
Before you start, gather everything in one place so you can work at a steady pace and avoid rushing between cuts.
- Crown moulding sized for your cabinet style
- Measuring tape
- Pencil
- Stud finder or cabinet layout marks
- Miter saw
- Finish nailer or brad nailer
- 1 1/4-inch to 2-inch finish nails, based on build-up strips and trim thickness
- Wood glue
- Drill and screws for support strips
- Filler strips or mounting cleats if your cabinets need a nailing surface
- Level
- Sandpaper
- Paintable caulk
- Wood filler
- Primer and paint or stain to match the cabinets
- Safety glasses and hearing protection
- Optional: angle finder for tricky inside and outside corners
Step-by-Step Guide on How to Attach Crown Moulding to Kitchen Cabinets
Step 1 – Inspect the Cabinets and Plan the Layout
Start by looking at the top of each cabinet run. Some cabinets have a flat top edge that accepts trim easily, while others need a mounting strip or riser to create enough space for the crown to sit at the correct spring angle. Run your hand across the top surface and front frame so you can feel dips, seams, or uneven spots that may affect the fit.
Next, sketch the cabinet layout and mark every visible side, corner, and return. Measure each run carefully from edge to edge. Write down your numbers clearly. This planning stage matters because crown moulding works as a system, not as separate pieces. Good notes now will save material later and help you avoid confusion once the saw is running.
Step 2 – Install Mounting Cleats or Build-Up Strips
Most cabinet crown moulding does not attach well directly to the thin top edge of a cabinet face frame. You usually need a solid nailing surface. Cut wood strips to fit along the cabinet tops, set them back slightly, and fasten them with screws from inside the cabinet or through secure framing points where they will not show.
These support pieces create a stable base and help the moulding project upward in a clean, even line. Check each strip with a level before tightening it fully. If one side sits low, add a shim so the final trim does not dip. When beginners learn how to attach crown moulding to kitchen cabinets, this hidden support step is often what makes the whole project go smoothly.
Step 3 – Measure Each Section and Mark the Angles
With the support in place, measure every moulding section one more time. Measure along the wall line where the trim will sit, not just across the face of the cabinet. Crown moulding wraps around corners, so even a small error can leave a visible gap. Label each piece as you go, such as left run, center span, or right return.
Then identify whether each end needs an inside corner, outside corner, square cut, or return cut. Use an angle finder if your kitchen corners are not perfectly square. Many are not. Set the moulding in place dry and visualize how each joint will close. This slow, careful step helps you waste less trim and keeps the install feeling controlled instead of frustrating.
Step 4 – Cut Test Pieces Before Cutting Full Lengths
Before you touch the full moulding pieces, cut a few short scrap sections to test your saw setup. Crown moulding sits at an angle when installed, so the cut direction can feel backward at first. A practice cut lets you confirm your miter saw settings and the moulding’s orientation without risking expensive material.
Hold the scrap against a cabinet corner and check the joint. You want the profile to meet tightly from top to bottom, with no daylight showing through. If the fit is off, adjust the saw and test again. It is much easier to correct a mistake on an eight-inch sample than on a long finished piece. Take your time here. A clean test fit builds confidence for the rest of the job.

Step 5 – Cut and Dry-Fit the Main Moulding Pieces
Once your test cuts look good, move to the full-length trim. Cut the longest visible runs first, then work toward shorter side pieces and returns. Support the moulding firmly at the saw so it does not shift during the cut. A smooth, steady blade pass leaves a cleaner edge and reduces tear-out on painted or stained trim.
After each cut, carry the piece to the cabinet and dry-fit it before nailing. Look at the corner joints from eye level and from below. Run your fingers across the seam. If the profile lines up and the edges close well, label the back and set it aside in order. This is the practical rhythm of how to attach crown moulding to kitchen cabinets without turning one small miscut into a chain of problems.
Step 6 – Fasten the Crown Moulding in Place
Now begin attaching the moulding one section at a time. Apply a thin bead of wood glue at corner joints or where the trim meets a return. Hold the first piece against the mounting strip and keep the bottom edge aligned with the cabinet face. Drive finish nails into the cleat or support strip, spacing them enough to hold the piece securely without splitting it.
Work from one end to the other while keeping pressure on the trim so it does not twist. If you are joining two pieces at a corner, fit them together tightly before locking them in with nails. Wipe away any squeezed-out glue right away. As each section goes up, the kitchen starts to feel different. The sharp profile, shadows, and clean lines instantly add depth and character.
Step 7 – Add Returns, Fill Gaps, and Secure Loose Joints
Some cabinet layouts end with an exposed side where the crown does not run into a wall. In those spots, install a small return piece so the moulding ends neatly instead of showing a raw cut. These tiny pieces can be fussy, so use glue and careful pinning to hold them in place. Let the adhesive do part of the work.
After all sections are installed, inspect every joint. Small gaps at corners are common, especially in older kitchens where walls are slightly out of square. Add a bit of wood filler for nail holes and a thin line of paintable caulk where the trim meets the cabinet or ceiling line, if needed. Keep the finish work light and neat. Too much filler can soften the crisp detail that makes crown moulding look professional.
Step 8 – Sand, Finish, and Check the Final Look
Once the filler and caulk dry, sand the repaired spots gently so the surface feels smooth under your fingertips. If the trim is paint-grade, prime bare areas and apply finish paint that matches or complements the cabinets. Use a small angled brush for control around corners and profile details. If the moulding is stain-grade, use matching stain products and touch-up markers with care.
Step back several feet and look across the whole cabinet run. Check whether the top line appears straight and whether joints blend well into the profile. Open cabinet doors to make sure nothing rubs or catches. This final review turns a rough carpentry project into finished trim work. The goal is not just secure attachment, but a built-in look that feels intentional and clean.

Common Mistakes to Avoid
One common mistake is skipping the mounting cleats or build-up strips. Beginners often try to nail crown moulding straight to the cabinet face, but that rarely gives enough holding power or the right angle. The result is loose trim, poor alignment, or joints that open over time.
Another issue is measuring only once and cutting too quickly. Crown moulding depends on precise corner cuts, and a small error can throw off the whole run. Many first-time installers also forget to test cut on scrap first. That usually leads to wasted material and confusion at the saw.
A third mistake is forcing pieces into place when the wall or cabinet is out of square. If a corner does not close, do not rely on nails to pull everything tight. Recut or fine-tune the angle instead. You should also avoid overfilling gaps with caulk. Heavy caulk lines make trim look messy and can hide problems rather than solve them.
Finally, some DIYers rush the finish work. Visible nail holes, rough sanding, and uneven paint can take away from an otherwise solid install. Careful prep and touch-up make a big difference in the final result.
Expert Tips
If you want cleaner results, cut and install the most visible front pieces first. That lets you place your best joints where people notice them most and save less perfect cuts for short side returns. It is a small strategy, but it improves the finished look.
Keep a pencil diagram nearby while you work. Mark each piece with its location and cut direction on the back. This helps prevent left-right mix-ups, which are very common with crown cuts. It also speeds up installation when several pieces are ready at once.
Use caulk sparingly and only after you are sure the fit is as good as you can make it. Good trim work comes from accurate cuts first, filler second. When in doubt, practice on scraps until the saw setup feels natural.
Frequently Asked Questions
Do I need a nailer to install crown moulding on cabinets?
A finish nailer makes the job faster and more precise, but you can do the work with a hammer and finish nails if needed. You will need extra care to avoid denting the trim. For most beginners, a nailer is worth using because it holds the moulding quickly and helps keep pieces from shifting during installation.
Can I attach crown moulding directly to the cabinet without support strips?
In many cases, no. Most cabinets do not offer enough surface area at the top front edge to support crown moulding properly. Mounting cleats or build-up strips give you a solid base for nails and help set the trim at the right position. Without that support, the moulding may feel unstable or sit at the wrong angle.
What is the best type of crown moulding for kitchen cabinets?
Lightweight paint-grade moulding is often the easiest choice for beginners. It cuts cleanly, handles well, and works nicely for painted cabinets. If your cabinets are stained wood, choose a stain-grade profile that matches the finish and style of the room. Simple profiles are easier to install than highly detailed ones, especially around corners.
How do I handle uneven walls or out-of-square corners?
Start by checking the angle before cutting your final pieces. If a corner is not a true 90 degrees, adjust your miter settings or use test cuts until the joint fits well. Small gaps can be filled during finishing, but large ones usually mean the cut needs correction. Patience matters more than speed in older kitchens with imperfect lines.
Should crown moulding touch the ceiling above the cabinets?
Not always. It depends on cabinet height, room design, and the size of the gap above the cabinets. Some installs leave a visible space, while others run the moulding tight to the ceiling for a built-in look. What matters most is that the trim looks intentional, level, and consistent across the full cabinet run.
Conclusion
Installing cabinet crown moulding takes more care than strength. If you can measure accurately, practice your cuts, and work in a steady order, you can get a polished result that changes the look of your kitchen. The key steps are simple: create a solid mounting surface, confirm your angles with test cuts, dry-fit every piece, and finish the joints neatly.
Do not worry if your first cuts are not perfect. Trim work improves fast with repetition, and even experienced carpenters rely on scrap pieces and small adjustments. Focus on clean lines, tight corners, and a calm pace. That approach leads to better results than rushing.
Now that you understand how to attach crown moulding to kitchen cabinets, you can take on the project with more confidence. With the right tools and a bit of patience, you can give ordinary cabinets a custom, built-in finish that looks sharp for years.

About
Nick Hall has spent the last seven years working at the intersection of kitchen design and home repair — first as a design assistant at a residential renovation studio, then as a freelance writer covering everything from cabinet layouts to leaky faucet fixes.
Her approach is simple: kitchens should look good and function well. That means she’s just as comfortable talking about color palettes and counter materials as she is walking readers through how to fix a wobbly cabinet hinge or troubleshoot a garbage disposal.
Nick has worked directly with homeowners on small-space kitchen makeovers, budget-conscious renovations, and the kind of everyday repairs that don’t need a contractor — just the right instructions. She writes from experience, not theory, and tests most of the fixes and tips she shares before publishing them.
When she’s not writing, Nick is usually hunting for mid-century kitchen finds at estate sales or helping friends plan their own renovations. She lives in Columbus, Ohio.