
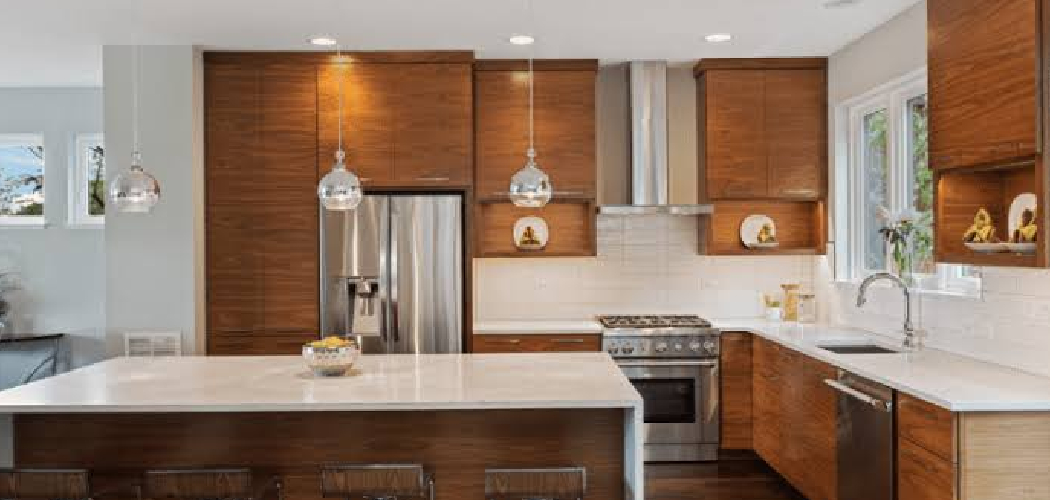

Cabinet refacing can give your kitchen a fresh look without the dust, cost, and disruption of a full remodel. Instead of tearing out solid cabinet boxes, you keep the existing structure and update the visible surfaces with new veneer, laminate, doors, drawer fronts, trim, and hardware.
If you are learning how to reface your kitchen cabinets for the first time, the process may look detailed, but it becomes much easier when you follow a clear order. You will learn how to assess your cabinets, prepare the surfaces, measure accurately, apply new facing material, and install new doors with confidence.
This guide shows you how to complete a beginner-friendly cabinet refacing project from planning to final adjustments.
Why Refacing Kitchen Cabinets Is Worth Learning
Refacing kitchen cabinets is worth learning because it can save money while still changing the whole feel of your kitchen. Full cabinet replacement often involves demolition, plumbing issues, flooring gaps, and higher labor costs. Refacing focuses on the parts you see most, which makes it a smart option when the cabinet boxes are still strong.
This skill helps homeowners refresh an older kitchen on a budget. It can also help renters when written permission is allowed, especially for removable hardware updates or approved cosmetic changes. For DIY beginners, cabinet refacing teaches useful skills like measuring, surface prep, adhesive use, hinge alignment, and finish matching.
You also get more control over the final style, from clean white shaker doors to warm wood veneer.
Tools and Materials You’ll Need
Gather your tools before you start so the work feels organized instead of rushed. Cabinet refacing depends on careful measuring, clean surfaces, and steady installation.
- Measuring tape and pencil
- Screwdriver or drill
- Painter’s tape and labels
- Degreaser or TSP substitute
- Sanding sponge or fine-grit sandpaper
- Wood filler and putty knife
- Veneer or laminate sheets
- Edge banding
- Contact cement or pressure-sensitive adhesive
- Utility knife with sharp blades
- Straightedge or trim router
- New cabinet doors and drawer fronts
- Hinges, screws, pulls, and knobs
- Soft-close hinges, if desired
- Optional convenience item: a hinge jig for faster, cleaner hinge placement
Step-by-Step Guide on How to Reface Your Kitchen Cabinets
Step 1 – Assess the Cabinet Boxes

Start by checking whether your cabinet boxes are worth refacing. Open each door and look inside the frames, shelves, side panels, and bottoms. The boxes should feel solid, square, and dry, with no strong musty smell, swelling, or crumbling particleboard.
Learning how to reface your kitchen cabinets begins with this honest inspection. Refacing works best when the layout is good and the structure is sound. If a cabinet box sags, pulls away from the wall, or has water damage under the sink, repair it before moving forward.
Run your hand along the face frames. They should feel firm, not loose or spongy.
Step 2 – Remove Doors, Drawer Fronts, and Hardware
Remove all cabinet doors, drawer fronts, hinges, knobs, and pulls. Work slowly with a drill or screwdriver so you do not strip the screws. Label each door and drawer location with painter’s tape, even if you plan to replace them, because the labels help you track sizes and placement.
Place hardware in bags if you might reuse any of it. If you are upgrading to soft-close hinges or new pulls, keep one old piece nearby for comparison.
Once everything is off, the kitchen may look bare, but that is helpful. You can now see the cabinet boxes clearly and spot dents, gaps, old adhesive, or trim problems.
Step 3 – Clean and Prepare Every Surface
Kitchen cabinets collect grease, steam, dust, and fingerprints. These layers can block adhesive from bonding well, so cleaning matters as much as cutting or measuring. Use a degreaser or TSP substitute on the face frames, end panels, toe kicks, and any area that will receive veneer or laminate.
The surface may feel slick at first. As the grease lifts, your cloth will drag more smoothly across the wood or laminate. Wipe away residue as directed by the cleaner and let the cabinets dry fully.
After cleaning, lightly sand glossy surfaces. You do not need to remove the old finish. You only need to dull it so adhesive can grip.
Step 4 – Repair Damage and Smooth the Frames
Fill small dents, nail holes, gaps, and old hardware marks with wood filler. Press the filler in firmly with a putty knife, then scrape away the excess. Once it dries, sand the area until it feels smooth under your fingertips.
This step helps the new veneer or laminate sit flat. Even tiny bumps can show as raised spots after installation, especially on face frames where light hits the edges.
Check end panels and cabinet sides too. If the old surface has peeling laminate or loose trim, remove or secure it before applying new material. Good surface prep creates a cleaner look and helps prevent lifting later.
Step 5 – Measure for Veneer, Doors, and Drawer Fronts

Accurate measuring is the heart of cabinet refacing. Measure each opening, door, drawer front, stile, rail, and end panel. Write everything down clearly, and measure twice before ordering or cutting anything.
For new door fronts, decide how much overlay you want. Overlay means how much the door covers the cabinet frame. A consistent overlay gives the kitchen a balanced, professional look.
When planning how to reface your kitchen cabinets, do not assume every opening is the same size. Older cabinets often shift over time, and handmade boxes may vary by a small amount. Those small differences can affect hinge alignment and reveal lines.
Step 6 – Apply Veneer or Laminate to Face Frames
Cut veneer or laminate slightly larger than each face frame part. This gives you room to trim clean edges after the material sticks. Follow the adhesive instructions closely, especially for contact cement, because it often bonds as soon as the surfaces touch.
Start with the vertical stiles, then cover the horizontal rails. Press the material down firmly with a veneer scraper or smooth block, working from the center outward. You should feel the surface flatten as air pockets move out.
Trim the edges with a sharp utility knife, straightedge, or trim router. Use light pressure and fresh blades. Dull blades can tear veneer and leave ragged lines.
Step 7 – Cover End Panels, Edges, and Trim
After the face frames look clean, move to the visible cabinet sides and end panels. These larger areas need careful alignment because a crooked sheet will stand out. Dry-fit each piece before applying adhesive so you know how it will sit.
Add edge banding where raw edges show, such as shelf fronts or exposed panel edges. Heat-activated edge banding usually needs steady pressure and a clean trim after it cools.
Install matching trim if you want a more finished look around toe kicks, cabinet ends, or crown areas. Finish matching matters here. A small difference in color or sheen can make new panels look separate from the rest of the kitchen.
Step 8 – Install New Doors, Drawer Fronts, and Hardware
Attach hinges to the new doors according to the hinge type and manufacturer’s spacing. A hinge jig can help keep holes straight and consistent. If you are using soft-close hinges, adjust them before fully tightening the screws.
Hang each door and check the reveal, which is the small gap around the door. Adjust the hinges until the gaps look even. This part takes patience, but it makes the finished cabinets look polished instead of rushed.
Install drawer fronts last, using temporary spacers or painter’s tape to keep alignment steady. Add pulls and knobs only after you are happy with the spacing. Step back often and check the kitchen from normal standing height.
Common Mistakes When Refacing Kitchen Cabinets
One common mistake is refacing weak cabinet boxes. New veneer, laminate, and door fronts cannot fix cabinets that are swollen, loose, or badly damaged. If the base structure is failing, you need repairs or replacement before cosmetic updates.
Another mistake is poor measuring. Even a small error can lead to doors that overlap badly, drawer fronts that rub, or uneven gaps that catch the eye. Measure each cabinet opening on its own, especially in older kitchens where frames may not be perfectly square.
Many beginners also rush surface prep. Adhesive needs clean, dull, dry surfaces. If you apply veneer over grease, dust, or glossy finish, the edges may lift over time, especially near the stove or dishwasher where heat and moisture are common.
Using the wrong adhesive is another problem. Some products work well for wood veneer but not laminate, while others need pressure or open time to bond correctly. Always match the adhesive to the facing material.
Finally, hardware placement can ruin an otherwise neat project. Crooked pulls, uneven knobs, or poorly adjusted hinges make new cabinets look off. Mark carefully, drill pilot holes, and adjust doors before calling the job finished.
Expert Tips
Order a few samples before choosing your final finish. Veneer, laminate, and painted door fronts can look different under kitchen lighting than they do online. Hold samples next to your countertops, backsplash, flooring, and wall color during the day and at night.
Plan your sequence before cutting. Many pros work from less visible areas to more visible areas, which gives you a chance to improve your technique before tackling eye-level frames. Keep blades sharp, because clean cuts make a big difference.
If you want a high-end look, pay close attention to reveal lines. Even gaps around doors and drawers often matter more than the material cost. Careful hinge alignment can make budget-friendly refacing look custom.
Frequently Asked Questions
Can I reface cabinets myself as a beginner?
Yes, you can reface cabinets yourself if the cabinet boxes are in good condition and you work carefully. The project requires patience more than advanced carpentry. The hardest parts are measuring accurately, applying veneer or laminate smoothly, and aligning doors. Start with a small section if you feel unsure, then continue once you understand the process.
Is cabinet refacing cheaper than replacing cabinets?
Cabinet refacing is usually cheaper than full replacement because you keep the existing cabinet boxes. You mainly pay for new surfaces, doors, drawer fronts, hardware, and supplies. Replacement often adds demolition, disposal, installation, plumbing changes, and possible flooring repairs. The final cost depends on your material choices, kitchen size, and whether you do the work yourself.
What is the best material for refacing kitchen cabinets?
The best material depends on your budget, style, and durability needs. Wood veneer gives a warm, natural look and can match traditional kitchens well. Laminate is often easier to clean and comes in many colors and patterns. Rigid thermofoil doors can create a smooth painted look, while solid wood doors offer strength and long-term flexibility.
Do I need to remove countertops to reface cabinets?
In most cases, you do not need to remove countertops to reface cabinets. Refacing focuses on the cabinet faces, sides, doors, and drawer fronts, so the countertop can usually stay in place. You may need extra care near the top edges of base cabinets. Protect counters with tape, drop cloths, or cardboard while cutting and applying materials.
How long does a cabinet refacing project take?
A small kitchen may take a few days, while a larger kitchen can take a week or more for a beginner. The timeline depends on cleaning, repairs, measuring, cutting, adhesive dry time, door installation, and hardware adjustments. If you order custom doors, include delivery time in your plan. Working slowly usually leads to better results.
Conclusion
Cabinet refacing is a practical way to update your kitchen without removing the entire cabinet system. When the cabinet boxes are strong, you can refresh the visible surfaces with veneer or laminate, install new door fronts and drawer fronts, add updated hardware, and create a cleaner style for much less disruption than a full remodel.
The best results come from careful prep, accurate measuring, clean cuts, and patient adjustments. Do not rush the steps that seem small, such as cleaning grease, filling dents, checking reveal lines, or aligning hinges. These details shape the final look.
Once you understand how to reface your kitchen cabinets, you can make an older kitchen feel brighter, newer, and more personal. Start by inspecting your cabinet boxes, choosing your finish samples, and measuring carefully. From there, each step builds toward a kitchen you can feel proud to use every day.

About
Nick Hall has spent the last seven years working at the intersection of kitchen design and home repair — first as a design assistant at a residential renovation studio, then as a freelance writer covering everything from cabinet layouts to leaky faucet fixes.
Her approach is simple: kitchens should look good and function well. That means she’s just as comfortable talking about color palettes and counter materials as she is walking readers through how to fix a wobbly cabinet hinge or troubleshoot a garbage disposal.
Nick has worked directly with homeowners on small-space kitchen makeovers, budget-conscious renovations, and the kind of everyday repairs that don’t need a contractor — just the right instructions. She writes from experience, not theory, and tests most of the fixes and tips she shares before publishing them.
When she’s not writing, Nick is usually hunting for mid-century kitchen finds at estate sales or helping friends plan their own renovations. She lives in Columbus, Ohio.