
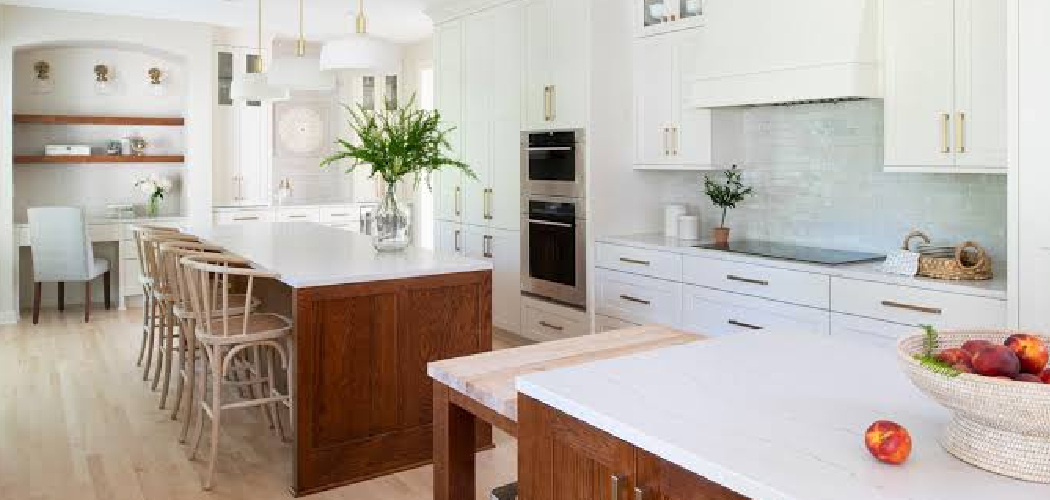
A kitchen island often starts as a simple prep surface, but your needs can change fast. Maybe you want more seating, extra storage, a larger work zone, or better flow for family meals and daily cooking. Learning how to extend kitchen island space can help you turn a cramped layout into one that feels more useful, balanced, and comfortable without a full kitchen remodel.

The good news is that you do not always need to tear everything out and start over. With the right plan, tools, and measurements, you can add length, width, overhang, or storage in a way that looks intentional and works well. This guide will show you how to plan, build, and finish a kitchen island extension with confidence.
Why Extending Your Kitchen Island Matters
A bigger kitchen island can change how your whole kitchen works. It gives you more room to chop, mix, serve, and gather, which matters if your counters always feel crowded. It can also create better traffic flow by defining spaces for cooking, eating, and casual conversation.
Extending your island may also improve storage and seating. You might add cabinets, open shelves, or a countertop overhang for stools, making the kitchen more social and practical at the same time. In many homes, the island becomes the center of daily life, so even a modest extension can make the room feel more useful and more polished. If you want a kitchen that supports both work and connection, this upgrade can be a smart move.
Tools and Materials You’ll Need
Before you begin, gather everything you need so the project moves smoothly from planning to installation. Most kitchen island extensions require a tape measure, level, stud finder, drill, driver bits, wood screws, clamps, circular saw or miter saw, construction adhesive, and sandpaper. You will also need framing lumber or plywood, depending on your design, along with trim pieces if you want a built-in look.
For the surface, you may need a matching countertop slab, butcher block, or finished panel. Many projects also call for wood filler, primer, paint, or stain, plus caulk for clean seams. If you are adding support for seating, be sure to include brackets or corbels rated for countertop overhangs. A shop vacuum is optional, but it makes cleanup much easier and keeps sawdust under control while you work.
Step-by-Step Guide on How to Extend Kitchen Island
Step 1 – Evaluate Your Existing Island
Start by taking a close look at your current island. Check its size, shape, finish, and structural condition. If the base feels loose, uneven, or poorly anchored, fix those issues before adding anything new. A solid extension depends on a stable foundation.
Walk around the island and notice how people move through the kitchen. Pay attention to nearby appliances, cabinet doors, and traffic paths. You want the new size to improve function, not create tight corners or awkward bottlenecks.
Measure the island from every side, including height and countertop thickness. Also check the floor for level. Small differences can affect how the extension fits and whether the finished surface sits flush. Good planning here saves you from frustrating adjustments later.
Step 2 – Decide What Type of Extension You Need
Not every island extension solves the same problem. Some homeowners need more prep space, while others want room for bar stools or hidden storage. Decide whether you are extending the length, widening the top, adding an overhang, or building out the base with cabinets or panels.
Think about how you use your kitchen each day. If you bake often, a broader work surface may help most. If your family gathers in the kitchen, seating space could be the better choice. This is where many people truly understand how to extend kitchen island designs in a way that matches real life instead of just looks.
Sketch a simple plan with rough dimensions. Even a basic drawing helps you spot spacing issues and compare options before you cut any material.
Step 3 – Measure the Space Carefully
Accurate measurements matter more than almost anything else in this project. Measure the island itself, then measure the open space around it. You should leave enough clearance for walking, opening appliances, and pulling out chairs if you plan to add seating.
Use a tape measure and write every number down right away. Measure twice from different points to confirm accuracy. It helps to note nearby features like drawer pulls, outlet locations, and floor vents that could affect your design.
Stand in the kitchen and imagine the finished extension in place. A few extra inches can feel helpful or crowded depending on the room. When you measure with real use in mind, the final result feels natural instead of oversized. Precision now leads to a cleaner build later.
Step 4 – Build or Modify the Base Support
Once your plan is set, focus on the support structure. If you are extending the base itself, build a frame that matches the existing island height and depth. Use straight lumber, secure joints tightly, and check for square corners as you go.
Attach the new frame to the existing island with screws and construction adhesive where appropriate. If you are only extending the countertop for seating, install heavy-duty brackets or corbels that can carry the extra weight. Weak support can lead to sagging, shifting, or cracks over time.

This stage often feels less exciting than the finish work, but it is where durability is built. When the frame is solid, the island feels steady under your hands, and the countertop sits with the quiet confidence of a well-made piece.
Step 5 – Add Panels, Cabinet Parts, or Storage Elements
Now you can shape the visible part of the extension. Attach side panels, face frames, shelving, or cabinet boxes depending on your design. Match the existing island as closely as possible in proportions and style so the addition looks original to the kitchen.
Dry-fit pieces before fastening them permanently. This lets you check alignment, reveal gaps, and make small cuts before everything is locked in place. Smooth edges with sandpaper and test doors or drawers if your extension includes them.
If your goal is storage, think about what belongs there. Deep shelves may work for mixing bowls, while narrow slots can hold trays or cutting boards. A smart extension does more than look bigger. It should make daily tasks feel easier and less cluttered.
Step 6 – Install the Countertop Extension
The countertop is the part everyone sees first, so take your time here. Set the new surface in place and confirm that it is level, centered, and properly supported. Whether you use butcher block, stone, laminate, or a matching slab, the fit should feel precise.
If possible, line up seams in less noticeable spots. A clean joint helps the extension feel intentional rather than added on later. Secure the top based on the material requirements, and do not overtighten fasteners where movement or cracking could become an issue.
Many homeowners searching for how to extend kitchen island space focus only on size, but the countertop finish shapes the whole result. When the top is smooth under your palm and visually balanced from every angle, the extension feels complete.

Step 7 – Blend the New Section With the Old One
At this point, the island may function well, but it still needs visual unity. Add trim, molding, filler strips, or edge details that match the original design. Even small finishing touches can hide transitions and make the extension look built-in.
Use wood filler on nail holes and seams where needed. Caulk tight gaps before painting for a cleaner line. If you are staining wood, test the color first on scrap material because new wood can absorb finish differently than old surfaces.
Stand back often and look at the island from across the room. The goal is not just attachment but integration. The more closely the finishes, proportions, and details match, the more natural the extension will feel in the kitchen.
Step 8 – Paint, Stain, and Seal the Surface
Finishing work brings the project to life. Paint or stain the base to match the existing island, then apply a protective topcoat if needed. In a kitchen, surfaces deal with moisture, grease, fingerprints, and daily wear, so durability matters as much as color.
Let each coat dry fully before adding the next. Rushing this stage can leave tacky surfaces, visible brush marks, or uneven color. If you are sealing butcher block or wood, use a product appropriate for kitchen use and follow cure times carefully.
As the finish dries, the island starts to look less like a construction project and more like part of your home. The smell of fresh paint or wood oil may linger for a bit, but it often signals that the hardest work is behind you.
Step 9 – Test Function and Make Final Adjustments
Before you call the job done, use the island the way you normally would. Stand at it and prep food. Pull up a stool. Open nearby drawers and appliances. Look for anything that feels awkward, wobbly, too tight, or slightly off-center.
Tighten hardware if needed and check that all supports are holding firm. Run your hand along edges to catch rough spots or uneven seams. Small touch-ups now can prevent annoyance later.
This final review is important because success is not only about appearance. A well-extended island should feel stable, comfortable, and easy to use every day. When everything works smoothly, you know the project was worth the effort.
Common Mistakes When Extending a Kitchen Island
One of the most common mistakes is extending the island without checking kitchen clearances. A larger island may sound helpful, but if it blocks appliance doors, pinches walkways, or makes seating hard to use, the kitchen will feel more cramped instead of more useful. Always plan around movement, not just surface area.
Another mistake is underbuilding the support structure. Countertops are heavy, and overhangs need proper bracing. If you rely on weak framing or decorative pieces that cannot carry load, the extension may sag, wobble, or fail over time. Solid support should come before cosmetic details.
Poor material matching also creates problems. If the new panels, trim, or countertop finish clash with the original island, the extension can look like an afterthought. Even when you cannot get a perfect match, choose complementary materials and repeat details that tie the design together.
Many beginners also rush measurement and installation. Small errors in height, depth, or level become obvious once the countertop goes on. Finally, do not ignore finishing work. Unsealed wood, visible seams, and rough paint lines can shorten the life of the project and make the island look unfinished even if the structure is sound.
Expert Tips
If you want the extension to look custom, match more than just color. Pay attention to door style, trim profile, countertop edge, and toe-kick depth. Those details create visual continuity and help the new section blend with the old one.
It also helps to mock up the extension with painter’s tape or cardboard on the floor before building. This simple step lets you test spacing and seating clearance in real size. If you are adding a countertop overhang, verify the support requirements for your material, since stone, wood, and laminate behave differently. Finally, think ahead about outlets, lighting, and storage access. A kitchen island works best when it supports the way you cook, serve, and gather every day.
Frequently Asked Questions
Can I extend a kitchen island without replacing the whole countertop?
Yes, in some cases you can. If your island design allows for a clean seam or a planned overhang, you may be able to add a matching or complementary countertop section. This works best with wood or laminate, though some stone fabricators can also join new pieces. The success of the project depends on support, alignment, and how visible the seam will be.
How much overhang should I add for seating?
A seating overhang usually needs about 12 inches to feel comfortable for knees and stools. In some layouts, 15 inches may work better, especially for taller users or thicker countertop edges. The key is making sure the extension is properly supported underneath so the added space feels sturdy and safe during everyday use.
Do I need permits to extend my kitchen island?
Many simple cosmetic or carpentry-only island extensions do not require permits, but that can change if you add plumbing, electrical outlets, or major structural modifications. Local building rules vary, so it is smart to check with your city or county before you begin. A quick call can prevent problems during inspections or future home sales.
What is the best material for a kitchen island extension?
The best material depends on your goals, budget, and existing kitchen finishes. Butcher block is popular because it is easier to cut, install, and refinish. Stone offers durability and a high-end look but needs strong support and professional handling. Laminate is budget-friendly and available in many styles. Choose a material that fits both your design and your skill level.
How do I make the extension look original to the kitchen?
Focus on consistency in shape, finish, and detail. Match panel styles, paint sheen, trim edges, and countertop thickness as closely as possible. Keep proportions in line with the original island so the extension does not feel oversized or tacked on. Careful finish work, hidden seams, and balanced dimensions make the biggest difference in creating a built-in appearance.
Conclusion
Extending a kitchen island is one of the most practical ways to improve workspace, storage, and seating without taking on a full remodel. The key is to plan carefully, measure accurately, build strong support, and finish the new section so it blends with the existing island. When you approach the project step by step, the process feels much more manageable.
If you have been wondering how to extend kitchen island space in a way that looks good and works hard, start with your layout and your daily habits. Think about what your kitchen truly needs, then build around that purpose. A thoughtful extension can make the room easier to use and more enjoyable to gather in. Take your time, trust your measurements, and focus on both structure and detail. The result can feel like it has always belonged there.

About
Nick Hall has spent the last seven years working at the intersection of kitchen design and home repair — first as a design assistant at a residential renovation studio, then as a freelance writer covering everything from cabinet layouts to leaky faucet fixes.
Her approach is simple: kitchens should look good and function well. That means she’s just as comfortable talking about color palettes and counter materials as she is walking readers through how to fix a wobbly cabinet hinge or troubleshoot a garbage disposal.
Nick has worked directly with homeowners on small-space kitchen makeovers, budget-conscious renovations, and the kind of everyday repairs that don’t need a contractor — just the right instructions. She writes from experience, not theory, and tests most of the fixes and tips she shares before publishing them.
When she’s not writing, Nick is usually hunting for mid-century kitchen finds at estate sales or helping friends plan their own renovations. She lives in Columbus, Ohio.