
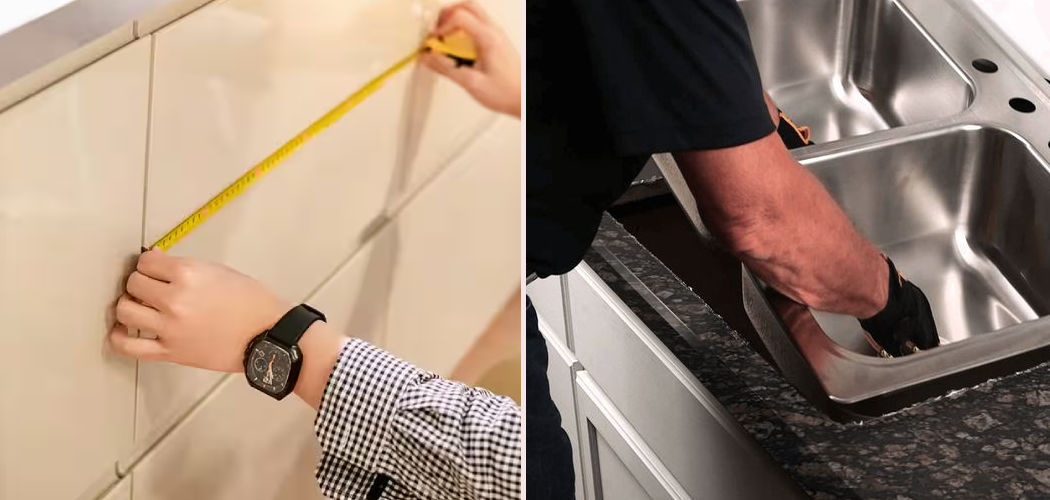
Replacing a kitchen sink seems simple until you realize how many dimensions need to line up. The sink has to fit the cabinet, match the countertop cutout, clear the faucet and backsplash, and connect well with your plumbing. If you skip careful planning, you can end up with a sink that looks great online but does not fit your space at all. That is why learning how to measure for new kitchen sink is one of the most important parts of the project.

The good news is that you do not need to be a contractor to get this right. With a tape measure, a notepad, and a few careful checks, you can gather everything you need before you buy. This guide will show you exactly what to measure, why it matters, and how to avoid costly mistakes.
Why Knowing How to Measure for a Sink Matters
Good measurements save time, money, and stress. When you know your sink opening size, cabinet width, bowl depth, and faucet clearance, you can shop with confidence instead of guessing. That matters whether you are replacing an old drop-in sink with the same style or switching to an undermount model with a new look.
For homeowners and DIYers, accurate measuring also helps prevent installation problems. A sink that is too wide may not fit inside the base cabinet. A bowl that is too deep can interfere with the drain, disposal, or stored items below. Tight spacing behind the sink can create faucet problems or splash issues. Careful measuring gives you a smoother install, a better fit, and a finished kitchen that works as well as it looks.
Tools and Materials You’ll Need
Before you begin, gather a few basic items so you can measure once and record everything clearly. You will need a tape measure with easy-to-read markings, a notepad or phone for notes, and a pencil or marker. A straightedge or ruler can help you confirm flat edges and opening dimensions. A flashlight is useful for seeing inside the sink base cabinet, especially around plumbing lines and the underside of the countertop. You may also want a level to check whether the counter or existing sink sits evenly, since uneven surfaces can affect fit. For extra convenience, a phone camera is helpful for taking photos of your current setup so you can compare dimensions later while shopping.
Step-by-Step Guide on How to Measure for New Kitchen Sink
Step 1 – Identify Your Current Sink Type
Start by looking closely at the sink you already have. Is it a drop-in sink with a visible rim resting on top of the counter, or an undermount sink attached below the countertop? This matters because the installation style affects what measurements you need and how much flexibility you have. A farmhouse or apron-front sink brings even more changes, since it may require cabinet modifications.
Run your hand along the sink edge and look underneath with a flashlight. You want to understand how the sink sits in the counter and where it attaches. Notice the feel of the rim, the seam line, and the mounting clips if you can see them. This first check gives you the basic layout of your project and helps you compare replacement options the right way.
Step 2 – Measure the Sink Opening
Next, measure the existing opening in your countertop. This is one of the most important dimensions because it often determines what size replacement sink will fit without cutting the counter again. Measure the opening from left to right at the widest point, then from front to back. Write both numbers down carefully.
If you are removing the old sink later, confirm whether the visible top dimensions match the actual cutout. For a drop-in model, the rim may hide part of the hole. Place your tape flat and steady, and check twice to avoid small errors. When people research how to measure for new kitchen sink, this is often the point where a half-inch mistake creates a major problem. Slow, careful measuring here saves a lot of trouble later.
Step 3 – Measure the Base Cabinet Width
Open the doors under your sink and measure the inside width of the base cabinet. This number is just as important as the countertop opening because the sink bowl must fit inside the cabinet box. Measure from the inner left wall to the inner right wall, not from the outside edges of the cabinet frame.
While you are there, look at the cabinet structure. Notice braces, corner supports, plumbing, or garbage disposal parts that may reduce usable space. Some sink product listings mention a minimum cabinet size, and this is the number they mean. If your cabinet feels crowded now, pay close attention to every inch. A sink may appear to fit the countertop opening but still be too large for the cabinet below, especially if the bowl is wide or deep.

Step 4 – Check Front-to-Back Clearance
Now measure the front-to-back space more carefully. Start at the back wall or backsplash area and measure to the front inside edge of the countertop. Then compare that space with your current sink and the new models you are considering. This step helps you avoid a sink that pushes too close to the faucet or too near the front edge of the counter.
Pay attention to how the area feels when you lean over it. You want enough room for a secure fit and comfortable use. A sink that sits too far forward can weaken the counter edge. One that sits too far back can crowd the faucet and make cleaning awkward. In many kitchens, this front-to-back check is where layout issues become obvious, especially when the countertop is narrower than it first appears.
Step 5 – Measure Sink Depth and Space Below
Sink depth affects both function and clearance. Measure from the top edge of the sink down to the bottom of the bowl if you still have the old sink in place. Then measure the open vertical space inside the cabinet from the underside of the counter down toward the bottom cabinet floor, noting where the drain pipe, trap, or disposal sits.
A deeper sink can feel great during daily use because it hides dishes and reduces splash. But it also lowers the drain outlet and may create plumbing conflicts. Reach into the cabinet and notice how tight the area feels around the drain assembly. If storage space is already limited, an extra-deep bowl may make it worse. This step helps you balance comfort above the counter with practical space below it.
Step 6 – Measure Faucet and Accessory Spacing
Your new sink has to work with your faucet setup, not just the hole in the counter. Measure the distance between the faucet and the back edge of the sink area. Also note the number of faucet holes in your current sink or countertop if that matters for your replacement. If you use a soap dispenser, filtered water tap, or side sprayer, include those locations too.
Stand at the sink and imagine using the space every day. You need room for the faucet handle to move, room behind the faucet for cleaning, and enough spread for any accessories. While learning how to measure for new kitchen sink, many people focus only on bowl size and forget these practical details. Yet faucet clearance often decides whether the finished setup feels smooth and spacious or cramped and awkward.
Step 7 – Account for Plumbing and Disposal Location
Look under the sink and map out where the plumbing sits. Measure the distance from the cabinet wall to the drain line if it is off-center. If you have a garbage disposal, note its width and how much room it takes below the bowl. These parts can affect what sink shapes and depths will work in your kitchen.
Use your flashlight and check slowly. Pipes can angle in ways that are easy to miss at first glance. A new sink with a deeper bowl or different drain position may force plumbing changes, which adds time and cost. You do not have to be a plumber to spot possible issues. You just need to note how everything lines up now so you can compare it with the sink specifications before you buy.
Step 8 – Confirm Manufacturer Specs Before Buying
Once you have your measurements, compare them with the specification sheet for the sink you want. Look for overall sink dimensions, bowl dimensions, minimum cabinet size, bowl depth, cutout size, and mounting style. Do not assume that two sinks labeled 33 inches are interchangeable. Product dimensions can vary more than you expect.
Read the technical details, not just the product title. If the sink is undermount, check the required cutout and reveal options. If it is a drop-in model, confirm the rim covers the existing opening well. This final review turns raw measurements into a smart purchase. By this stage, you are no longer guessing. You are matching real dimensions to real installation requirements, which is the safest way to choose a sink that fits cleanly.
Common Measuring Mistakes
One common mistake is measuring only the old sink and not the countertop cutout or cabinet interior. A sink can have outside dimensions that seem close enough, but the actual opening and the usable cabinet space may tell a different story. If you skip either of those checks, you increase the risk of ordering a sink that cannot be installed without extra work.
Another mistake is ignoring sink depth. Many people choose a deeper bowl for style or convenience, then discover it crowds the garbage disposal, lowers the drain too much, or reduces storage under the sink. Depth changes more than appearance. It affects plumbing, comfort, and available space below.
A third issue is forgetting about faucet clearance. The sink may fit the opening perfectly, yet the faucet handle may hit the backsplash or sit too tightly against the rear edge. This problem often appears in smaller kitchens with limited counter depth.
People also make errors by rounding measurements carelessly. Even a small difference can matter when you are working with stone counters, mounting clips, or tight cabinet walls. Measure twice and write everything down clearly.
Finally, some buyers rely only on product names and photos instead of full spec sheets. A sink described as standard size may still have a different bowl layout, drain placement, or minimum cabinet requirement than your current model.
Expert Tips
Take photos of every measurement point before you shop. A quick photo of the sink opening, cabinet interior, faucet area, and plumbing layout makes it much easier to compare options later. It also gives you a backup if your written notes are unclear.
If your measurements fall close to a product limit, choose caution over hope. Tight fits leave little room for mounting hardware, slight cabinet irregularities, or countertop variations. It is usually smarter to select a sink with a bit of breathing room than to force a near match.
Also, always think in terms of the full system. The sink, cabinet, countertop, faucet, drain, and disposal all need to work together. The best choice is not just the sink that fits the hole. It is the sink that fits your kitchen as a whole and supports easy daily use.

Frequently Asked Questions
Can I measure for a new sink without removing the old one?
Yes, in most cases you can gather the key measurements while the old sink is still installed. You can measure the visible top dimensions, the countertop opening as much as possible, the base cabinet width, the faucet spacing, and the plumbing below. If you need exact cutout details for a special install, removing the old sink may still help.
What is the most important measurement for a replacement sink?
There is not just one. The most important set includes the countertop opening, the inside width of the sink base cabinet, and the bowl depth. Those three measurements affect whether the sink fits above and below the counter. If one of them is off, the install can become much more difficult.
How much smaller should a sink be than the cabinet?
That depends on the sink design, but the manufacturer’s minimum cabinet size is your best guide. In general, the sink needs enough room to fit inside the cabinet with space for mounting and plumbing. Always use the interior cabinet width and compare it directly to the product specifications before buying.
Do I need different measurements for undermount and drop-in sinks?
Yes. A drop-in sink relies heavily on the top opening and rim coverage, while an undermount sink depends more on the cutout shape, mounting area, and edge finish under the countertop. The cabinet width and plumbing still matter for both, but the installation details and cutout needs are different.
Should I measure in inches only, or use fractions too?
Use the most exact measurements you can, including fractions if needed. Kitchen sinks and countertop cutouts often come down to small differences, and rounding too early can cause mistakes. Write dimensions clearly and keep them consistent. Precise notes help you compare sink specs with confidence and reduce surprises during installation.
Conclusion
Measuring for a new kitchen sink is not hard, but it does require patience and attention to detail. The goal is to look beyond the old sink itself and understand the full space around it. When you measure the opening, cabinet width, front-to-back clearance, sink depth, faucet area, and plumbing layout, you give yourself a clear path to the right replacement.
If you are careful with your notes and compare them to manufacturer specs, you can avoid the most common buying mistakes. You will also make installation easier, whether you handle the project yourself or hire a pro. The process becomes much less stressful once you know what matters and why.
Now that you understand how to measure for new kitchen sink, you can shop with more confidence and choose a model that fits your kitchen, your plumbing, and your daily routine. Good measurements lead to a better fit, a smoother install, and a sink you will be happy to use every day.

About
Nick Hall has spent the last seven years working at the intersection of kitchen design and home repair — first as a design assistant at a residential renovation studio, then as a freelance writer covering everything from cabinet layouts to leaky faucet fixes.
Her approach is simple: kitchens should look good and function well. That means she’s just as comfortable talking about color palettes and counter materials as she is walking readers through how to fix a wobbly cabinet hinge or troubleshoot a garbage disposal.
Nick has worked directly with homeowners on small-space kitchen makeovers, budget-conscious renovations, and the kind of everyday repairs that don’t need a contractor — just the right instructions. She writes from experience, not theory, and tests most of the fixes and tips she shares before publishing them.
When she’s not writing, Nick is usually hunting for mid-century kitchen finds at estate sales or helping friends plan their own renovations. She lives in Columbus, Ohio.