
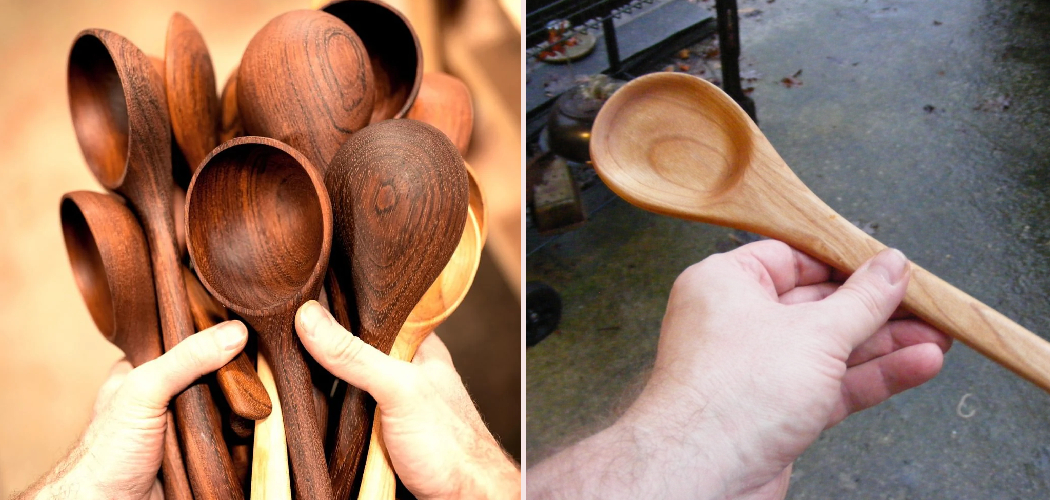
Making your own wooden cooking tools is one of the most satisfying beginner woodworking projects you can try. If you have ever wanted to learn how to make wooden kitchen utensils, you do not need a full shop or years of carving experience to get started. A simple spoon, spatula, or spreader can teach you how wood grain works, how hand tools feel, and how to shape something useful with your own hands.

This skill also gives you more control over size, shape, and finish than store-bought tools ever will. In this guide, you will learn the basic process, the right materials, and the small details that help first-time makers get good results.
Why Learn to Make Wooden Kitchen Utensils for Outdoor Use
For campers and outdoor beginners, wooden utensils make a lot of sense. They are quiet to pack, light in the hand, and gentle on metal pots, cast iron, and enamel cookware. A handmade spoon or spatula also feels warmer and more comfortable to use around a fire than cold metal tools.
Learning this skill can help you build a simple camp kitchen kit that fits the way you cook outside. You can shape a stirring spoon with a longer handle for deeper pots or carve a flat edge that works well on a griddle. It is also a practical way to repair or replace gear without relying on plastic items that crack or melt. For many beginners, this project becomes an easy first step into bushcraft, camp craft, and useful woodworking.
Tools and Materials You’ll Need
- A food-safe hardwood blank such as maple, cherry, beech, birch, or walnut
- Pencil for sketching your utensil shape
- Paper template or cardboard pattern
- Coping saw, band saw, or small hand saw for rough cutting
- Carving knife, hook knife, or whittling knife for shaping
- Rasp or wood file for refining curves and edges
- Sandpaper in several grits, such as 80, 120, 180, and 220
- Clamps or a bench hook to hold the wood steady
- Clean rag for wiping dust away
- Food-safe finish such as mineral oil or beeswax blend
- Safety gloves or thumb guard for carving
- Optional: rotary tool for faster shaping in tight areas
Step-by-Step Guide on Making Wooden Kitchen Utensils
Step 1 – Choose the Right Wood
Start with a close-grained hardwood that can handle regular kitchen use. Maple, cherry, birch, and beech are all beginner-friendly choices because they carve well and hold up to washing and stirring. Avoid softwoods like pine, which can dent easily and may leave resin behind. Also skip wood with cracks, knots in key stress areas, or strong open pores that can trap moisture.
Pick a blank that feels dry, solid, and straight. For a spoon or spatula, a piece around three-quarters of an inch thick is usually enough. Run your fingers over the grain and imagine how the tool will sit in your hand. If the grain follows the length of the utensil, you will get better strength and a cleaner final shape.
Step 2 – Sketch the Shape
A clear outline makes the whole project easier. Draw your utensil directly on the wood or use a paper template first. Keep the design simple for your first project. A flat spatula, tasting spoon, or camp stirrer is much easier than a deep serving spoon with a wide bowl.
Think about function while you draw. A cooking spoon needs a handle long enough to keep your hand away from heat, while a spatula needs a thin working edge and a strong neck. When people first learn how to make wooden kitchen utensils, they often draw shapes that look good on paper but feel awkward in real use. Keep the handle slightly wider where your palm rests, and round sharp corners before you cut anything.
Step 3 – Cut the Rough Blank
Once your outline is ready, cut just outside the pencil line. This leaves a little extra material for shaping later, which helps you correct small mistakes. Use a coping saw or hand saw if you want more control, or a band saw if you have one. Work slowly through curves so the wood does not split near narrow sections.

After the rough cut, you should have something that looks simple and blocky. That is exactly what you want. At this stage, focus on keeping the main form intact rather than chasing detail. If the handle seems a little thick or the spoon head looks too wide, do not worry yet. The next stages are where the utensil starts to feel smooth, balanced, and comfortable.
Step 4 – Shape the Main Form
Now begin refining the outline with a rasp, carving knife, or file. Round the handle first, then soften the shoulders where the handle meets the working end. Remove thin layers instead of taking deep bites. You want control, not speed. As the corners disappear, the utensil will start to feel more natural in your grip.
Pause often and hold it as if you were cooking with it. That quick hand test tells you more than your eyes can. Check for pressure points, bulky areas, and uneven thickness. If you are shaping a spoon, keep the neck strong enough to resist flexing. If you are making a spatula, taper the front edge gradually so it can slide under food without feeling flimsy.
Step 5 – Carve the Bowl or Working Edge
This is the part where the tool becomes truly useful. For a spoon, carve a shallow bowl with a hook knife or gouge, taking small curls of wood at a time. For a spatula or scraper, thin the leading edge and shape the face so it meets the pan smoothly. Let the grain guide your cuts. If the blade starts to chatter or tear, reverse direction and work with the wood instead of against it.
As you practice how to make wooden kitchen utensils, you will notice that tiny changes make a big difference. A spoon bowl that is too deep feels clumsy for stirring, while one that is too flat may not scoop well. A spatula edge that is too thin can chip. Aim for a balanced tool that looks simple, feels strong, and works easily.
Step 6 – Refine the Grip and Balance
A good wooden utensil should feel steady, not heavy or awkward. This step is all about comfort. Round the handle more fully, smooth the thumb area, and thin any bulky spots that make the tool feel stiff in the hand. You can even add a gentle flare at the end of the handle so it does not slip forward when you stir.
Balance matters more than many beginners expect. If the head feels too large, the utensil can feel top-heavy. If the handle is too thin, it may twist when you use it with thick foods like oatmeal or stew. Hold it with dry hands and then again with slightly damp hands. That simple test helps you catch grip problems before sanding hides the pencil marks.
Step 7 – Sand for a Smooth Finish
Sanding turns a carved object into a kitchen-ready tool. Start with a coarse grit to remove tool marks, then move through finer grits in order. Wipe the surface between stages so loose dust does not scratch the wood again. Pay close attention to the bowl, handle, and edges, where rough spots are easiest to feel during use.
Do not rush this part. A wooden spoon should glide across your skin without catching. Run your thumb over every curve, especially around the neck and working edge. If the grain lifts after sanding, lightly dampen the wood, let it dry, and sand again with a fine grit. That extra step helps the utensil stay smooth after its first wash and gives it a cleaner, softer feel.
Step 8 – Apply a Food-Safe Finish
Once the utensil is fully shaped and sanded, apply a food-safe finish to protect the surface. Mineral oil is the easiest choice for beginners because it soaks in well and is simple to refresh. A beeswax and oil blend adds a little more water resistance and leaves a soft glow on the wood. Rub the finish in with a clean cloth and let the wood absorb it fully.
The color usually deepens right away, and the grain becomes more visible. That moment is one of the best parts of the project. Let the utensil rest, then wipe away any extra oil so the surface does not feel sticky. One coat works, but two or three light coats usually give better results, especially for tools that will see frequent cooking and washing.
Step 9 – Test It in the Kitchen
Before you call the project done, use the utensil in a simple cooking task. Stir soup, flip a piece of bread in a pan, or scoop dry rice from a container. You will quickly notice whether the handle is too thick, the spoon bowl is too shallow, or the edge needs more taper. Real use reveals things shaping alone cannot.
This final test also builds confidence. Your first utensil does not need perfect lines or a polished maker’s mark to be a success. It only needs to work well and feel good in your hand. If you spot a small issue, go back and refine it. Many of the best handmade kitchen tools improve through one last round of use, adjustment, and finish.
Common Mistakes When Making Wooden Kitchen Utensils
One common mistake is choosing the wrong wood. Beginners often grab whatever scrap is nearby, but soft, oily, or cracked wood can lead to weak utensils that wear out fast or feel rough after washing. Food-safe hardwoods with tight grain are a much better choice for cooking tools.
Another mistake is cutting too close to the final line too early. When you rush the rough cut or carve away too much wood at once, it becomes hard to fix shape problems later. Leaving a little extra material gives you room to refine the form and improve balance as you go.
Many first-time makers also ignore grain direction. If you carve against the grain, the surface can tear and chip, especially around thin spoon bowls and spatula edges. Slowing down and changing the direction of your cut will usually solve that problem and leave a cleaner finish.
Poor sanding is another issue. If you skip grits or stop too soon, the utensil may look fine but still feel scratchy in use. Finally, some people apply too much finish or use the wrong product. Heavy coats can feel gummy, and non-food-safe finishes do not belong on kitchen tools. Light coats of mineral oil or a wax blend are safer and easier to maintain.

Expert Tips
Start with a simple design and make two or three of the same utensil instead of jumping between different shapes. Repetition teaches your hands faster than variety. By the second or third piece, you will notice cleaner cuts, better symmetry, and more confidence in your shaping.
Keep your tools sharp. A sharp knife or gouge is safer, easier to control, and leaves a smoother surface that needs less sanding. It also helps you read the grain instead of forcing cuts.
If you want your utensil to last, keep thickness where strength matters most. The neck between the handle and head often breaks first if carved too thin. Also, wash finished utensils by hand and re-oil them now and then. That simple care routine keeps the wood from drying out or cracking over time.
Frequently Asked Questions
What is the best wood for beginner wooden utensils?
Maple, cherry, beech, and birch are great options for beginners. They are strong, food-safe when properly finished, and easier to shape than many exotic woods. They also have tight grain, which helps the utensil feel smoother and hold up better with regular use in the kitchen.
Do I need power tools to make wooden kitchen utensils?
No, you can make a simple spoon or spatula with hand tools alone. A small saw, carving knife, rasp, and sandpaper are enough for many beginner projects. Power tools can speed things up, but they are not required if you work slowly and use a straightforward design.
What finish is safe for wooden cooking tools?
Food-grade mineral oil is the most common beginner-safe finish. It is easy to apply, simple to refresh, and widely used on cutting boards and wooden utensils. A beeswax and mineral oil blend also works well if you want a slightly richer feel and a bit more moisture resistance.
How do I clean handmade wooden utensils?
Wash them by hand with mild soap and warm water, then dry them right away. Do not leave them soaking in a sink, and do not put them in the dishwasher. Too much water and heat can cause swelling, cracking, or warping, especially if the utensil is thin in key areas.
How long does it take to make one utensil?
For a first project, expect two to four hours depending on the design and the tools you use. A simple spreader or flat spatula goes faster than a carved spoon bowl. As your technique improves, you will work more efficiently and spend less time correcting shape and sanding issues.
Conclusion
Learning how to make wooden kitchen utensils is a practical way to build woodworking skills while creating something you will actually use. You do not need fancy equipment, rare lumber, or years of experience. You just need good wood, a few simple tools, patience, and a willingness to shape the piece a little at a time.
Start with an easy project, such as a camp spoon or flat spatula, and pay attention to grain, balance, and comfort in the hand. Those details matter more than fancy decoration. If your first piece has a few uneven lines, that is fine. What matters is that it works, feels solid, and teaches you what to do better on the next one.
Make one utensil this week, test it while cooking, and adjust from there. That small first project can grow into a useful handmade set for your kitchen or camp kit.

About
Nick Hall has spent the last seven years working at the intersection of kitchen design and home repair — first as a design assistant at a residential renovation studio, then as a freelance writer covering everything from cabinet layouts to leaky faucet fixes.
Her approach is simple: kitchens should look good and function well. That means she’s just as comfortable talking about color palettes and counter materials as she is walking readers through how to fix a wobbly cabinet hinge or troubleshoot a garbage disposal.
Nick has worked directly with homeowners on small-space kitchen makeovers, budget-conscious renovations, and the kind of everyday repairs that don’t need a contractor — just the right instructions. She writes from experience, not theory, and tests most of the fixes and tips she shares before publishing them.
When she’s not writing, Nick is usually hunting for mid-century kitchen finds at estate sales or helping friends plan their own renovations. She lives in Columbus, Ohio.