
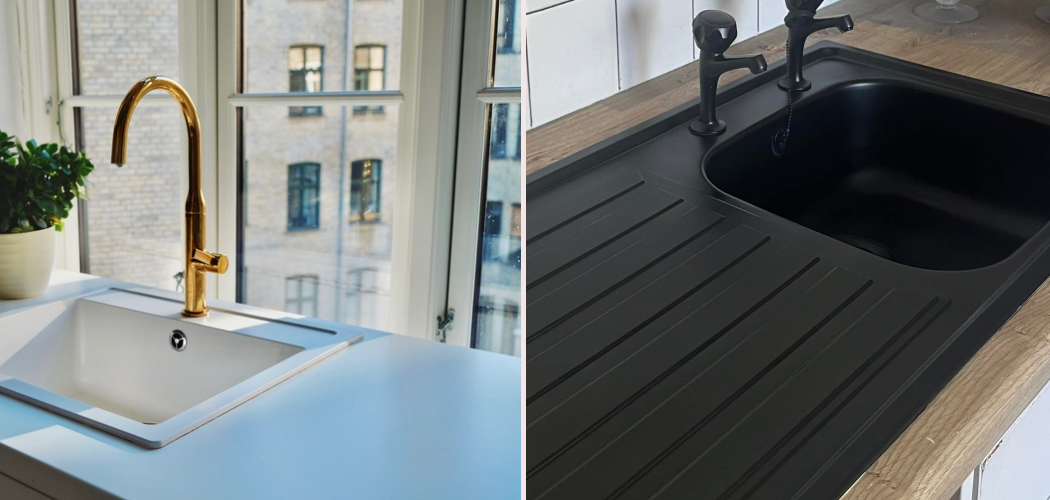
A worn sink can make your whole kitchen look tired, even if the rest of the space is clean and well kept. If you want a budget-friendly way to refresh it, learning how to repaint kitchen sink surfaces can save money and extend the life of what you already have. The job is very doable for a first-timer, but success depends on careful prep, the right coating, and enough drying time between stages.

You do not need advanced DIY skills to get a smooth, durable finish. You just need patience, a clean workspace, and a clear plan. This guide will walk you through each stage so you can repaint your sink with confidence.
Why Refurbishing Your Sink Matters
Your kitchen sink handles constant use. It faces water, soap, grease, food stains, and temperature changes every day. Over time, that wear can leave the surface dull, scratched, or discolored. Repainting gives the sink a cleaner, brighter look without the cost and mess of a full replacement.
For beginners, this project is a smart place to start. It teaches surface prep, safe coating methods, and proper curing time, all of which are useful skills for other home improvement jobs. A refinished sink can also help your kitchen feel more updated, especially if you are working with an older enamel, porcelain, or cast-iron model. When done well, the finish looks neat, feels smooth to the touch, and helps protect the sink from further wear.
Tools and Materials You’ll Need
Before you begin, gather everything in one place so you can work without stopping midway. Most sink refinishing issues happen when people rush or substitute the wrong product.
- Sink-safe epoxy paint or a sink refinishing kit
- Degreasing cleaner
- Non-abrasive sponge and clean rags
- Fine and medium grit sandpaper
- Tack cloth or lint-free microfiber cloth
- Painter’s tape
- Plastic sheeting or drop cloths
- Putty knife or scraper for old caulk
- Caulk remover, if needed
- Protective gloves
- Safety goggles
- Respirator or high-quality mask rated for paint fumes
- Small foam roller or high-density brush, depending on the coating
- Optional: portable fan for ventilation and faster air movement
Check the label on your coating before you start. Some products are made for porcelain or ceramic only, while others work on metal or composite sinks.
Step-by-Step Guide on How to Repaint Kitchen Sink
Step 1 – Clear the Area and Protect Nearby Surfaces
Start by removing everything from around the sink. Move soap bottles, dish racks, sponges, and any items stored under the basin. You want a clear space so you can focus and avoid bumping wet paint later.
Next, protect the countertop, faucet base, backsplash, and cabinet edges with painter’s tape and plastic sheeting. Cover the drain if your product instructions suggest it, or prepare to remove hardware if needed. Open windows and set up airflow before you open any cleaner or coating. A well-ventilated kitchen feels less stuffy, reduces strong odor buildup, and makes the whole job more comfortable. This first setup step may seem basic, but it prevents drips, smears, and cleanup headaches once you begin applying the finish.
Step 2 – Deep Clean the Sink Surface
A paintable surface must be fully clean. Even a thin film of grease or soap residue can keep the coating from bonding well. Spray or apply a strong degreasing cleaner across the sink, paying close attention to the bowl, drain edge, corners, and overflow area.
Scrub the surface thoroughly with a non-abrasive sponge. If the sink has mineral buildup, work slowly and repeat the cleaning until the surface feels squeaky clean instead of slick. Rinse with warm water and dry it with a lint-free cloth. Run your hand across the sink once it dries. If it feels oily, dusty, or waxy, clean it again. This stage is one of the biggest factors in a lasting result, because paint sticks best to a surface that is truly free of residue.
Step 3 – Remove Caulk and Repair Minor Damage
Old caulk can interfere with a clean finish, especially along the sink rim where coating lines need to look crisp. Use a putty knife or caulk remover to strip away loose, cracked, or moldy caulk. Work carefully so you do not scratch the surrounding countertop.

Inspect the sink closely after that. Look for chips, hairline cracks, rust spots, or worn patches where the original finish has thinned. Some refinishing kits include filler for small flaws. If yours does, smooth it into damaged spots and let it dry fully before sanding. Touch the repaired areas with your fingertips. They should feel level, not raised or rough. This is also a good checkpoint for anyone learning how to repaint kitchen sink surfaces for the first time, because visible damage almost always shows through if you skip repairs.
Step 4 – Sand for Better Adhesion
Sanding gives the new coating something to grip. You are not trying to remove the whole original finish. You are creating a lightly roughened surface that helps the paint bond evenly. Use medium grit sandpaper first on glossy or slick areas, then switch to a finer grit for a more even texture.
Work in steady, overlapping motions across the entire sink, including the sides and rim. Be extra careful around curves where coatings often fail first. Once you finish, the sink should look dull rather than shiny. Wipe away all dust with a tack cloth or damp microfiber cloth, then let the surface dry completely. If any powder remains, the finish may turn gritty. Take your time here, because a smooth-looking final coat begins with consistent sanding.
Step 5 – Apply Primer if Your Product Requires It
Some sink refinishing kits are all-in-one systems, while others need a separate primer. Read the product directions closely and follow them exactly. If primer is required, apply a thin, even coat with a foam roller or the recommended applicator.
Do not overload the tool. Thick coats tend to pool around the drain, corners, and lower curve of the basin. It is better to build coverage slowly than to fight drips later. As you work, look at the surface from different angles under good light. You want a wet, even film, not streaks or heavy patches. Let the primer dry for the full time listed on the label. Many beginners get impatient at this stage, but rushed layering often leads to peeling, bubbling, or a soft finish that never fully hardens.
Step 6 – Apply the First Coat of Sink Paint
Now you are ready for the main coating. Stir the paint slowly if the instructions call for it, but avoid whipping air into the product. Start at the upper edges of the sink and work your way inward and down. This helps you control drips before they settle into the basin.
Use long, even passes with your roller or brush. Overworking the paint can leave ridges, tacky spots, or visible texture. The first coat may look slightly thin, and that is normal. Focus on consistency rather than full coverage right away. Keep an eye on the smell and airflow in the room while you work. Good ventilation matters when learning how to repaint kitchen sink surfaces safely, especially with epoxy-based products. Once the coat is on, step back and let it level out without constant touching.
Step 7 – Let It Dry and Add Additional Coats
Dry time is part of the job, not a pause between the important parts. Let the first coat dry exactly as directed. If the label suggests a second coat within a certain window, plan around that timing. Touching the surface too early can leave fingerprints, drag marks, or dull patches.
When it is ready, apply the next coat just as carefully as the first. Thin, even layers usually perform better than one heavy layer. Watch the basin under bright light to catch missed spots along the curve near the drain. If your product allows a third coat, add it only if coverage still looks uneven. The surface should begin to look smoother and richer with each pass. By this point, the sink often takes on that fresh, glossy appearance that makes the project feel worth the effort.
Step 8 – Cure the Finish and Re-Caulk the Edges
Dry and cured do not mean the same thing. A sink may feel dry to the touch long before it is ready for water, dishes, or cleaning products. Follow the curing time on the product label closely. In many cases, you will need to wait at least a full day, and some coatings need longer for maximum hardness.
Keep the sink empty and avoid splashing water nearby during this period. Once the finish is fully cured, apply fresh caulk around the edges if you removed the old bead earlier. Smooth it neatly for a clean line between sink and countertop. The final result should feel hard, sleek, and even. When you run your hand gently over the surface, it should feel more like a factory finish than a temporary paint layer.
Common Mistakes
The most common mistake is poor surface preparation. Many first-time DIYers clean the sink quickly, assume it looks fine, and move on. But hidden grease, soap film, and mineral residue can stop the coating from bonding. Even a beautiful first coat may peel early if the surface underneath was not fully cleaned and sanded.
Another frequent issue is using the wrong product. Standard wall paint, furniture paint, or generic spray paint is not made for standing water and heavy daily use. A kitchen sink needs a coating designed for wet, hard-use surfaces, such as epoxy or a dedicated refinishing kit. Choosing the right formula matters just as much as applying it well.
People also rush the drying and curing stages. The sink may seem ready after a few hours, but early use can leave dents, scratches, or cloudy marks in the finish. Heavy coats cause problems too. Thick layers often drip, cure unevenly, and feel soft for longer than expected.
Finally, many beginners skip ventilation and safety gear. Refinishing products can have strong fumes, especially in a closed kitchen. Gloves, eye protection, and fresh air make the project safer and more comfortable from start to finish.
Expert Tips
Work when the room temperature is stable and moderate. Very cold air can slow curing, while high heat can make some coatings set too fast and leave roller marks. If possible, choose a low-humidity day so moisture does not interfere with drying.
Good lighting helps more than most people expect. Use bright overhead light or a portable work light to spot streaks, bubbles, and thin coverage before the paint sets. It is also smart to practice your application technique on cardboard or scrap material if you have never used epoxy before.
Finally, be gentle with the sink for the first week after curing. Avoid metal scrubbers, harsh chemicals, or dropping heavy pans into the basin. A careful start helps the new finish last longer and stay glossy.

Frequently Asked Questions
Can you repaint any type of kitchen sink?
Not every sink is a good candidate, but many are. Porcelain, enamel, cast iron, and some metal sinks can often be refinished successfully with the right product. Very flexible materials, heavily damaged surfaces, or sinks with major structural cracks may not hold a new finish well. Always check product compatibility before you begin.
How long does a repainted sink last?
A properly refinished sink can last for years, especially if you use a high-quality coating and allow full curing time. Lifespan depends on daily wear, cleaning habits, and how well the surface was prepared. Gentle cleaning and avoiding abrasive tools will help the finish stay smooth and bright longer.
Do I need to remove the sink before painting it?
In most cases, no. Many homeowners repaint the sink while it is still installed, which saves time and avoids plumbing work. You just need to mask nearby surfaces carefully and protect the countertop, faucet, and drain area. Removal is usually only needed for major repairs or full replacement.
What kind of paint should I use on a kitchen sink?
Use a sink refinishing product, epoxy coating, or a kit made for wet, high-contact surfaces. These coatings are designed to resist water, stains, and regular use better than standard household paint. Always read the label to confirm it is suitable for your sink material and for kitchen use.
How do I clean a newly painted sink?
Wait until the coating has fully cured according to the product instructions. After that, clean it with mild dish soap, a soft sponge, and warm water. Avoid bleach-heavy cleaners, scouring pads, and abrasive powders unless the manufacturer says they are safe. Gentle care helps prevent scratches and keeps the finish looking even.
Conclusion
Refreshing a worn sink does not have to mean tearing it out and buying a new one. With the right tools, careful prep, and enough patience, you can create a clean, durable finish that improves the look of your whole kitchen. The key steps are simple: clean deeply, repair flaws, sand well, use the proper coating, and respect the full drying and curing time.
If this is your first refinishing project, start slow and follow the product directions closely. Small details make the biggest difference. Smooth prep work, thin coats, and good ventilation will help you get a better result and avoid the most common problems.
Once you understand how to repaint kitchen sink surfaces the right way, the project feels far less intimidating. You can take an older sink that looks dull or stained and give it a fresh new life. Done with care, this is a practical upgrade that saves money and gives you a result you will notice every day.

About
Nick Hall has spent the last seven years working at the intersection of kitchen design and home repair — first as a design assistant at a residential renovation studio, then as a freelance writer covering everything from cabinet layouts to leaky faucet fixes.
Her approach is simple: kitchens should look good and function well. That means she’s just as comfortable talking about color palettes and counter materials as she is walking readers through how to fix a wobbly cabinet hinge or troubleshoot a garbage disposal.
Nick has worked directly with homeowners on small-space kitchen makeovers, budget-conscious renovations, and the kind of everyday repairs that don’t need a contractor — just the right instructions. She writes from experience, not theory, and tests most of the fixes and tips she shares before publishing them.
When she’s not writing, Nick is usually hunting for mid-century kitchen finds at estate sales or helping friends plan their own renovations. She lives in Columbus, Ohio.