
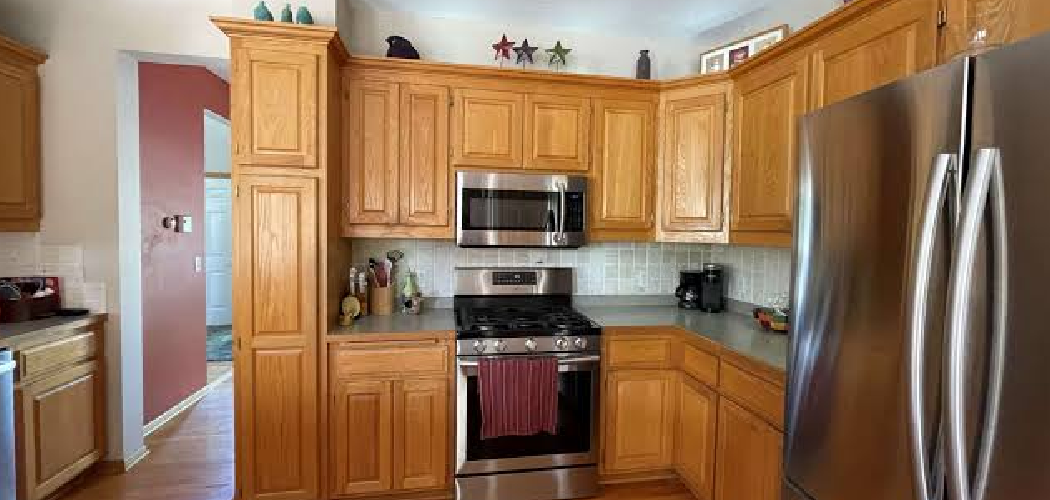
A full kitchen remodel costs a lot, but refinishing your cabinets can give the room a rich, updated look for a fraction of the price. If your cabinet boxes and doors are still solid, staining them is one of the best ways to bring out the natural beauty of the wood while hiding years of wear. Many first-time DIYers search for how to refinish kitchen cabinets with stain because they want a result that feels custom without hiring a pro.
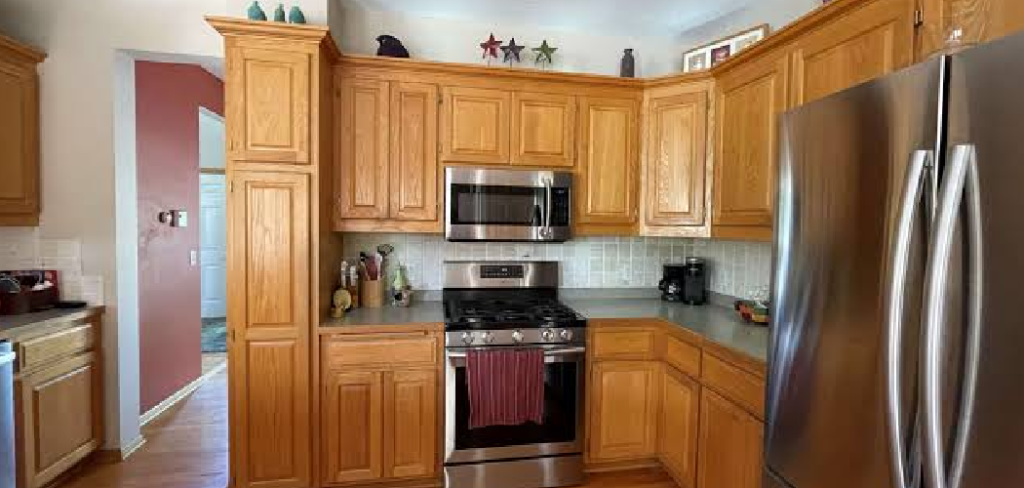
In this guide, you’ll learn what tools to gather, how to prep the surface, how to apply stain evenly, and how to protect the finish so it lasts.
Why Learning to Refinish Cabinets is Essential
Learning to refinish cabinets gives you more control over the look and cost of your kitchen upgrade. Instead of replacing solid wood cabinets that still have good structure, you can restore them with new color, fresh sheen, and a cleaner finish. That saves money, reduces waste, and lets you tailor the final style to your home.
It also helps you build practical DIY skills that transfer to other woodworking projects. Once you understand sanding, stain absorption, and topcoat protection, you can use the same process on vanities, shelves, trim, and furniture. The big benefit is simple: you get a dramatic visual change without the mess and cost of a full cabinet replacement.
Tools and Materials You’ll Need
Before you begin, gather everything in one place so you can move through the project without stopping halfway.
- Screwdriver or drill for removing doors, drawers, and hardware
- Painter’s tape and labels for marking each door and hinge location
- Drop cloths or rosin paper to protect floors and counters
- Degreaser or cabinet-safe cleaner
- Buckets, sponges, and clean lint-free rags
- Wood filler for dents, gouges, or old hardware holes
- Sandpaper in medium and fine grits or a sanding sponge
- Tack cloth or vacuum with brush attachment for dust removal
- Pre-stain wood conditioner if your wood species tends to blotch
- Oil-based or water-based wood stain in your chosen color
- Quality brush, foam applicator, or staining pads
- Clear protective topcoat such as polyurethane or polycrylic
- Safety glasses, gloves, and a respirator or mask
- Optional: a drying rack or painter’s pyramids for easier door finishing
Step-by-Step Guide on How to Refinish Kitchen Cabinets with Stain
Step 1 – Remove the doors, drawers, and hardware
Start by taking off each cabinet door, drawer front, handle, pull, and hinge. Work slowly and label every part as you go. A simple numbered system with masking tape saves a lot of frustration when it’s time to reassemble everything.
Set the doors on a protected work surface in a garage, workshop, or well-ventilated room. Keep screws and hardware in separate bags so pieces do not get mixed up. This step may feel basic, but good organization shapes the whole job. When every part has a clear place, the project moves faster and the finished kitchen goes back together with less stress.
Step 2 – Clean away grease and built-up residue
Kitchen cabinets collect more grime than most people realize. Years of cooking oil, fingerprints, smoke, and dust can leave a slick film that blocks stain and finish from bonding well. If you skip deep cleaning, even careful sanding may not fix the problem.
Use a strong degreaser or cabinet cleaner and scrub every surface, especially around handles and edges. Rinse with a damp cloth and let the wood dry fully before moving on. The surface should feel clean and dull, not tacky or shiny. This part is not glamorous, but it has a huge effect on how smooth and even the new finish will look.
Step 3 – Repair dents, scratches, and surface flaws
Once the cabinets are clean, inspect them in good light. Look for chipped corners, deep scratches, worn edges, and old hardware holes if you plan to switch handle placement. Small flaws become more visible after staining, so now is the time to fix them.
Apply stainable wood filler where needed and smooth it with a putty knife. Let it dry based on the product directions, then sand it flush with the surrounding surface. Run your hand over the repair spots to check for ridges. The goal is a flat, natural feel that blends into the wood. Care here helps your cabinets look refinished rather than simply covered up.
Step 4 – Sand the old finish down evenly
Sanding removes the worn top layer and opens the wood so it can accept stain more evenly. If you are learning how to refinish kitchen cabinets with stain, this is one of the most important stages to get right. Uneven sanding often leads to patchy color, shiny spots, or rough texture.
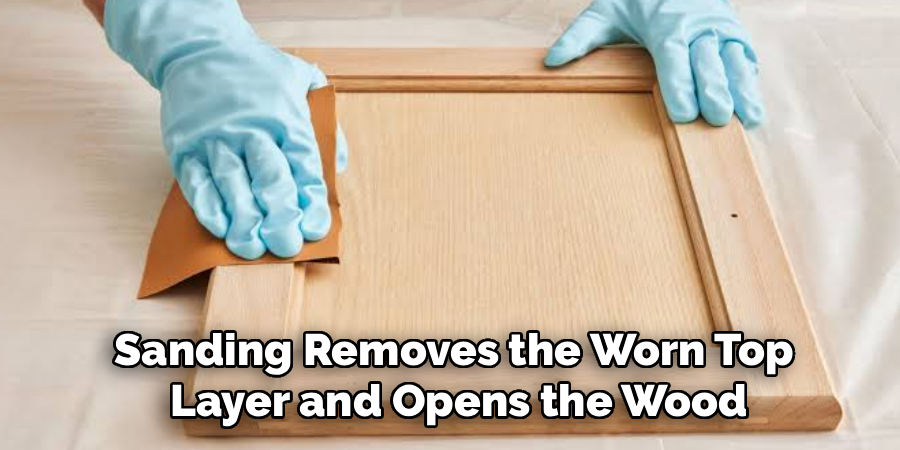
Use medium-grit sandpaper first to cut through the old finish, then switch to a finer grit to smooth the surface. Sand with the wood grain, not across it, and use a sanding sponge for grooves or profiles. You do not need to grind the wood down aggressively, but you do need to remove the failing finish and create a uniform surface. When done, the wood should look consistently dull and feel smooth to the touch.
Step 5 – Remove all dust before applying stain
After sanding, dust settles into corners, seams, and wood grain. If it stays there, it mixes into the stain and creates a gritty finish. This is one of the easiest problems to avoid, yet many beginners rush through it and regret it later.
Vacuum every panel, edge, and groove with a soft brush attachment. Then wipe everything with a tack cloth or a slightly damp lint-free rag. Pay extra attention to raised panel doors and inside corners, where fine dust tends to hide. Let the surface dry completely. Clean wood looks almost bare and feels silky, which is exactly what you want before you open the stain can.
Step 6 – Test stain and condition the wood if needed
Different wood species absorb stain in different ways. Oak often takes stain well, while maple, birch, and pine can absorb unevenly and leave dark blotches. That is why testing the color on the back of a door or a hidden area matters so much.
If your wood is prone to blotching, apply a pre-stain wood conditioner first. Follow the timing on the label, because stain usually needs to go on within a certain window. Then brush or wipe a small amount of stain onto your test area and check the color after wiping off the excess. Lighting changes the look, so examine it in both daylight and your kitchen light. This small test can save you from a whole room of cabinets that look too orange, too dark, or too muddy.
Step 7 – Apply the stain in thin, even coats
Now comes the part most people picture when they think about how to refinish kitchen cabinets with stain. Stir the stain well, but do not shake it, since shaking can create bubbles. Apply it with a brush, foam pad, or lint-free cloth, working in the direction of the grain.
Leave the stain on for the amount of time recommended by the manufacturer, then wipe away the extra with a clean rag. The longer it sits, the deeper the color usually becomes. Work one surface at a time so you can keep the finish consistent. As the stain goes on, the grain becomes richer and more defined, which is often the most satisfying moment in the project. Let each piece dry fully before deciding whether it needs a second coat.
Step 8 – Seal the finish with a protective topcoat
Stain adds color, but the clear topcoat adds durability. In a kitchen, cabinets face steam, grease, spills, and frequent touching, so this layer matters just as much as the stain itself. Without it, the finish can wear quickly, especially near sinks and around knobs.
Choose a compatible topcoat and apply thin coats with a good brush. Follow the grain and avoid overworking the finish once it starts to level out. Let each coat dry, then sand lightly with very fine sandpaper if the product directions call for it. Wipe away dust before adding another coat. A smooth topcoat should feel hard, even, and slightly slick when cured, not sticky or soft.

Step 9 – Reassemble carefully and let the finish cure
Once the doors and drawers are fully dry, reinstall hinges, pulls, and drawer fronts using the labels you made at the beginning. Move carefully to avoid scratching fresh surfaces. If you upgraded hardware, double-check hole spacing before drilling anything new.
Keep in mind that dry and cured are not the same thing. Cabinets may feel dry enough to handle in a day or two, but the finish can take much longer to fully harden. During that time, treat the surfaces gently. Avoid harsh cleaners, slamming doors, or stacking items against finished panels. This final patience pays off with a cleaner, longer-lasting result that looks polished instead of rushed.
Common Mistakes
One common mistake is skipping the cleaning stage or doing only a quick wipe-down. Kitchen grease can be invisible in some light, but it interferes with both stain and topcoat adhesion. If the surface still feels slick, the finish may look uneven or wear out early.
Another problem is sanding too little or too aggressively. Light sanding over a failing finish often leaves shiny patches that resist stain, while heavy sanding can damage edges, profiles, and veneer. The goal is consistency, not force. You want the old finish dulled and the wood smooth, not gouged.
Many beginners also choose a stain color based only on the can label. Wood species, old finish residue, and lighting all change the final color. Testing in a hidden area gives you a much clearer idea of the real result.
A fourth mistake is applying stain or topcoat too thickly. Thick coats dry slowly, trap dust, and can turn sticky or streaky. Thin, even coats are easier to control and usually look better.
Finally, people often rehang doors too soon. Even if the surface feels dry, the finish may still be soft underneath. If you rush, you can leave fingerprints, dents, or stuck edges. A little extra drying time protects all the work you just did.
Expert Tips
If you want a cleaner, more professional result, work on the doors flat whenever possible. That helps the stain settle evenly and reduces runs in the topcoat. Good lighting also makes a big difference. A portable work light helps you spot missed sanding marks, puddled stain, and dust before they become permanent.
Try to finish all visible cabinet fronts in the same session or under the same conditions. Temperature, humidity, and wiping time can affect color depth. Use fresh rags often, because overloaded cloths can smear stain rather than remove it evenly.
If your cabinets are made from a mix of solid wood and veneer, sand with extra care. Veneer is thin, and once you cut through it, the repair gets much harder. Gentle, steady prep always beats rushing.
Frequently Asked Questions
Can I stain cabinets without stripping them completely?
Yes, but it depends on the current finish and cabinet material. If the cabinets have a thick painted surface, stain will not soak in the way it should unless you remove that coating first. If they already have a worn clear finish over real wood, thorough cleaning and sanding may be enough to prepare them for staining.
What type of stain is best for kitchen cabinets?
Oil-based stain gives you a longer working time and often creates a rich, deep look, which helps beginners wipe it evenly. Water-based stain dries faster, has less odor, and cleans up more easily. The best choice depends on your comfort level, ventilation, and the topcoat you plan to use afterward.
Do all cabinets need wood conditioner before staining?
No, but some woods benefit from it more than others. Softwoods and tight-grain hardwoods like pine, birch, and maple can absorb stain unevenly and look blotchy. A wood conditioner helps control that absorption. If your cabinets are oak or another open-grain wood, you may not need it, but testing first is still smart.
How long does cabinet refinishing take?
Most DIY cabinet staining projects take several days, and some take a full week when drying and curing time are included. Prep work often takes longer than expected, especially cleaning, sanding, and labeling. The timeline also depends on weather, humidity, and how many doors and drawers your kitchen has.
How do I maintain stained kitchen cabinets after refinishing?
Use a soft cloth and a mild cleaner made for finished wood or sealed cabinetry. Avoid abrasive pads, harsh degreasers, and soaking the surface with water. Wipe spills quickly, especially near the sink and stove. Regular gentle cleaning helps preserve both the stain color and the protective clear coat.
Conclusion
Refinishing your kitchen cabinets with stain takes time, but it is one of the most rewarding ways to update your space without a full remodel. The process is straightforward when you break it into stages: remove and label the parts, clean away grease, repair flaws, sand evenly, test the stain, apply thin coats, and protect the finish with a durable topcoat. Each step builds on the last.
The biggest lesson is that prep work shapes the final result. When you slow down and give attention to cleaning, sanding, and drying time, your cabinets look richer, smoother, and more professional. That is what makes how to refinish kitchen cabinets with stain such a useful skill for homeowners who want a budget-friendly upgrade with lasting impact.
Start with one door if you feel unsure. Once you see the color deepen and the grain come alive, the rest of the project will feel much more manageable.

About
Nick Hall has spent the last seven years working at the intersection of kitchen design and home repair — first as a design assistant at a residential renovation studio, then as a freelance writer covering everything from cabinet layouts to leaky faucet fixes.
Her approach is simple: kitchens should look good and function well. That means she’s just as comfortable talking about color palettes and counter materials as she is walking readers through how to fix a wobbly cabinet hinge or troubleshoot a garbage disposal.
Nick has worked directly with homeowners on small-space kitchen makeovers, budget-conscious renovations, and the kind of everyday repairs that don’t need a contractor — just the right instructions. She writes from experience, not theory, and tests most of the fixes and tips she shares before publishing them.
When she’s not writing, Nick is usually hunting for mid-century kitchen finds at estate sales or helping friends plan their own renovations. She lives in Columbus, Ohio.