
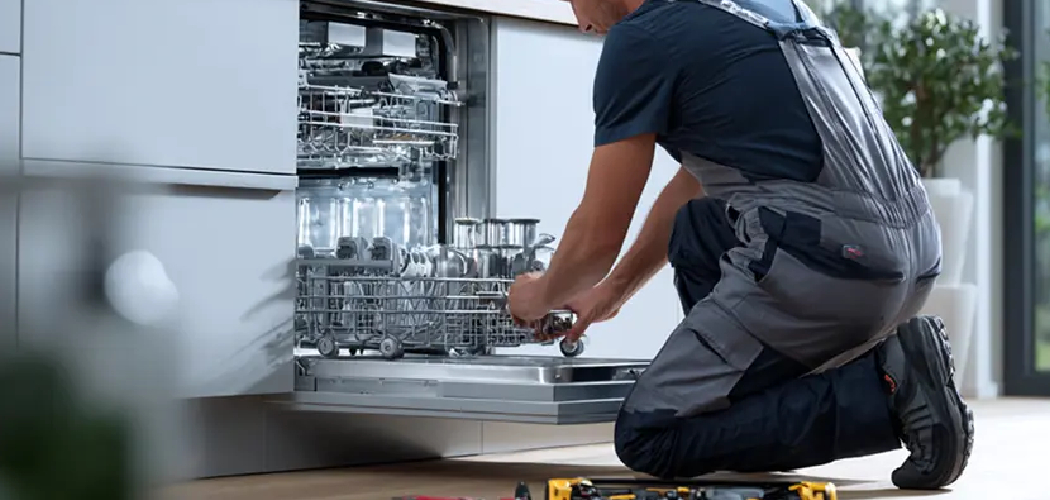
Standing in front of your dishwasher, pressing buttons, and getting nothing but a blinking light? You’re not alone. KitchenAid dishwashers are reliable workhorses, but their controls can feel a little puzzling the first time around.
Maybe you just moved into a new home, replaced an old unit, or you’re simply trying to break a frustrating habit of washing dishes by hand. Whatever brought you here, getting that wash cycle going is easier than it looks.
Learning how to turn on a KitchenAid dishwasher takes only a few minutes once you know where to look and which steps matter most.
In this guide, I’ll walk you through every step, from checking the power supply to starting the right cycle, so your dishes come out sparkling clean without any guesswork.

Why Learning to Turn On a KitchenAid Dishwasher Matters
A dishwasher only helps you if you can actually get it running. When the buttons don’t respond or the cycle won’t start, that pile of dirty plates just keeps growing.
Knowing the proper startup steps saves you time, frustration, and the headache of calling for help over something simple. You also avoid running half-empty or improper cycles that waste water and energy.
This skill matters even more if you live in an RV, camper, or cabin. Compact dishwashers in mobile kitchens and outdoor living setups often have slightly different controls, and a confident grasp of the basics carries over to nearly any model.
For everyday home users and DIY beginners, mastering this one small task gives you real control over your kitchen. It’s quick to learn, easy to remember, and it keeps your daily routine running smoothly.
Tools and Materials You’ll Need
You won’t need much to get your dishwasher started. Most of these items are already sitting in your kitchen.
- Dishwasher detergent (pods, gel, or powder)
- Rinse aid for spot-free drying
- A clean, dry cloth for wiping the door seal
- Your KitchenAid owner’s manual or model number
- A flashlight to inspect the control panel and latch
- Dishwasher-safe dishes, properly scraped
One optional convenience item: a packet of dishwasher cleaner tablets. Running a cleaning cycle now and then keeps your machine fresh and helps every wash cycle perform at its best, though you can skip it for a basic startup.
Have these ready before you begin, and the whole process will feel smooth and stress-free.
Step-by-Step Guide on How to Turn On a KitchenAid Dishwasher
Step 1 – Confirm the power supply
Before anything else, make sure your dishwasher actually has power. It sounds obvious, but a tripped breaker or loose plug is one of the most common reasons a unit won’t respond.
Check your home’s electrical panel and look for a switched-off breaker labeled for the kitchen or dishwasher. Flip it back if needed.
Many dishwashers also connect to a wall switch near the sink, so glance there too. If you hear a faint hum or see the control panel light up when you touch it, power is flowing.
Learning how to turn on a KitchenAid dishwasher starts right here, because nothing else works until electricity reaches the machine. A quick check now saves you plenty of confusion later.
Step 2 – Load your dishes properly
Now open the door and load your dishes the right way. Good loading helps water and detergent reach every surface.
Place plates and bowls facing the center, angled slightly downward so they drain. Keep tall items along the sides and back where they won’t block the spray arms.
Put cups, glasses, and small bowls on the top rack, tilted to avoid trapping water. Knives and forks go in the basket, handles up for safety, though long utensils lay flat on the top rack.
Scrape off large food scraps first, but skip the heavy pre-rinsing. Listen for the spray arms spinning freely when you give them a gentle nudge. Crowding them is a recipe for cloudy, half-clean dishes.
Step 3 – Add detergent and rinse aid
Next, fill the detergent dispenser. You’ll find it on the inside of the door, usually a small covered compartment with a latch.
Add a pod, a measured scoop of powder, or a squeeze of gel, then close the lid until it clicks. Don’t overfill it, since too much detergent leaves a filmy residue on your glasses.
If your dishes come out spotty or wet, check the rinse aid reservoir nearby. Pour rinse aid in until it reaches the fill line, then wipe up any drips with a cloth.
The faint clean scent of fresh detergent tells you you’re ready. This small step makes a big difference in how spotless and dry your dishes turn out.
Step 4 – Wipe and inspect the door latch
Take a moment to check the door seal and latch before closing up. A clean, secure latch is essential for the cycle to begin.
Run your cloth along the rubber gasket to clear away crumbs, grease, or old food bits. A dirty seal can let water leak or stop the door from closing fully.
Look at the latch mechanism itself. It should look intact, with no cracks or stuck pieces. When the door isn’t fully latched, your dishwasher simply won’t start, no matter how many buttons you press.
Press the door shut and listen for a satisfying click. That sound confirms the door latch has engaged and the machine knows it’s safe to fill with water.

Step 5 – Find and read the control panel
Now get familiar with your control panel. KitchenAid makes two main styles, and knowing yours helps everything click into place.
A front control panel sits on the outside of the door, visible even when closed. You’ll see buttons for cycles, options, and a clear power button or start button right there.
A top control panel hides along the top edge of the door, visible only when the door is open. These models often need you to select your settings first, then close the door to begin.
Shine your flashlight if the labels are faint. Take note of buttons for normal cycle, heavy cycle, and quick wash, plus options like heated dry and delay start.
Step 6 – Select your wash cycle
With your settings in view, pick the wash cycle that fits your load. The right choice saves water and gets better results.
Choose the normal cycle for everyday mixed loads of plates, glasses, and silverware. Reach for the heavy cycle when you’ve got baked-on grease, pots, or pans that need extra muscle.
In a hurry? The quick wash handles lightly soiled dishes in a fraction of the time. Press the button for your chosen cycle, and watch the indicator light glow to confirm your pick.
You’ll usually hear a soft beep as each selection registers. Matching the cycle to your dishes means cleaner results and less wasted energy, so take a second to choose wisely.
Step 7 – Choose optional settings
Before you start, decide if any extra options suit your load. These small touches tailor the wash to your needs.
Tap heated dry if you want your dishes warm and ready to put away right after the cycle. Skip it to save energy and let dishes air dry instead.
Need the load finished later? Press delay start and set the hours, perfect for running the machine overnight or during off-peak times. Just confirm you haven’t accidentally set a delay when you want it to run now.
Some models include sanitize or extra rinse options too. Each setting lights up when active, so glance over your choices once more. A quick review here prevents surprises when you open the door.
Step 8 – Press start and close the door
Here’s where it all comes together. Press the start button, and pay close attention to what happens next.
On a front control model, the cycle usually begins right away with a quiet whir and the sound of water filling. You’re done.
On a top control model, the steps reverse slightly. You’ll press start, then close the door firmly within a few seconds, or the cycle won’t begin. Listen for that latch click followed by the gentle hum of water.
This timing trips up a lot of beginners, so don’t rush off too soon. Once you understand how to turn on a KitchenAid dishwasher this way, the rhythm becomes second nature, and you’ll start cycles without a second thought.
Step 9 – Confirm the cycle is running
Finally, make sure your dishwasher is truly working. A few quick checks give you peace of mind.
Listen for the steady sound of water spraying and the spray arms turning inside. You might feel a faint warmth on the door as the water heats up.
Glance at the control panel for a running indicator or an estimated time display counting down. Many models show a small light that stays on until the clean light appears at the end.
If nothing happens, don’t panic. Check that the door is fully latched, the child lock isn’t on, and you didn’t set a delay. A quick reset, by switching the breaker off and on, often clears a stubborn glitch.

Critical Mistakes When Turning On a KitchenAid Dishwasher
A few small slip-ups stop the cycle before it ever begins, so let’s cover the ones that catch people off guard most often.
The biggest mistake is not closing the door firmly enough. The door latch must click fully, or the machine simply won’t start. On top control models, people also forget to shut the door within a few seconds of pressing start, which quietly cancels the cycle.
Another common error is overlooking the child lock. This handy feature freezes the control panel to keep little fingers safe, but it also blocks you if you forget it’s on. Hold the lock button for a few seconds to release it.
Many beginners accidentally set a delay start, then wonder why nothing happens. Always double-check that no delay timer is counting down when you want an immediate wash.
Folks also overload the racks or block the spray arms, which leads to poorly cleaned dishes even when the cycle runs fine. Finally, some forget to check the power button or a tripped breaker entirely. A quick power check first saves a lot of needless frustration.
Expert Tips
A little know-how keeps your dishwasher running smoothly every time. Always scrape your dishes instead of heavy rinsing, since modern detergents work best with a bit of food residue to grab onto.
Keep your rinse aid topped up for spot-free, faster-drying glasses. It’s an easy habit that makes a noticeable difference.
If your control panel ever freezes or acts strange, try a simple reset first. Flip the dishwasher’s breaker off, wait a full minute, then flip it back on. This clears most minor electronic hiccups.
Run a cleaning cycle with dishwasher tablets once a month to prevent buildup in the spray arms and filter. And learn your specific model, since top control and front control panels behave a bit differently. A few minutes with your manual pays off for years.
Frequently Asked Questions
Why won’t my KitchenAid dishwasher turn on?
Several simple issues usually cause this. Check these first:
- The door isn’t fully latched, so the cycle can’t begin
- The child lock is active and freezing the control panel
- A breaker tripped, cutting power to the unit
- A delay start timer is counting down quietly
Run through each one, and you’ll often find the fix in under a minute without any tools.
How do I start a top control KitchenAid dishwasher?
Top control models hide their buttons along the top edge of the door. Open the door, select your wash cycle and any options like heated dry, then press the start button. Now close the door firmly within a few seconds, listening for the latch click. The cycle begins once the door seals. If it doesn’t start, reopen and repeat, closing a bit faster this time.
What does the child lock do and how do I turn it off?
The child lock disables your control panel so curious kids can’t start or stop a cycle. When it’s on, your buttons won’t respond, which can feel like a malfunction. To turn it off, press and hold the dedicated lock button, often marked with a lock icon, for about three to five seconds. You’ll usually hear a beep and see the lock light switch off.
Which wash cycle should I choose?
Match the cycle to your load for the best results. Use the normal cycle for everyday mixed dishes. Pick the heavy cycle for greasy pots, pans, and baked-on messes. Choose quick wash for lightly soiled items you need fast. Add heated dry if you want dishes ready to put away immediately. Matching the cycle saves water, energy, and time while keeping everything spotless.
How do I reset my KitchenAid dishwasher?
A reset clears most minor glitches and frozen panels. The simplest method is a power cycle:
- Turn off the dishwasher’s breaker at your electrical panel
- Wait a full minute for the electronics to clear
- Flip the breaker back on
Then try starting a cycle again. If problems continue after a reset, check the door latch and consult your owner’s manual for model-specific steps.
Conclusion
Getting your dishwasher running really comes down to a handful of simple steps, and now you’ve got every one of them.
Let’s recap the main takeaways. Start by confirming the power supply, then load your dishes so the spray arms turn freely. Add detergent and rinse aid, wipe the seal, and make sure the door latch clicks shut. From there, find your control panel style, pick the right wash cycle, choose any options like heated dry or delay start, and press start.
Remember the key quirk: top control models need you to close the door within a few seconds of pressing start. And if nothing happens, check the child lock, the breaker, and any delay timer before worrying.
Now that you know how to turn on a KitchenAid dishwasher, you can handle this task with total confidence, no technician required. That’s one more kitchen skill firmly in your hands.
So load up those dishes, press start, and enjoy the quiet hum of a job well done. Your sparkling clean plates are just one cycle away.

About
Nick Hall has spent the last seven years working at the intersection of kitchen design and home repair — first as a design assistant at a residential renovation studio, then as a freelance writer covering everything from cabinet layouts to leaky faucet fixes.
Her approach is simple: kitchens should look good and function well. That means she’s just as comfortable talking about color palettes and counter materials as she is walking readers through how to fix a wobbly cabinet hinge or troubleshoot a garbage disposal.
Nick has worked directly with homeowners on small-space kitchen makeovers, budget-conscious renovations, and the kind of everyday repairs that don’t need a contractor — just the right instructions. She writes from experience, not theory, and tests most of the fixes and tips she shares before publishing them.
When she’s not writing, Nick is usually hunting for mid-century kitchen finds at estate sales or helping friends plan their own renovations. She lives in Columbus, Ohio.