
Reaching for your favorite aluminum pan only to find your induction cooktop ignoring it? You’re not alone. Many home cooks discover that their trusty aluminum cookware just sits there cold, no matter how high they crank the dial. The reason is simple: induction needs magnetism to work, and plain aluminum has none.
But don’t pack that pan away just yet. Learning how to use aluminum on induction stove setups is easier than you think, once you understand the trick behind it. With the right workaround, your aluminum cookware can heat up beautifully and cook your meals just as well as any pricey induction pan.
This guide shows you exactly how to make aluminum work safely on an induction stove, step by step, so you can cook with confidence.
Why Learning to Use Aluminum on an Induction Stove Matters
If you camp, travel by RV, or escape to a cabin, you know space and gear are precious. Portable induction cooktops have become a favorite for outdoor cooks because they’re light, fast, and energy efficient. But many beginners pack aluminum cookware, then panic when nothing heats up.
Knowing this skill means you don’t have to buy a whole new set of pans for your backup kitchen. You can keep using the lightweight aluminum gear you already own, which saves money and luggage room.
For RV cooking and off-grid cabins, that flexibility matters. A single converter disk can turn your portable cooktop into a workhorse that handles any pan you bring.
Mastering this trick gives you reliable, efficient meals wherever you set up, without leaving your trusted cookware behind.
Tools and Materials You’ll Need
Before you start cooking, gather a few simple items. Most cost very little, and they make all the difference between a cold pan and a hot meal. Having everything ready keeps your first attempt smooth and stress-free.
Here’s what to grab:
- Your aluminum pan (flat-bottom works best)
- An induction converter disk, also called a stainless steel interface plate
- A small kitchen magnet for a quick cookware test
- Oven mitts or pot holders for safe handling
- A heat-resistant trivet to set hot cookware on
- Mild dish soap and a soft sponge for cleanup afterward
- Optional: An induction-ready aluminum pan with a bonded steel base, for the easiest long-term solution
Set these out near your portable cooktop before you begin. A little prep now means you won’t scramble mid-cook while your meal waits.
Step-by-Step Guide on How to Use Aluminum on Induction Stove
Step 1 – Test Your Pan With a Magnet
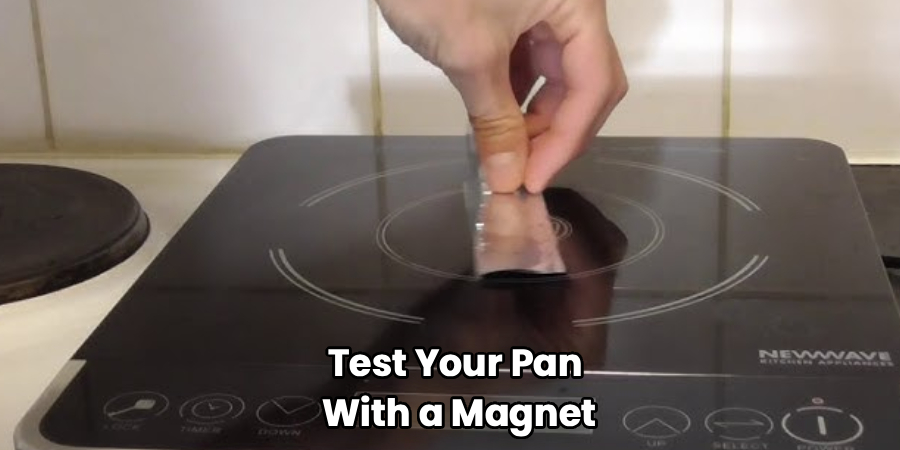
Start with a quick cookware test before anything else. Grab a small kitchen magnet and press it against the bottom of your aluminum pan.
If it doesn’t stick, that’s your answer. Pure aluminum has no magnetic base, so your induction cooktop won’t recognize it on its own. Don’t worry, this is completely normal and easy to work around.
This simple check saves you time and frustration. You’ll know instantly whether you need a converter disk or whether your pan already has a bonded steel base.
Run your fingers over the pan bottom too. A truly flat, smooth surface transfers heat better and sits more securely. Knowing exactly what you’re working with sets you up for a safe, successful cook from the very first try.
Step 2 – Choose Your Workaround
Now decide how you’ll make that aluminum cookware work. You have two solid paths, and both are beginner-friendly.
The first option is an induction converter disk. This flat metal plate sits between your pan and the cooktop surface. The induction field heats the disk, and the disk passes that warmth straight to your pan.
The second option is swapping to an induction-ready aluminum pan with a bonded steel base. These pans look like regular aluminum but have a magnetic layer built into the bottom.
Figuring out how to use aluminum on induction stove tops really comes down to this choice. For occasional cooking, the disk works great. For everyday use, a bonded pan saves you a step every single time.
Step 3 – Inspect the Converter Disk
If you’re going with the converter disk, give it a quick once-over first. Lay it flat on a clean counter and check both sides.
You want a smooth, flat surface with no warping or deep dents. A bent disk wobbles, creating poor contact and uneven heat transfer. That leads to annoying hot spots and slow cooking.
Wipe away any dust or grease with a soft cloth. Even a thin film can affect how well the disk grips the cooktop and your pan.
Check the handle too, if yours has one. A loose handle makes the disk awkward and risky to move once it’s hot. A clean, sturdy disk gives you steady, reliable heat and far better pan stability throughout your meal.
Step 4 – Place the Disk on the Cooktop
Set the converter disk in the center of your induction burner. Line it up carefully so it sits flat against the cooktop surface with full contact.
Centering matters for burner compatibility. If the disk sits off to one side, the induction field won’t engage it properly, and your heating will suffer.
Make sure the cooktop is clean and dry first. Any crumbs or water droplets underneath can affect how steadily the disk rests.
Listen for the cooktop to recognize the disk once you power it on. Most units give a gentle hum or beep when they detect a compatible surface. That sound tells you the magnetic connection is working and the disk is starting to warm, ready for your aluminum pan to go on top.
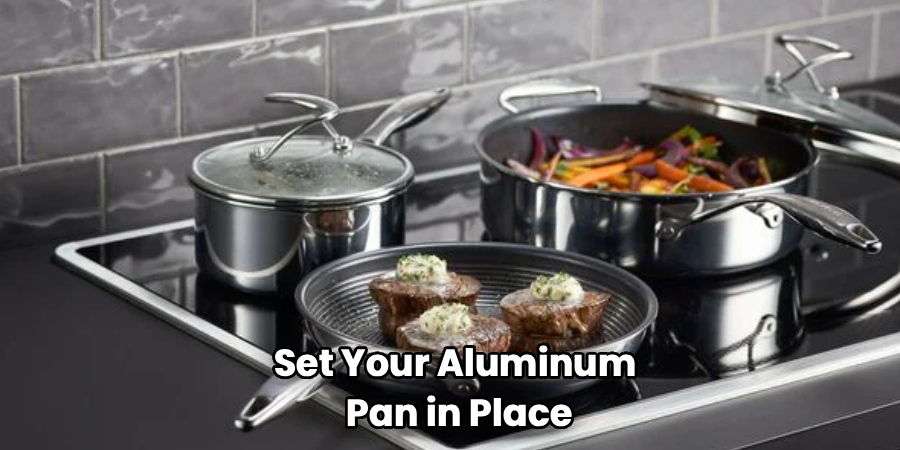
Step 5 – Set Your Aluminum Pan in Place
Now lower your aluminum pan gently onto the heated disk. Center it so the flat-bottom pan rests evenly across the whole surface.
Press down lightly to confirm a snug, stable fit. Good contact between the pan and disk means smooth, even heat with fewer hot spots. A wobbly pan cooks unevenly and feels unsafe.
You might notice the pan warming within a minute or two. Hold your hand a few inches above it and feel that gentle rise in heat. That’s the converter disk doing its job.
Keep the handle turned inward, away from the edge, so you don’t bump it. With your pan settled and warming nicely, you’re ready to start cooking your meal just like you always have.
Step 6 – Adjust Heat Slowly
Resist the urge to blast the heat right away. Start on a low to medium setting and let the disk and pan warm together gradually.
Aluminum heats fast once it gets going, so a gentle start prevents scorching. Give it a minute, then nudge the temperature up as needed.
Watch and listen as the pan responds. A little shimmer of oil or a soft sizzle tells you it’s ready for food. These small sensory cues guide you better than the dial alone.
Because the heat travels through the disk first, expect a slight delay compared to direct induction cooking. That’s perfectly normal. Patience here keeps your cooking even and protects your cookware from sudden, uneven temperature spikes that cause sticking or burning.
Step 7 – Cook and Monitor Carefully
With everything warmed up, cook just as you normally would. Stir, flip, and simmer your food while keeping an eye on how the pan behaves.
The converter disk spreads heat fairly evenly, but stay alert for hot spots, especially in the center. Moving food around now and then keeps everything cooking uniformly.
Notice how the pan holds steady warmth, perfect for simmering sauces or frying eggs. The setup gives you that familiar control once it’s running.
Always use oven mitts when adjusting the pan or disk, since both get genuinely hot. Mastering how to use aluminum on induction stove cooking means respecting that heat and handling everything with care. Keep your trivet nearby so you have a safe landing spot the moment your dish is done.
Step 8 – Cool Down and Clean Up
When your meal’s ready, power off the cooktop and lift the pan onto your heat-resistant trivet. Remember, the converter disk stays scorching hot for several minutes.
Let the disk cool fully on the cooktop before you touch it. Rushing this step risks a nasty burn, so give it time.
Once everything’s cool, clean your aluminum pan with mild dish soap and a soft sponge. Wipe the converter disk down too, removing any splatters or grease.
Dry both pieces completely before storing them. A little moisture left behind can cause spots or dullness over time.
Store the disk flat so it stays warp-free for next time. With a clean, well-kept setup, you’re ready to cook again whenever the craving strikes.
Critical Mistakes When Using Aluminum on an Induction Stove
Even simple methods trip people up, so let’s cover the common errors. The biggest mistake is expecting a plain aluminum pan to work directly on induction. Without a magnetic base, the cooktop simply won’t engage it, no matter how high you turn the heat. Always run the magnet test first and use a converter disk or a bonded-base pan.
Another frequent slip is cranking the heat to maximum right away. Aluminum conducts heat quickly, and a screaming-hot start scorches food and warps thin pans. Build the temperature up gradually instead.
People also forget that the converter disk gets dangerously hot and stays that way long after cooking. Grabbing it bare-handed leads to painful burns, so keep oven mitts close and let it cool fully.
Using a warped or dented disk causes trouble too. A bumpy surface creates poor contact, uneven heat transfer, and frustrating hot spots. Inspect it before each use.
Finally, placing the pan or disk off-center confuses the cooktop’s sensors and ruins burner compatibility. Center everything carefully so the induction field engages properly and your meal cooks evenly.
Expert Tips
Want smoother results? Match your converter disk size to your pan as closely as possible. A disk that’s too small leaves the pan edges cool, while a perfectly sized one delivers even warmth across the whole base.
For frequent cooking, invest in an induction-ready aluminum pan with a bonded steel base. It skips the disk entirely and gives you faster, more responsive heat with better energy efficiency.
Keep a heat-resistant trivet within arm’s reach every time. You’ll always have a safe spot to set that hot disk down without scrambling.
When camping or in an RV, pack one quality disk rather than several pans. It works with all your aluminum cookware and saves precious storage space.
Finally, clean the cooktop surface before each use. Even tiny crumbs affect contact and pan stability.
Frequently Asked Questions
Can I use any aluminum pan directly on an induction stove?
No, not directly. Pure aluminum lacks the magnetic base that induction cooktops need to generate heat, so the burner won’t recognize it. Test your pan with a magnet first. If the magnet doesn’t stick, you’ll need a workaround. Use an induction converter disk under the pan, or switch to an induction-ready aluminum pan that has a bonded steel base built into the bottom.
What is an induction converter disk?
An induction converter disk, sometimes called a stainless steel interface plate, is a flat metal plate that sits between your pan and the cooktop. The induction field heats the disk, and the disk transfers that warmth to your aluminum pan. It’s an affordable, beginner-friendly solution that lets you keep using non-magnetic cookware without buying a whole new set of pans.
Is it safe to use aluminum cookware this way?
Yes, when you follow basic precautions. Use a flat, undamaged converter disk for steady heat transfer and good pan stability. Always handle the hot disk with oven mitts, since it stays scorching long after cooking. Set hot cookware on a heat-resistant trivet, and never leave a heating pan unattended. Done carefully, this method is completely safe and reliable.
Why does my aluminum pan heat unevenly?
Uneven heating usually comes down to a few fixable causes:
- A warped or dented converter disk creating poor contact
- A pan that isn’t flat-bottomed sitting unevenly
- The disk or pan placed off-center on the burner
Center everything carefully, inspect your disk for damage, and choose a flat pan. These small adjustments smooth out hot spots and give you steadier, more even cooking results.
Will a converter disk work on my portable induction cooktop?
Yes, converter disks work well on most portable cooktops, making them perfect for RV cooking, cabins, and camping. Just check that your disk fits within the cooktop’s marked cooking zone and matches your pan size. Center it properly so the burner detects it. This combination keeps your gear lightweight while letting you cook with any aluminum cookware you already own.
Conclusion
Cooking with aluminum on an induction stove isn’t impossible, it just takes the right approach. Since plain aluminum has no magnetic base, your cooktop won’t heat it directly. But with a converter disk or an induction-ready pan with a bonded steel base, your favorite aluminum cookware works beautifully again.
Remember the essentials: test your pan with a magnet, inspect your disk for warping, center everything on the cooktop, and raise the heat slowly. Handle that hot disk with care, and always keep a trivet nearby for safe landings.
This skill pays off everywhere, from your home kitchen to a portable cooktop in your RV or cabin. You save money, pack lighter, and keep using the gear you already trust.
Now that you know how to use aluminum on induction stove setups the safe and easy way, give it a try with your next meal. You’ll enjoy reliable, even cooking and the quiet satisfaction of solving the problem yourself, no new cookware or technician required.

About
Nick Hall has spent the last seven years working at the intersection of kitchen design and home repair — first as a design assistant at a residential renovation studio, then as a freelance writer covering everything from cabinet layouts to leaky faucet fixes.
Her approach is simple: kitchens should look good and function well. That means she’s just as comfortable talking about color palettes and counter materials as she is walking readers through how to fix a wobbly cabinet hinge or troubleshoot a garbage disposal.
Nick has worked directly with homeowners on small-space kitchen makeovers, budget-conscious renovations, and the kind of everyday repairs that don’t need a contractor — just the right instructions. She writes from experience, not theory, and tests most of the fixes and tips she shares before publishing them.
When she’s not writing, Nick is usually hunting for mid-century kitchen finds at estate sales or helping friends plan their own renovations. She lives in Columbus, Ohio.