
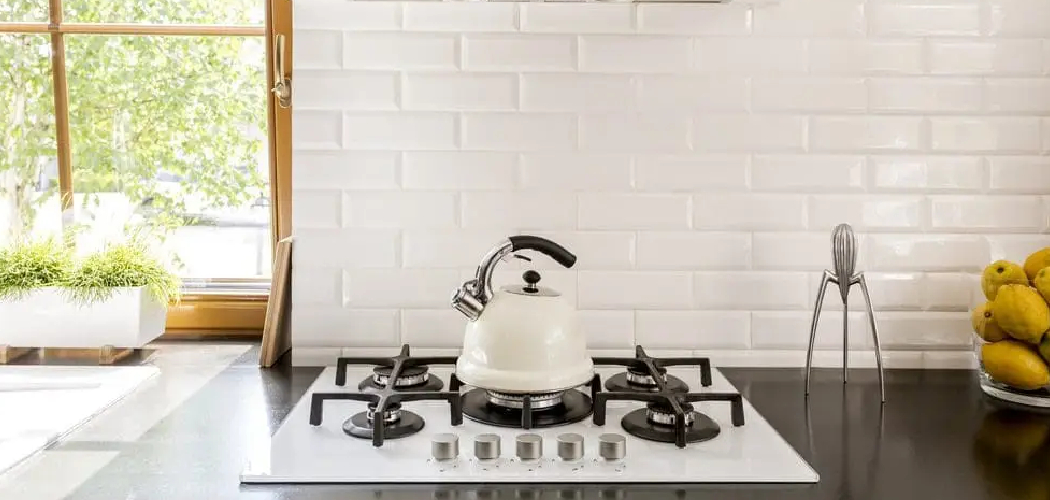
Learning how to remove kitchen backsplash can save you money, give your kitchen a fresh start, and help you prepare the wall for a new look. If your old tile feels dated, cracked, or simply not your style anymore, taking it down is a project you can handle with patience and the right setup. The work can be dusty and a little noisy, but it does not have to be confusing.
For beginners, the key is to move slowly and protect the wall, countertop, and outlets before you begin. Once you understand the order of the job, each part becomes much easier to manage. This guide will show you how to remove an old backsplash safely, cleanly, and with less stress.
Why Remove an Old Kitchen Backsplash Yourself
Removing a backsplash yourself gives you more control over your kitchen update. You can work on your own schedule, spend less on labor, and see what shape the wall is in before you install new tile, beadboard, or a painted finish. For many homeowners, that first layer of demolition is the step that makes a remodel feel real.
This skill is also useful beyond a full renovation. You may need to remove loose tile after water damage, replace a small section behind the stove, or prep the wall for a more modern design. When you know how the materials are attached and how to take them off carefully, you reduce the risk of deep drywall damage. That means fewer repairs and a smoother path to the next stage of your project.
Tools & Materials You’ll Need
- Safety glasses to protect your eyes from sharp tile chips and dust
- Work gloves for grip and hand protection
- Dust mask or respirator, especially if grout and drywall dust will be heavy
- Utility knife with a sharp blade
- Putty knife or painter’s tool for prying at edges
- Small pry bar for stubborn sections
- Hammer for tapping tools behind tile
- Oscillating multi-tool with grout blade, if grout lines are hard to open
- Drop cloths or rosin paper to protect floors and counters
- Painter’s tape to secure coverings and mark areas
- Screwdriver to remove outlet and switch covers
- Trash bucket or heavy-duty contractor bags for debris
- Shop vacuum for cleanup
- Optional: heat gun to soften adhesive on some peel-and-stick or mastic-backed materials
Step-by-Step Guide on How to Remove Kitchen Backsplash
Step 1 – Protect the Workspace
Start by clearing everything off the countertop. Move small appliances, dish soap, decor, and anything breakable out of the room if possible. Then cover the counters, stove, and nearby floor with drop cloths or thick protective paper. Tape the edges so the covering stays in place while you work.
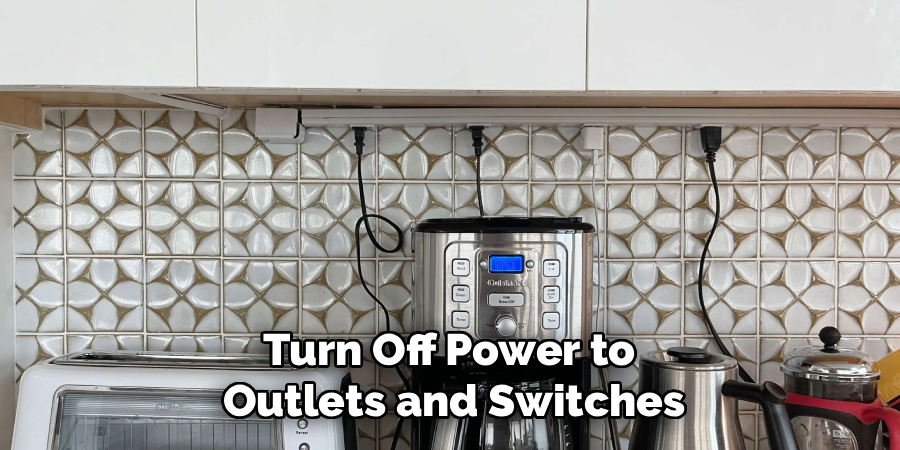
Turn off power to outlets and switches in the backsplash area at the breaker. Remove the cover plates and keep the screws in a cup so they do not disappear. This part matters more than many beginners expect. Tile shards can fly, dust gets everywhere, and one careless hit near a live outlet can create a dangerous situation. A well-protected workspace lets you focus on clean removal instead of worrying about damage around you.
Step 2 – Inspect the Backsplash and Find a Starting Point
Take a close look at the material before you pry at anything. Ceramic tile, glass tile, peel-and-stick panels, and stone can all come off differently. Check the edges under upper cabinets, near the end of the counter, or along a seam where the tile meets painted drywall. These areas often give you the easiest entry point.
Run your hand lightly across the surface and look for loose pieces, cracked grout, or hollow-sounding spots. Those weak areas can help you start without forcing a tool into a solid section. If you are learning how to remove kitchen backsplash for the first time, choosing the right starting point makes the rest of the project much easier. It can mean the difference between a controlled removal and a wall that tears apart too quickly.
Step 3 – Cut Caulk and Loosen the Grout Lines
Use a sharp utility knife to slice through caulk where the backsplash meets the countertop, cabinets, and side walls. This helps separate the tile from nearby surfaces so you do not pull paint, trim, or cabinet finish off with it. Move the blade slowly and stay tight to the seam.
Next, loosen grout around your starting tile. An oscillating tool with a grout blade works fast, but a manual grout saw can work too if you want more control. You do not need to remove every grout line in the whole backsplash. Focus on the first few tiles so you can isolate one piece at a time. You will hear a dry scraping sound as the grout breaks free. That sound is a good sign that the tile is starting to separate cleanly.
Step 4 – Pry Off the First Tile Carefully
Slip a putty knife or painter’s tool behind the edge of the first tile. If needed, tap it gently with a hammer to get the blade in place. Start with light pressure. The goal is to lift the tile, not punch through the drywall behind it.
Some tiles pop off with a sharp crack. Others fight back and break into pieces. That is normal. Keep your face turned slightly away and wear eye protection because chips can snap off fast. Once the first tile comes free, you create space for your tools and a better angle for the next ones. This first removal is usually the slowest part of the job. After that, you can settle into a rhythm and work more confidently across the wall.
Step 5 – Remove the Remaining Tile in Small Sections
Now continue across the backsplash one tile or small section at a time. Work from the exposed edge you created rather than jumping around the wall. Keeping a steady direction helps reduce random tears in the drywall paper and makes cleanup simpler. If a tile resists, loosen more grout before you pry harder.
As you move, listen and feel for changes in resistance. Some areas will release with a brittle snap, while others stay rubbery because of thick mastic adhesive. That change tells you what is happening behind the surface. When people ask how to remove kitchen backsplash without destroying the wall, this is the most important habit: be patient. Force causes damage. Steady pressure, shallow tool angles, and small sections give you much better results.
Step 6 – Handle Adhesive and Backing Left on the Wall
After the tile is off, the wall may still look rough. You might see dried mastic, thinset ridges, paper facing, or bits of mesh backing. Scrape these areas with a putty knife held at a low angle. If the adhesive is soft or tacky, a heat gun on low setting can help loosen it, but use care around painted surfaces and outlets.
Do not chase perfection right away. Your goal is to remove loose material and flatten the wall enough to assess repairs. If chunks of drywall facing come up, stop digging at them. Over-scraping often makes a small patch turn into a large repair. The wall may sound scratchy and gritty under the blade, and that is expected. Clean passes and a light touch are better than aggressive scraping.
Step 7 – Repair the Drywall Surface
Most backsplash removal jobs leave at least minor wall damage. Small gouges, torn paper, and shallow divots are common, especially if the tile was set directly on drywall. Use joint compound to fill low spots and smooth damaged areas. If the paper is badly torn, seal it first with a problem-surface primer so bubbling does not happen later.
Apply compound in thin coats rather than one heavy layer. Let each coat dry fully, then sand lightly with fine-grit sandpaper. The wall should feel mostly flat when you run your hand across it. You are creating a stable base for whatever comes next. New tile, peel-and-stick panels, and paint all look better when the surface underneath is solid, smooth, and free of loose material.
Step 8 – Clean, Inspect, and Prepare for the Next Finish
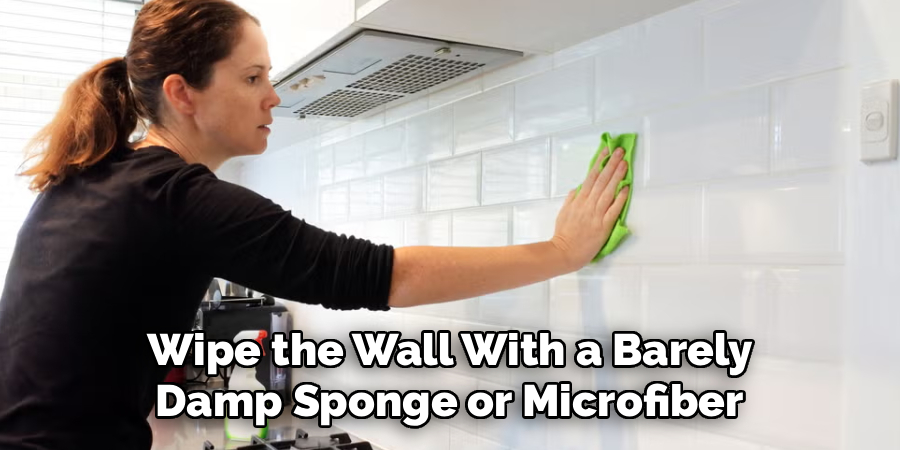
Finish by vacuuming every surface, including the countertop edges, outlet boxes, and floor seams where sharp fragments collect. Wipe the wall with a barely damp sponge or microfiber cloth to remove fine dust. Once the dust settles, inspect the entire area in good light. Uneven spots often show up more clearly after cleanup.
Check that the wall is dry, smooth, and free of grease before you move on to installation or paint. Reinstall outlet covers only after any wall repair or finishing work is complete. At this stage, the loud part of the project is over, and the kitchen starts to feel calm again. You have cleared away the old surface, handled the mess, and created a clean base for a fresh backsplash that fits your space better.
Common Mistakes to Avoid
One common mistake is rushing into demolition without protecting the counters, outlet areas, and nearby finishes. Even one dropped tile can chip a countertop edge or scratch a stainless steel surface. Good prep takes extra time, but it prevents damage that is far more frustrating to fix later.
Another mistake is prying too hard before cutting the caulk and loosening the grout. When the tile is still locked to the surrounding surfaces, force travels into the drywall and tears away larger sections than necessary. Many beginners think a stronger pull will save time, but it usually creates more patching.
Some homeowners also underestimate the adhesive left behind. They remove the tile and assume the wall is ready, only to discover ridges, paper tears, and uneven areas after the new finish goes up. Skipping wall repair leads to poor results, especially with glossy tile or painted surfaces that show every flaw.
A final mistake is ignoring safety gear. Dust, sharp shards, and hidden electrical hazards are part of backsplash removal. Glasses, gloves, and shutting off power are not optional details. They are basic steps that keep the project safe and manageable.
Expert Tips
If you want cleaner results, work during daylight or use a bright task light aimed across the wall. Side lighting makes raised adhesive, torn drywall paper, and small cracks easier to spot. That helps you fix problems before they show through the new finish.
Keep two tools in your hand rotation: a stiff putty knife for lifting and a wider drywall knife for scraping. Switching between them gives you better control than trying to do everything with one pry tool. It also reduces the chance of digging too deep into the wall.
If you plan to install new tile, do not judge the wall only by sight. Run your hand across it after sanding. Your fingers will catch ridges and dips your eyes miss. A smooth wall now makes the next phase much easier.
Frequently Asked Questions
Can I remove a kitchen backsplash without damaging drywall?
Yes, but some minor drywall damage is common. Your best chance of keeping the wall in good shape is to cut the caulk, loosen grout lines, and pry slowly from an edge or weak spot. The more patient you are, the less likely you are to tear the drywall paper or pull off chunks of the wall surface.
What is the easiest type of backsplash to remove?
Peel-and-stick backsplash panels are often the easiest, especially if the adhesive has not fully hardened over many years. Standard ceramic tile can also come off fairly well if grout lines are loosened first. Natural stone and heavily mortared tile are usually harder because they bond more aggressively to the wall.
Do I need to replace drywall after removing backsplash?
Not always. Many walls only need patching, sanding, and primer before they are ready for a new finish. If the drywall has deep gouges, widespread paper tears, mold, or soft spots from water damage, replacing part of the wall may be the better choice for a clean and lasting result.
Should I remove the countertop before removing the backsplash?
In most cases, no. You can usually leave the countertop in place and protect it with thick covering and tape. The key is cutting the caulk line carefully where the backsplash meets the counter. That separates the materials and reduces the chance of pulling or chipping the counter edge during removal.
How long does backsplash removal usually take?
A small backsplash can take a few hours, while a larger or more stubborn one may take most of a day. The timeline depends on the tile type, adhesive strength, grout condition, and how much wall repair is needed afterward. Cleanup and patching often take nearly as long as the removal itself, so plan for both.
Conclusion
Removing an old backsplash is messy, but it is very manageable when you break it into clear steps. Protect the space, shut off power, open the seams, remove tile carefully, and repair the wall before moving on. That slower approach gives you better control and leaves you with a smoother surface for whatever finish comes next.
If you have been putting off this project because it seemed too technical, now you know the process is mostly about patience, prep, and tool control. You do not need advanced renovation experience to get solid results. You just need to work methodically and resist the urge to force stubborn sections.
Once you understand how to remove kitchen backsplash, you can update your kitchen with more confidence and avoid many of the mistakes that trip up first-time DIYers. Take your time, protect the wall, and trust the process. A cleaner, fresher kitchen starts with getting the old surface off the right way.

About
Nick Hall has spent the last seven years working at the intersection of kitchen design and home repair — first as a design assistant at a residential renovation studio, then as a freelance writer covering everything from cabinet layouts to leaky faucet fixes.
Her approach is simple: kitchens should look good and function well. That means she’s just as comfortable talking about color palettes and counter materials as she is walking readers through how to fix a wobbly cabinet hinge or troubleshoot a garbage disposal.
Nick has worked directly with homeowners on small-space kitchen makeovers, budget-conscious renovations, and the kind of everyday repairs that don’t need a contractor — just the right instructions. She writes from experience, not theory, and tests most of the fixes and tips she shares before publishing them.
When she’s not writing, Nick is usually hunting for mid-century kitchen finds at estate sales or helping friends plan their own renovations. She lives in Columbus, Ohio.