
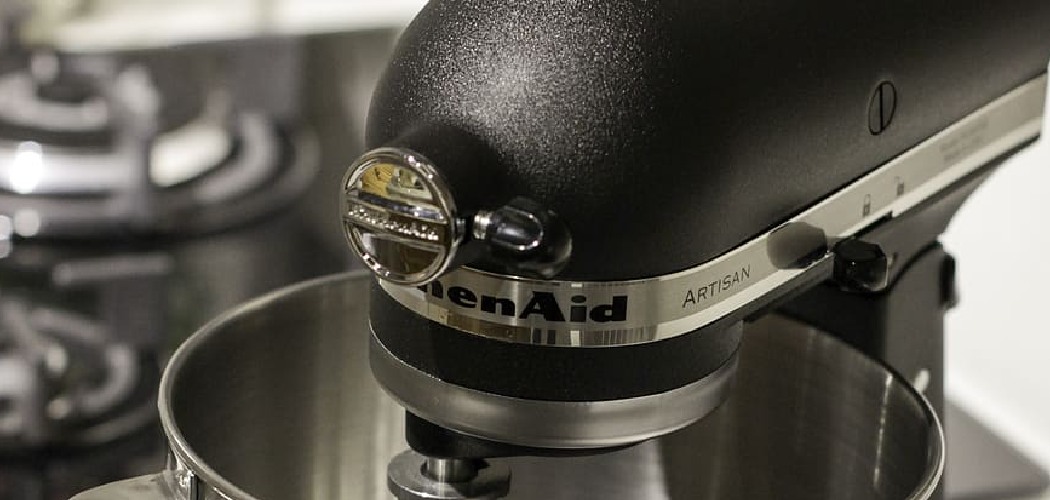
Has your trusty stand mixer started sounding rougher than usual, or maybe leaving little smears of dark grease on your dough? Those are signs it’s craving some attention, and you don’t need a repair shop to fix it.
Learning how to oil kitchen aid mixer units is a skill any home baker can pick up in an afternoon. With a few simple tools and a little patience, you can open the gear case, refresh the old lubricant, and get that smooth, quiet hum back.
It feels good to care for a machine you rely on so often. The savings beat a service call too, and the confidence you gain is priceless.
This guide walks you through the whole process step by step, so even a complete beginner can service their mixer safely and confidently.
Why Oiling Your KitchenAid Mixer Matters
Fresh grease keeps your mixer running the way it should. Over time, the factory lubricant inside the gear case thickens, dries, or separates, and that strains the motor and gears every time you bake.
For home cooks who knead bread or whip stiff batters, smooth gears mean less wear and a longer life for the machine. A well-greased transmission housing also runs quieter, so you won’t wince at grinding noises.
Baking enthusiasts gain reliability right when it counts, with no surprise breakdowns mid-recipe. Busy households save money too, since regular mixer maintenance costs far less than a replacement.
And for DIY beginners, this project builds real confidence. Once you’ve opened the housing and refreshed the grease yourself, plenty of other small repairs suddenly feel within reach.
Tools and Materials You’ll Need
The best part is how little you actually need for this job. Most of these items already live in a kitchen drawer or a basic toolbox.
Start with the right screwdrivers, usually a flathead and a Phillips, to remove the housing screws and trim band. Keep a clean cloth or two nearby for wiping away old, separated lubricant, along with some paper towels for the messier parts.
You’ll need food-grade mixer grease, which is the single most important supply here. Never substitute random oils, since only food-safe grease belongs near anything that touches your food. A plastic scraper or an old spoon helps you scoop and spread it evenly.
One optional but handy item is a small parts tray, which keeps every screw and washer organized so nothing rolls off the bench and disappears.
Read More: How to Regrout Kitchen Counter Tile
Step-by-Step Guide on How To Oil Kitchen Aid Mixer
Step 1 – Unplug and Set Up Your Workspace
Safety comes first, every single time. Pull the plug from the wall before you touch a single screw, since a mixer that springs to life mid-repair can ruin your day fast.
Clear a wide, flat surface and lay down an old towel or some newspaper. Grease smears easily, and you’ll thank yourself for protecting the table.
Gather your tools within arm’s reach so you’re not hunting for a screwdriver mid-job. Good light matters too, so position a lamp or work near a bright window.
Take a moment to look over the whole machine. Notice how the motor head feels and sounds before you open it, since that gives you a baseline to compare against once you’ve finished servicing it.
Step 2 – Remove the Trim Band and Housing Screws
With everything unplugged, you can open the mixer up. Tilt the motor head back and look for the screws holding the housing together.
Some models hide a screw under the trim band, that decorative strip wrapping the base of the head. Gently pry it loose with a flathead, working slowly so you don’t bend or crack it.
Set each screw in your parts tray as you remove it. They’re small and love to roll away, so keep them corralled.
Loosen the housing screws evenly rather than yanking one out all at once. As the cover begins to lift, you’ll feel a slight resistance from the old grease inside. Take your time and let the housing separate naturally without forcing anything.
Step 3 – Open the Gear Case
Now you reach the heart of the machine. Carefully lift away the housing cover to expose the gear case and transmission housing inside.
Expect a strong smell of old lubricant and a coating of thick, darkened grease on the gears. That’s completely normal for a well-used mixer.
Move slowly here. Some models have a gasket between the cover and the case, so peel it gently and keep it intact for reassembly.
Look at the worm gear and the planetary mechanism as they come into view. Take a quick photo with your phone before you disturb anything. That picture becomes a handy reference later, showing you exactly where each part sits and how the gears line up when it’s time to close everything back up.
Step 4 – Inspect the Old Grease and Gears
Before you clean anything, study what you see. Fresh grease looks smooth and creamy, while old grease often turns dark, gritty, or watery.
If you spot a thin liquid pooling separately from the thicker paste, that’s grease separation, a common sign the lubricant has broken down. It can leak out and stain your food, so it definitely needs replacing.
Run your eye over the gears themselves. Healthy teeth look even and smooth, while chipped, flattened, or shiny worn spots warn of trouble.
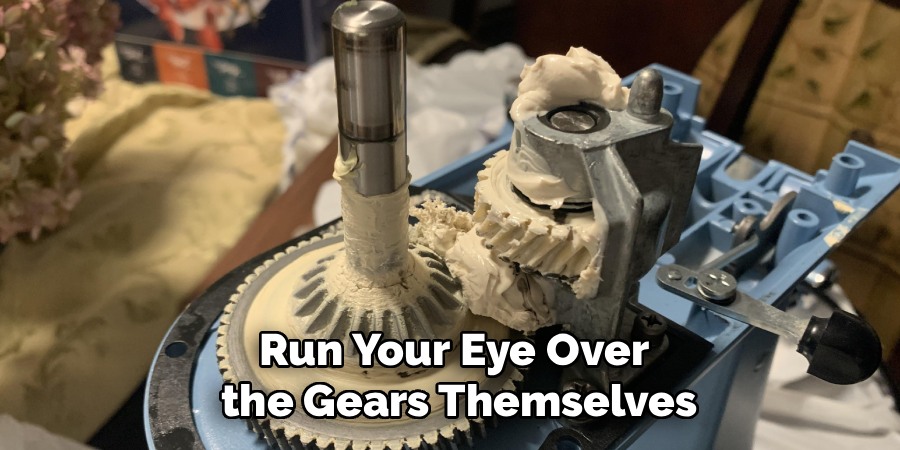
Wiggle the gears gently with a gloved finger and feel for roughness. Most mixers just need fresh grease, but catching a worn worm gear now saves you from a bigger breakdown later. Note anything that looks off before moving on.
Step 5 – Clean Out the Old Lubricant
Time to clear away the mess. Use a clean cloth and a plastic scraper to wipe out the old, separated lubricant from the gear case.
Work patiently and reach into the corners and around the gear teeth. The old grease clings stubbornly, so a little elbow grease helps loosen it.
Avoid harsh solvents that could damage seals or strip protective coatings. A dry cloth and gentle scraping do the job for most of the buildup.
You’ll notice the gears looking brighter and cleaner as you go. Don’t dunk parts in water or soak the housing, since trapped moisture invites rust. Aim for clean and dry, not spotless. Once the worst of the gunk is gone, you’ve got a fresh surface ready for new grease.
Step 6 – Apply Fresh Food-Grade Grease
Here’s the satisfying part. Scoop a generous amount of food-grade mixer grease and pack it into the gear case where the old lubricant used to sit.
Spread it evenly across the gear teeth and the worm gear using your scraper or a clean spoon. You want full coverage without overfilling, since too much grease can ooze out later.
Knowing how to oil kitchen aid mixer gears properly means coating every meshing surface so they glide smoothly. Turn the gears slowly by hand to work the grease into the contact points.
The fresh paste feels cool and smooth, a world apart from the dried-out crust you removed. Aim for a thick, even layer that covers the moving parts without burying the whole cavity in excess.
Step 7 – Reassemble the Housing
With everything freshly greased, you can close it back up. Reposition the gasket first if your model uses one, making sure it sits flush in its groove.
Line up the housing cover using that photo you took earlier as a guide. Lower it gently so you don’t smear grease onto the threads or pinch any wiring.
Start each screw by hand to avoid cross-threading, then tighten them with your screwdriver. Work in a crisscross pattern, snugging each one a little at a time for even pressure.
Don’t overtighten, since stripped screws or a cracked housing are easy to cause and hard to fix. Finish by pressing the trim band back into place until it clicks. The mixer should look whole again, just like before you started.
Step 8 – Test the Speed Control and Listen
The moment of truth has arrived. Plug the mixer back in, but keep your hands clear of the moving parts.
Start on the lowest setting and let it run for a few seconds. Slowly move the speed lever up through the range, listening closely at each step.
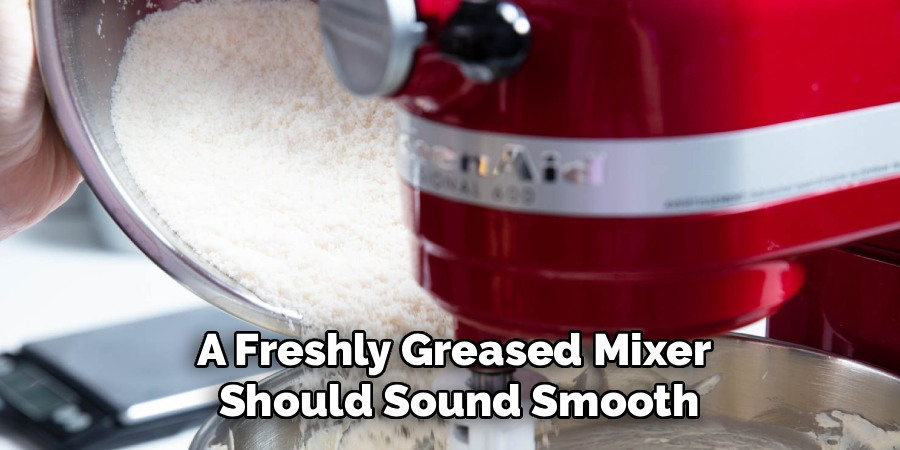
A freshly greased mixer should sound smooth and even, without grinding, clicking, or harsh whining. Feel the motor head for any unusual vibration too.
If you hear something rough, unplug it and double-check that the gears seated correctly and the screws are snug. A small fix now prevents a bigger problem later. When it hums along quietly at every speed, you’ll know your work paid off. Attach a paddle attachment and run it briefly to confirm everything meshes.
Step 9 – Wipe Down and Finish Up
You’re nearly done, so let’s make it shine. Unplug the mixer one last time and wipe the exterior with a damp cloth to remove fingerprints and stray grease.
Clean around the seams and the trim band where smudges love to hide. A dry buff afterward brings back that glossy finish.
Tidy your workspace and dispose of the old grease and dirty cloths responsibly. Return your tools to their spots so they’re ready next time.
Take a second to admire your work. Your mixer now runs smoother, sounds quieter, and should serve you well for years of baking. Jot down today’s date somewhere handy so you remember when you last serviced it, since regular care keeps this faithful machine in top shape.
Critical Mistakes When Oiling a KitchenAid Mixer
Even careful beginners stumble over a few avoidable errors, and knowing them upfront saves real headaches. The most dangerous one is forgetting to unplug the mixer before opening it. A machine that powers on with the housing off can cause nasty injuries, so always pull that plug first, every time.
Using the wrong lubricant ranks a close second. Plenty of folks grab whatever oil sits in the garage, but only food-grade grease belongs in a machine that touches your food. Regular oils can contaminate batter, drip out, or fail to protect the gears properly. Stick with the right product and nothing else.
Another common slip is overtightening the housing screws during reassembly. Cranking them down hard feels reassuring, but it strips threads and can crack the plastic housing. Snug them firmly and stop there.
Many people also overfill the gear case, thinking more grease means smoother running. Too much simply oozes out, makes a mess, and can gum up the works. A thick, even coat is all you need.
Finally, skipping the inspection step is a missed opportunity. If you ignore worn gears or grease separation, you’ll be reopening the machine far sooner than you’d like.
Expert Tips
Want professional-level results? Snap photos at every stage as you take things apart. Those reference shots make reassembly almost foolproof, especially around the gasket and gear alignment.
Warm the grease slightly in your hands before applying it. Softer grease spreads more easily into the gear teeth and gives you better coverage with less effort.
Keep a small magnet handy near your parts tray. Those tiny screws love to roll away, and a magnet rescues them fast.
Service your mixer about once a year if you bake often, or every couple of years for lighter use. Regular attention prevents the grease from drying out and separating in the first place.
And always buy a little extra food-grade grease. Having spare on hand means you’ll never stop a repair halfway just to wait on a delivery.
Frequently Asked Questions
How Often Should I Grease My Stand Mixer?
It depends on how hard you work it. Frequent bakers benefit from yearly servicing, while occasional users can stretch it to every two or three years. Watch for warning signs rather than the calendar alone:
- Grinding or whining noises during mixing
- Dark grease smears appearing on your dough
- A burning smell from the motor head
Catching these early keeps small issues from turning into costly repairs.
What Kind of Grease Should I Use?
Always choose food-grade grease made for stand mixers. It’s safe around food, holds up under heat, and protects the gears without breaking down quickly. Never substitute motor oil, cooking oil, or generic lubricants, since these can contaminate your food or fail under load. Many appliance brands sell their own approved grease, and food-safe equivalents work well too. When in doubt, match the original specification.
Can I Damage My Mixer by Doing This Myself?
You can absolutely do this safely with care. The most common risks come from rushing or skipping steps. Protect yourself and your machine by remembering a few basics:
- Always unplug before opening the housing
- Avoid overtightening screws to prevent cracks
- Use only food-grade grease in the gear case
Take photos as you go, work slowly, and the job stays well within a beginner’s reach.
Why Is There Liquid Leaking From My Mixer?
That liquid usually points to grease separation. Over time, the lubricant inside the transmission housing breaks down, and the thinner oil separates from the thicker paste. It then seeps out around the seams or the planetary mechanism. It’s a clear sign your mixer needs fresh grease. Open it up, clean out the old lubricant, and repack the gear case to stop the leaking for good.
Do I Need to Replace the Gasket When Servicing?
Not always. If the gasket stays soft, intact, and seated properly, you can reuse it. Inspect it carefully once you open the housing. Replace it if you notice cracks, hardening, or tears, since a failing gasket lets grease escape and dust creep in. Gaskets are inexpensive and easy to source, so keeping a spare on hand makes any future service quicker and cleaner.
Conclusion
Caring for your stand mixer is far easier than it might seem, and the payoff is a machine that runs smoothly for years. With a little patience and the right food-grade grease, you can handle this job yourself and skip the repair bill entirely.
Remember the simple flow: unplug the unit, open the housing carefully, inspect the gears, clean out the old lubricant, and repack the gear case with fresh grease. Then reassemble, tighten gently, test through the speed range, and wipe everything down.
The biggest lessons are to always unplug first, use only food-safe grease, and never overtighten or overfill. Those habits keep both you and your mixer safe.
Now that you know how to oil kitchen aid mixer gears properly, you’ve gained a skill that protects one of your hardest-working kitchen helpers. The next time it starts grinding or leaking, you won’t reach for the phone to call a technician. You’ll grab your screwdriver, open it up, and give it the care it deserves with your own two hands.

About
Nick Hall has spent the last seven years working at the intersection of kitchen design and home repair — first as a design assistant at a residential renovation studio, then as a freelance writer covering everything from cabinet layouts to leaky faucet fixes.
Her approach is simple: kitchens should look good and function well. That means she’s just as comfortable talking about color palettes and counter materials as she is walking readers through how to fix a wobbly cabinet hinge or troubleshoot a garbage disposal.
Nick has worked directly with homeowners on small-space kitchen makeovers, budget-conscious renovations, and the kind of everyday repairs that don’t need a contractor — just the right instructions. She writes from experience, not theory, and tests most of the fixes and tips she shares before publishing them.
When she’s not writing, Nick is usually hunting for mid-century kitchen finds at estate sales or helping friends plan their own renovations. She lives in Columbus, Ohio.