
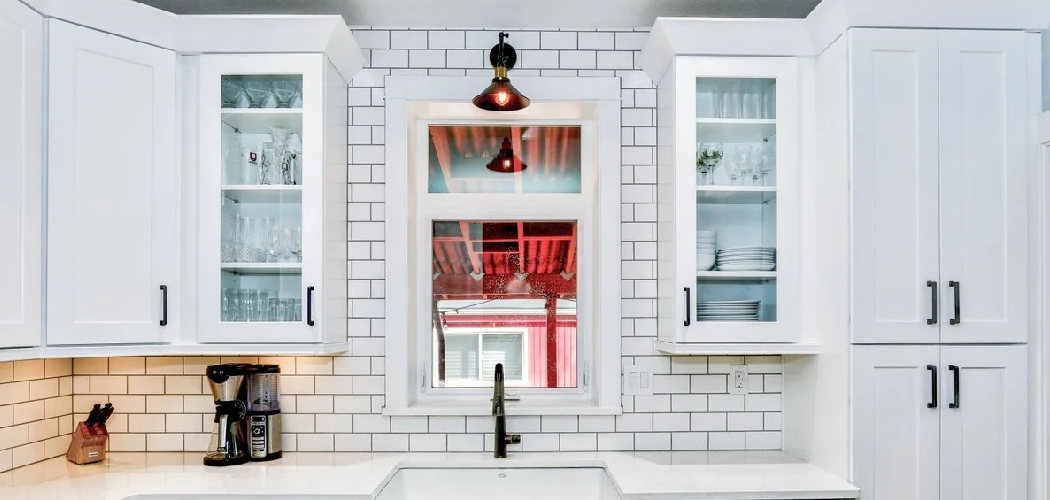
A worn, layered cabinet finish can make your whole kitchen feel tired, even when the cabinet boxes are still solid and worth saving. Learning how to strip paint from kitchen cabinets gives you a practical way to restore wood, fix uneven old coatings, and prepare the surface for a smoother new finish. It also helps you avoid common repainting problems like peeling, bubbling, and visible brush marks caused by poor prep.

If this is your first cabinet refinishing project, don’t worry. You do not need pro-level skills to get good results, but you do need patience, safe habits, and a clear process. This guide will walk you through the tools, steps, mistakes, and finishing advice you need to strip cabinet paint with confidence.
Why Stripping Paint Matters
Stripping old paint is not just about looks. It creates a clean, stable surface so your next coat of primer, stain, or paint can bond the way it should. If you paint over loose or thick old layers, the finish often fails early. You may see chips around handles, rough patches on edges, or doors that stick from paint buildup.
It also helps you uncover what you are really working with. Some cabinets are solid wood, while others are veneer or engineered wood, and each surface responds a little differently to chemicals, moisture, and sanding. Once you remove old paint, you can inspect damage, repair dents, and decide whether to repaint or stain. In short, stripping gives you a better foundation and a better final result.
Tools and Materials
Before you start, gather everything in one place so you can work steadily and safely. A chemical paint stripper made for wood is the main product, and a gel formula is often easiest for beginners because it clings well to vertical surfaces. You will also need a putty knife or paint scraper with a dull edge, protective gloves, safety glasses, drop cloths, painter’s tape, and plenty of clean rags.
You should also have a bucket of water, a scrub pad or nylon brush, and medium- and fine-grit sandpaper for cleanup after stripping. A screwdriver is essential for removing doors, hinges, and hardware. Mineral spirits or the cleaner recommended on the stripper label can help with residue. An optional but very helpful item is a small detail scraper or old toothbrush for grooves, corners, and carved trim.
Step-by-Step Guide on How to Strip Paint From Kitchen Cabinets
Step 1 – Remove Doors, Drawers, and Hardware
Start by taking every door and drawer front off the cabinet boxes. Remove hinges, knobs, pulls, catches, and any removable shelf supports. Place screws and hardware in labeled bags so you do not waste time later guessing what belongs where. This simple setup step makes the whole job easier and protects metal parts from stripper and sanding dust.

Lay each piece flat on a covered work surface if possible. A flat position helps the stripper stay in place and lowers the chance of drips running onto finished areas. Label the back of each door with painter’s tape so reassembly goes smoothly. When you create order at the start, the rest of the project feels less chaotic and far more manageable.
Step 2 – Clean Away Grease and Surface Dirt
Kitchen cabinets collect more than dust. They often hold a thin, sticky film of grease from cooking, plus food splatter and hand oils around handles and edges. If you apply stripper over grime, it can struggle to break through evenly. Wash the surfaces with a degreasing cleaner or warm water and mild soap, then wipe them dry with clean cloths.
Pay close attention to corners near the stove and upper cabinet doors around cooking zones. These areas usually feel slightly tacky when you run your hand over them. A clean surface helps the stripper contact the paint instead of the dirt sitting on top of it. It also lets you see problem spots, such as cracks, dents, or layers of old finish, before you move to the next stage.
Step 3 – Test the Stripper in a Small Area
Before coating every cabinet piece, test the product on a hidden spot, such as the back edge of a door or inside a frame. This tells you how fast it works and how the paint reacts. Some old finishes wrinkle quickly and lift in sheets, while others soften slowly and need more than one pass. Testing gives you a safer, smarter starting point.
This is also the best time to confirm that your chosen product suits your cabinet material. If you are learning how to strip paint from kitchen cabinets, a test patch can save you from overapplying stripper or scraping too aggressively. Watch for bubbling, softening, and color change. Then follow the label timing closely. A few minutes of testing can prevent a lot of avoidable damage later.
Step 4 – Apply the Paint Stripper Evenly
Brush on a generous, even coat of stripper with a cheap disposable brush or one recommended for chemical use. Do not spread it too thin. A thicker layer usually stays wet longer, which helps it penetrate multiple paint coats. Work in small sections so you can monitor the progress without rushing. Once applied, leave it alone for the full dwell time listed on the product label.
You may notice the paint begin to blister, wrinkle, or look lifted at the edges. That is the signal that the chemical is doing its job. Avoid poking at it too early. If you scrape before the paint has softened enough, you will work harder and may gouge the wood. Let the product do most of the labor for you. Patience here leads to a cleaner, easier removal process.
Step 5 – Scrape Off Softened Paint Carefully
Once the finish has loosened, use a plastic scraper or a dull metal putty knife to lift the paint. Hold the tool at a low angle and push gently with the grain of the wood whenever possible. You want to separate softened paint from the surface, not dig into the cabinet face. Thick ribbons of old coating may peel off with a damp, sticky feel.
Wipe your scraper often onto cardboard or old newspaper so you are not dragging sludge back across the wood. For profiles and trim, switch to a smaller tool or scrub pad. If the paint resists, do not force it. Apply more stripper and wait again. Much of how to strip paint from kitchen cabinets comes down to resisting the urge to rush. Slow scraping protects edges, corners, and veneer.
Step 6 – Repeat on Stubborn Layers and Details
Many cabinets have more than one old finish. You may remove the top coat only to find another color underneath, especially in older kitchens where cabinets were repainted more than once. This is normal. Apply a second round of stripper to any areas that still look coated, especially around recessed panels, bead details, and inside corners where paint tends to collect.
Detailed areas often need a different touch. A nylon brush, old toothbrush, or detail scraper can help you reach grooves without flattening decorative shapes. Work methodically and keep checking the surface in good light. Run your fingers lightly across the wood. It should feel mostly smooth, not gummy or ridged with paint. Taking extra time in these tight spots makes the finished cabinets look much more even and professional.

Step 7 – Clean Off Residue and Let the Wood Dry
After the paint is removed, you still need to clear away the leftover residue from the stripper. Follow the product directions exactly here. Some formulas need water, while others call for mineral spirits or another neutralizing cleaner. Wipe every surface thoroughly with clean rags until it no longer feels slick or sticky. Leftover residue can interfere with primer, stain, or topcoat adhesion.
Once cleaned, allow the cabinets to dry fully before sanding. This drying time matters more than many beginners realize. Damp wood fibers can swell slightly, and solvents can remain trapped in corners for hours. Set the pieces in a well-ventilated space and give them time. When dry, the surface should feel clean, dull, and stable. That is the condition you want before moving into final prep.
Step 8 – Sand Lightly for a Smooth Finish
Sanding after stripping is not about removing lots of material. It is about refining the surface. Use medium-grit sandpaper first if you still see rough patches, then move to a finer grit to smooth the wood. Sand with the grain and use a gentle hand, especially on edges and veneered panels. The goal is a flat, even feel, not a freshly reshaped surface.
As you sand, you may notice a faint dusty smell and a smoother drag under your fingertips. That is a good sign. Focus on feathering any leftover paint traces rather than grinding hard in one place. Once done, vacuum the dust and wipe with a tack cloth or damp rag. A clean, lightly sanded cabinet is now ready for the next finish, whether that is primer and paint or a clear wood treatment.
Common Mistakes
One of the biggest mistakes is skipping the cleaning stage. Cabinets may look clean, but cooking grease can block the stripper and leave random patches of stuck paint behind. Another common problem is choosing the wrong scraper or using too much force. Sharp blades and aggressive pressure can gouge wood, chip veneer, and scar detailed trim in seconds.
Many beginners also apply stripper too thinly or scrape too soon. When the product dries out before it has time to work, paint removal becomes patchy and frustrating. Rushing the timing often leads to more scraping, more mess, and more surface damage. On the other hand, leaving some products on too long can also create problems, especially if the label warns against extended dwell time.
Poor ventilation is another serious mistake. Even lower-odor products need airflow, gloves, and eye protection. Finally, some people move straight from stripping to painting without removing residue or letting the cabinets dry fully. That shortcut can ruin hours of work because new paint may fail to bond. A better result comes from respecting each stage, especially cleanup, drying, and final sanding.
Expert Tips
Work on one door or one small section at a time instead of coating everything at once. This keeps the process under control and helps you give each piece the right dwell time. Good lighting also makes a big difference. Side lighting from a work lamp helps you spot leftover paint in corners, profile edges, and grain lines that overhead light can miss.
If your cabinets have ornate details, use a gel stripper and soft brushes rather than aggressive scraping. For flat areas, let the chemical do the heavy lifting, then finish with light sanding. Keep plenty of rags nearby and change them often, because dirty rags smear residue instead of removing it. Most of all, pace yourself. Cabinet refinishing rewards steady work far more than fast work.
Frequently Asked Questions
Can I strip painted cabinets without removing them?
You can strip cabinet frames while they stay in place, but it is much easier to remove doors and drawer fronts. Working on flat pieces gives you better control and reduces drips. For the fixed cabinet boxes, use drop cloths, tape off nearby walls and counters, and work in small sections so the stripper does not run where you do not want it.
What is the best paint stripper for kitchen cabinets?
For most beginners, a wood-safe gel stripper is the easiest option. It clings to vertical surfaces, stays wet longer, and is easier to control on detailed cabinet doors. Always check the label to make sure it works on your paint type and cabinet material. A test spot is the safest way to confirm it will perform well before full application.
Do I need to sand after stripping paint?
Yes, light sanding is usually still needed after stripping. The stripper removes paint, but it often leaves behind slight roughness, raised grain, or traces of finish in small areas. Sanding smooths the surface and helps prepare it for primer, paint, or stain. Use a gentle touch so you refine the wood instead of damaging edges or veneer.
How long does it take to strip kitchen cabinets?
The timeline depends on the number of cabinets, the number of old paint layers, and the amount of detail in the doors. A small kitchen may take a weekend, while a larger kitchen can take several days. Drying time, repeat applications, and cleanup all add to the schedule. Plan for steady progress rather than trying to finish everything in one rushed session.
Is stripping better than sanding off paint?
In many cases, yes. Stripping is often safer for detailed doors and thick paint buildup because it removes layers without as much abrasion. Sanding alone can take much longer and may flatten trim or damage veneer if done aggressively. A common approach is to strip first, then sand lightly for smoothing. That combination gives you control and helps preserve the cabinet shape.
Conclusion
Stripping cabinet paint takes time, but it is one of the most effective ways to revive a tired kitchen and build a finish that lasts. The key steps are simple: remove the hardware, clean the surfaces, test your product, apply stripper with care, scrape gently, clean off residue, and sand lightly before refinishing. When you follow the process in order, the work feels much less intimidating.
If you are new to refinishing, focus on patience more than speed. Let the product work, protect the wood, and give each stage the attention it needs. That approach leads to smoother cabinet doors, cleaner edges, and fewer problems when it is time to repaint or stain. Once you understand how to strip paint from kitchen cabinets, you can take on the project with real confidence and get results that look clean, solid, and worth the effort.

About
Nick Hall has spent the last seven years working at the intersection of kitchen design and home repair — first as a design assistant at a residential renovation studio, then as a freelance writer covering everything from cabinet layouts to leaky faucet fixes.
Her approach is simple: kitchens should look good and function well. That means she’s just as comfortable talking about color palettes and counter materials as she is walking readers through how to fix a wobbly cabinet hinge or troubleshoot a garbage disposal.
Nick has worked directly with homeowners on small-space kitchen makeovers, budget-conscious renovations, and the kind of everyday repairs that don’t need a contractor — just the right instructions. She writes from experience, not theory, and tests most of the fixes and tips she shares before publishing them.
When she’s not writing, Nick is usually hunting for mid-century kitchen finds at estate sales or helping friends plan their own renovations. She lives in Columbus, Ohio.