
That trusty stand mixer has whipped your cream, kneaded your bread, and stood by you through countless batches of cookies. So when it suddenly slows down, makes a strange clicking sound, or leaks grease into your batter, it feels personal. The good news? Most problems are far simpler to solve than you’d expect.
Learning how to fix a kitchen aid stand mixer at home saves you money, spares you the hassle of shipping a heavy machine off for repair, and gives you a real sense of accomplishment. You don’t need to be a mechanic to do this. With a screwdriver, a little patience, and the right know-how, you can bring your mixer back to life. This guide walks you through the most common issues and exactly how to fix each one yourself.
Why Learning to Repair a Stand Mixer Matters
A reliable mixer is the backbone of any baking habit. When it fails, your weekend bread or birthday cake plans grind to a halt. Knowing how to repair it yourself means you’re never stuck waiting on a costly service center.
This skill shines in small spaces too. If you bake in a tiny apartment kitchen, a tucked-away studio, or even a camper with a portable power setup, you can’t always haul gear to a shop. Fixing it where it sits keeps you cooking.
It also stretches the life of equipment you already love. A well-maintained stand mixer can last decades, and many of its parts are cheap and easy to swap. Once you understand how the motor housing, gears, and speed lever work together, you’ll handle hiccups with calm confidence instead of panic.
Tools and Materials You’ll Need
Round up your supplies before you start so you’re not searching mid-repair with the mixer half open.
- A set of flathead and Phillips screwdrivers
- A pin punch and a drift punch (for removing pins on the planetary)
- A small hammer to tap the punches
- Food-safe grease for relubricating the gear case
- Clean rags and paper towels for wiping old grease
- A multimeter to test for power loss
- Replacement parts if needed, like a worm gear or carbon brush
- A small container to hold screws and pins
- Optional: a magnetic parts tray to keep tiny hardware from rolling off your counter
That tray seems minor, but losing a single screw under the fridge can stall your whole afternoon.
Step-by-Step Guide on How to Fix a Kitchen Aid Stand Mixer
Step 1 – Unplug and Diagnose the Problem
Safety first, every time. Pull the plug from the wall before you touch a single screw. An accidental start while your hands are near the beater is exactly what you want to avoid.
Now play detective. Turn the speed lever and listen closely. A clicking sound often points to a stripped worm gear. A slipping beater that won’t catch suggests an attachment hub or planetary issue. Total silence usually means power loss, which a multimeter can confirm at the cord and switch.
Run the machine briefly, if it works at all, and note exactly what feels or sounds wrong. Pinning down the symptom now saves you from opening parts that don’t need touching. Knowing how to fix a kitchen aid stand mixer starts with a clear diagnosis.
Step 2 – Check the Power and Speed Control
If your mixer won’t turn on, the culprit is often electrical, not mechanical. Inspect the cord for fraying or kinks first, since a damaged cord is a common and cheap fix.
Touch your multimeter probes to the cord ends to test for continuity. No reading means the cord needs replacing. If the cord checks out, the trouble may sit in the speed control plate inside the housing.
A mixer that races at full speed or won’t change pace often has a misaligned or dirty speed control plate. Sometimes a gentle adjustment screw tweak restores normal behavior. You’ll feel the speed lever respond more smoothly once it’s set right. Address these simple electrical points before diving deeper into the motor and gears.
Step 3 – Open the Motor Housing
With power confirmed or ruled out, it’s time to look inside. On a tilt-head model, you’ll find screws hidden beneath trim bands or behind a cover at the rear. Remove them carefully and drop each one into your parts tray.
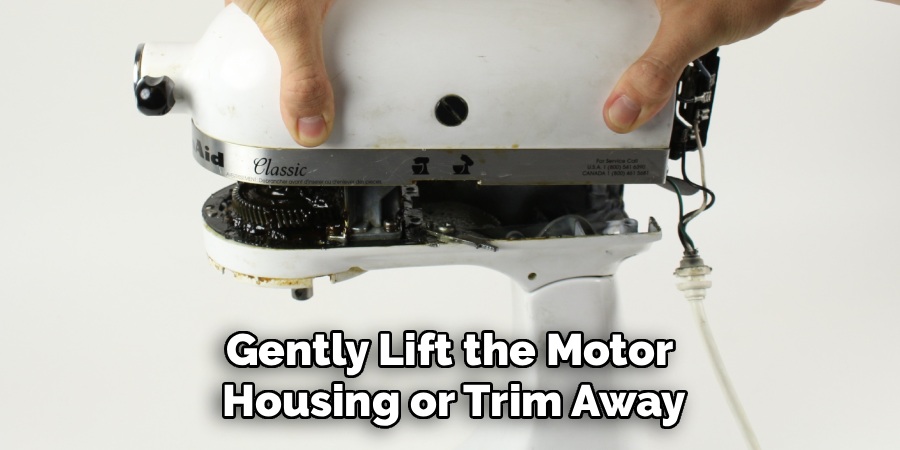
Gently lift the motor housing or trim away. You’ll likely catch a whiff of old grease and see darkened lubricant coating the gears. That’s normal on a well-used machine.
Go slow here. Wires connect the housing to the switch, so don’t yank anything free. Note how each piece sits before you separate it, or snap a quick photo. A clear mental map now makes reassembly far less stressful when you reach the final steps.
Step 4 – Inspect and Replace the Worm Gear
The worm gear is the heart of many mixer problems. It’s designed to strip and fail before the expensive motor does, acting like a built-in safety fuse. So if you heard clicking or grinding, this part is your prime suspect.
Look for chewed, rounded, or missing teeth on the gear. Damaged teeth confirm your diagnosis. Slide the worn gear out and compare it against your replacement part to be sure they match.
Wipe away the old grease around the gear case as you work. The smell can be sharp, and the texture often turns gritty with age. Seat the new worm gear firmly into place. This single swap revives more mixers than any other repair you’ll do.
Read More: How to Clean Grease Off Kitchen Walls
Step 5 – Clean Out Old Grease and Relubricate
Old grease is one of the sneakiest mixer killers. Over years, it dries, separates, and can even melt and leak down into your bowl. Scoop and wipe out every bit of the old lubricant from the gear case.
Use a rag and a plastic scraper to reach into the corners. You’ll notice the difference between fresh grease and the hardened, discolored stuff you’re removing.
Pack in fresh food-safe grease, coating all the gears and moving surfaces generously. Don’t skimp, but don’t overflow the case either. Proper lubrication keeps the transmission running quietly and smoothly. This step alone can erase a noisy, struggling mixer and make it feel brand new again the moment you power it back up.
Step 6 – Check the Carbon Brushes
If your motor runs weakly or sparks, worn carbon brushes may be to blame. These small blocks press against the motor’s spinning core to pass electricity, and they wear down naturally over years of use.
Locate the brushes on either side of the motor, usually held by small caps or screws. Slide them out and measure their length. Brushes worn down shorter than a quarter inch need replacing.
You’ll see a curved tip where each brush met the motor. Pop in fresh brushes if needed, making sure they slide freely in their channels. New brushes restore strong, steady power. This fix is common on older bowl-lift model machines that have logged thousands of mixing hours in busy kitchens.
Step 7 – Address Mixer Head Wobble and Attachment Fit
A wobbly mixer head or beater that won’t sit snug is frustrating and messy. On a tilt-head model, the hinge pin or locking lever may have loosened over time. Tighten the hinge screws to firm up the head.
If your beater rides too high or low in the bowl, you’ll see uneven mixing or hear it scrape the bottom. Adjust the bowl height screw, turning it slightly until the beater clears by about the width of a dime.
For attachment hub issues, check that the planetary and shaft turn freely without grinding. A loose attachment fit often traces back to worn parts inside. Snug everything down and test the planetary movement by hand before closing things up.
Step 8 – Reassemble and Test Everything
Now bring it all back together. Reverse your earlier steps, guiding wires back into place and seating the motor housing without pinching anything. Drive each screw in snugly, but don’t overtighten and crack the casing.
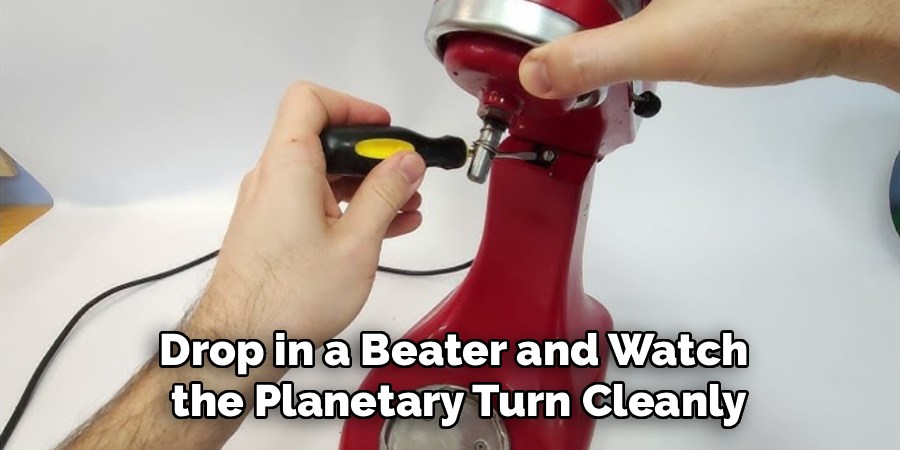
Once it’s sealed, plug the mixer in and stand back. Run it through every speed slowly, listening for smooth, even humming instead of clicks or grinding.
Drop in a beater and watch the planetary turn cleanly around the bowl. Feel for any wobble and confirm the speed lever shifts gears without hesitation. If it runs quiet and strong, you’ve done it. That’s the full process for how to fix a kitchen aid stand mixer, and your machine is ready for its next batch.
Critical Mistakes When Fixing a Stand Mixer
The most dangerous mistake is leaving the mixer plugged in while you work. It only takes one accidental bump of the speed lever for the beater to spring to life near your fingers. Always unplug first, no exceptions.
Another frequent error is using the wrong lubricant. Regular automotive or household grease can melt, leak into your food, or fail to protect the gears properly. Stick strictly to food-safe grease made for mixers, since the wrong type can ruin both the machine and your next bake.
Many beginners also force the planetary pins out with too much muscle or the wrong tool. Hammering wildly bends shafts and cracks housings. Use a proper pin punch and drift punch, tapping gently and steadily until the pin slides free.
People often replace the motor when a cheap worm gear is the real problem. That gear is built to fail first and save the motor, so check it before assuming the worst. Finally, don’t lose track of your screws and small parts. Mixing up hardware during reassembly leaves you with mystery pieces and a head that wobbles. A simple parts tray prevents this headache entirely.
Expert Tips
Take photos at every stage as you disassemble your mixer. When it’s time to put everything back, those pictures become your personal repair manual, showing exactly where each wire and screw belongs.
Order your replacement parts before you open the machine if you already suspect the issue. That way you won’t leave your mixer in pieces for a week while a worm gear ships.
Clean as you go. Wiping away old grease the moment you reach it keeps your hands and workspace tidy, which makes delicate steps far easier.
Finally, don’t fear the planetary pins. They look intimidating, but with a drift punch and light hammer taps, they come out smoothly. Match your replacement gear to the model number stamped under the machine to guarantee a perfect fit every single time.
Frequently Asked Questions
Why does my stand mixer make a clicking sound?
A clicking sound almost always points to a worn or stripped worm gear inside the gear case. This gear is intentionally made of softer material so it fails before the costly motor does. Open the motor housing, inspect the gear teeth, and look for rounded or missing edges. Swapping in a fresh worm gear typically silences the clicking and restores smooth, strong mixing right away.
Is it safe to repair my mixer myself?
Yes, as long as you take basic precautions. Always unplug the machine before opening it, and keep your workspace organized. Most repairs involve simple mechanical parts rather than complex wiring. That said, call a professional if:
- You smell burning or see scorched wires
- The motor itself is clearly damaged
- You’re uncomfortable working with electrical components
For gears, grease, and brushes, though, DIY is very achievable.
What kind of grease should I use?
Always use food-safe grease specifically rated for stand mixers. Regular grease can melt at operating temperatures, leak into your food, or fail to protect the metal gears. Food-safe grease stays stable, lubricates the transmission properly, and keeps everything running quietly. You can find the correct type online or through appliance parts suppliers. Never substitute automotive grease, since it isn’t designed for contact near food.
Why does my beater scrape the bottom of the bowl?
This usually means your bowl height needs adjusting. Look for a small adjustment screw near the hinge on a tilt-head model. Turn it slightly to raise or lower the beater. The classic test is the dime trick: a dime placed in the bowl should just barely move when the beater turns. Adjust until you reach that sweet spot, and the scraping stops.
How long should a stand mixer last?
With proper care, a quality stand mixer can easily last 15 to 20 years or more. The key is regular maintenance, like relubricating the gears every few years and replacing worn parts promptly. Because so many components are cheap and replaceable, these machines rarely need full replacement. Treat yours well, fix small issues early, and it will serve your kitchen for decades.
Conclusion
Bringing your mixer back to life is more rewarding than you might think. You start by unplugging and diagnosing the symptom, then check the power and speed control before opening the motor housing. From there you inspect the worm gear, clean out the old grease and relubricate, check the carbon brushes, tighten any head wobble, and finally reassemble and test every speed.
The big lessons are simple: always unplug first, use only food-safe grease, reach for the right punches instead of brute force, and check the cheap worm gear before blaming the motor. Keep your screws organized and snap photos along the way, and the whole job becomes surprisingly smooth.
Now that you know how to fix a kitchen aid stand mixer from start to finish, there’s no need to pay for repairs or replace a machine you love. Grab your screwdriver, clear some counter space, and give your faithful mixer the care it deserves. One good repair, and you’ll be back to baking with confidence in no time.

About
Nick Hall has spent the last seven years working at the intersection of kitchen design and home repair — first as a design assistant at a residential renovation studio, then as a freelance writer covering everything from cabinet layouts to leaky faucet fixes.
Her approach is simple: kitchens should look good and function well. That means she’s just as comfortable talking about color palettes and counter materials as she is walking readers through how to fix a wobbly cabinet hinge or troubleshoot a garbage disposal.
Nick has worked directly with homeowners on small-space kitchen makeovers, budget-conscious renovations, and the kind of everyday repairs that don’t need a contractor — just the right instructions. She writes from experience, not theory, and tests most of the fixes and tips she shares before publishing them.
When she’s not writing, Nick is usually hunting for mid-century kitchen finds at estate sales or helping friends plan their own renovations. She lives in Columbus, Ohio.