

Replacing a kitchen sink can feel like a big project when you have never worked with plumbing or countertops before. You may be looking at the sink cutout, drain opening, faucet holes, supply lines, and mounting clips and wondering where to start. The good news is that most basic sink installations follow a clear order, and you can handle the job with simple tools, careful measurements, and patience.
Learning how to install a new kitchen sink gives you more control over small home upgrades and helps you understand the parts under your countertop. You do not need to rush or guess. This guide walks you through the full process, from preparing the cabinet space to sealing, fastening, connecting, and testing your new sink.
Why Learning Kitchen Sink Installation Matters
Kitchen sink installation is a useful skill for more than everyday home improvement. If you camp often, use a cabin kitchen, upgrade an RV sink, or build an outdoor prep station, the same basic ideas apply. You need a stable sink, a sealed rim, a working drain, and safe water connections.
This skill also helps when you set up a utility sink in a garage, laundry area, shed, or outdoor wash zone. You learn how to check the countertop, fit the basin, protect the cabinet space, and prevent water damage.
Even if you call a plumber for complex work later, knowing the process helps you spot problems early. The key takeaway is simple: a well-installed sink makes any cooking, washing, or cleanup area cleaner, safer, and easier to use.
Tools and Materials You’ll Need
Gather your tools before you remove the old sink or open the new box. A smooth installation depends on having the right parts within reach, especially when you are working in a tight cabinet with water lines nearby. Check the sink instructions as well, because mounting hardware can vary by sink style.
- New kitchen sink
- Faucet and drain assembly
- Sink flange or basket strainer
- Plumber’s putty
- Silicone sealant
- Mounting clips and screws
- Adjustable wrench
- Screwdriver
- Utility knife
- Tape measure
- Level
- Bucket or shallow pan
- Clean rags or paper towels
- Flashlight
- Optional convenience item: painter’s tape to mark the sink position before sealing
Make sure the sink matches the existing sink cutout before you begin.
Step-by-Step Guide on How to Install a New Kitchen Sink
Step 1 – Shut Off Water and Clear the Cabinet

Start by turning off the hot and cold shutoff valves under the sink. Turn the faucet on for a few seconds to release pressure and confirm the water has stopped. Place a bucket under the supply lines and drain area because old fittings often hold a little water.
Clear everything from the cabinet space so you can move freely. Cleaning bottles, trash bags, and stored pans can block your view and make the job harder. Wipe the floor of the cabinet dry so new drips are easy to spot later.
This first step may feel slow, but it protects your home. A dry, open workspace gives you better control and helps prevent rushed mistakes.
Step 2 – Remove the Old Sink and Fixtures
Disconnect the supply lines from the faucet using an adjustable wrench. Then loosen the drain connections and remove the trap if it blocks access. Keep the bucket in place because the drain pipe may release dark, stale water with a sharp smell.
Look under the countertop for mounting clips. Loosen each clip until the sink no longer grips the underside of the counter. Cut through the old caulk bead around the sink rim with a utility knife, working slowly so you do not scratch the countertop.
Lift the old sink straight up if possible. If it sticks, gently work around the edge again with the knife. Avoid prying hard, since laminate, stone, and solid-surface counters can chip.
Step 3 – Clean and Check the Sink Cutout
Once the old sink is out, clean the countertop around the sink cutout. Scrape away old silicone sealant, plumber’s putty, dried caulk, and dirt. The surface should feel smooth under your fingers, not gritty or raised.

Set the new sink into the opening without sealant to test the fit. This dry fit is one of the most important parts of how to install a new kitchen sink because it shows whether the basin sits flat before you commit. Check that the faucet holes face the right direction and that the rim covers the cutout evenly.
Use a level across the sink rim. A small gap or wobble can lead to a poor seal, so fix fit problems before moving forward.
Step 4 – Install the Faucet and Drain Parts
It is usually easier to install the faucet before the sink goes into the countertop. Set the faucet through the faucet holes and tighten the mounting hardware from below. Keep the faucet centered so the handles and spout look straight from the front.
Next, prepare the drain opening. Roll plumber’s putty into a soft rope and press it around the underside of the sink flange or basket strainer. Set the flange into the drain opening, then tighten the gasket and nut from below until the fitting feels snug.
Wipe away extra putty that squeezes out around the drain. The metal should sit flat and clean, with no thick clumps around the edge.
Step 5 – Apply Sealant and Set the Sink
Lift the sink out after the dry fit and place it upside down on a soft towel if needed. Apply a steady caulk bead of silicone sealant around the underside of the sink rim. Keep the bead even, not too thin and not so thick that it creates a messy squeeze-out.
Now lower the sink into the opening. Move slowly and aim straight down so you do not smear sealant across the countertop. Press around the rim with firm, even pressure until the sink settles into place.
Stand back and check the alignment from the front edge of the counter. The sink should look centered, square, and level before the sealant starts to skin over.
Step 6 – Tighten the Mounting Clips
Go under the sink and locate the mounting clips. These clips pull the sink rim tight against the countertop and help keep the seal stable. Start each clip by hand so it catches properly before you tighten it.
Work in a balanced pattern instead of tightening one side fully at once. Tighten a clip on the front, then one on the back, then move to each side. This spreads pressure around the rim and helps the sink sit flat.
This is another key moment in how to install a new kitchen sink because uneven clip pressure can twist the basin or break the seal. Tighten until secure, but avoid forcing screws past resistance.
Step 7 – Connect the Drain and Supply Lines
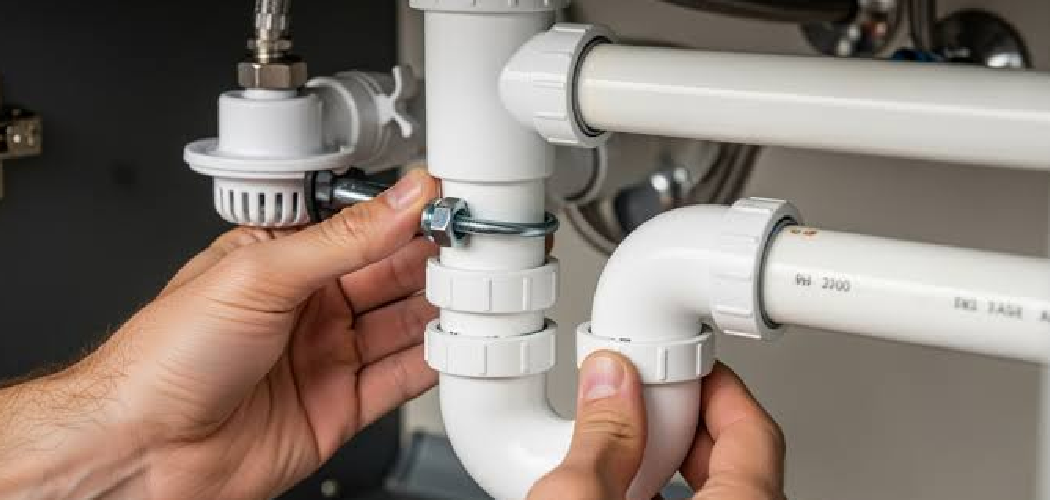
Reconnect the drain assembly under the sink. The tailpiece, trap, and drain pipe should line up naturally without pulling or bending. If the parts sit at an angle, loosen the slip nuts and adjust the alignment before tightening them again.
Connect the hot and cold supply lines to the faucet. Thread each line by hand first to avoid cross-threading, then use a wrench for a small final turn. Do not overtighten, especially on braided lines or plastic fittings.
Check that the shutoff valves remain closed while you work. The space may feel cramped, and you may hear tools tapping against the cabinet wall, but slow movements prevent damaged fittings.
Step 8 – Run a Full Water Test
Turn the shutoff valves on slowly and watch the supply line connections. If you see a bead of water forming, turn the valve off and tighten the fitting slightly. Dry the area with a rag so you can tell whether the leak returns.
Run the faucet at low flow, then high flow. Watch the drain, sink flange, trap, and supply lines. Fill the basin a few inches, then release the water all at once to test the drain under heavier flow.
Look around the rim where the sink meets the countertop. The silicone should stay smooth and dry. Once the water test shows no leaks, wipe the sink clean and let the sealant cure according to the product directions.
Common Mistakes When Installing a New Kitchen Sink
One common mistake is skipping the dry fit. A sink may look close to the right size but still fail to sit flat in the cutout. If the rim rocks, the clips pull unevenly, or the basin presses against the countertop edge, the seal can fail after regular use.
Another mistake is using too much silicone sealant or applying it unevenly. A thick, messy bead can squeeze out around the rim and still leave weak spots underneath. Use a steady bead and clean the excess before it dries.
Many beginners also overtighten mounting clips. It feels safe to make every screw as tight as possible, but too much force can bend thin stainless steel, crack some sink materials, or stress the countertop. Secure is enough.
Forgetting to check faucet holes before setting the sink can also cause frustration. Some sinks have one hole, while others have three or four. Match the sink to your faucet, sprayer, soap dispenser, or cover plate before applying sealant.
Finally, rushing the water test can hide small leaks. Let water run long enough to test both the supply lines and the drain path.
Expert Tips
Read the sink manufacturer’s instructions before you start, even if the installation seems basic. Drop-in, undermount, farmhouse, stainless steel, granite composite, and cast iron sinks can use different clips, sealants, or support methods.
Protect the countertop while you work. Lay down towels when handling tools, and ask another person to help lift a heavy sink. A second set of hands makes alignment easier and reduces the chance of chipped edges.
Keep old parts nearby until the new sink passes the water test. You may need to compare fittings, reuse a working supply line, or match the drain size at the hardware store.
If the shutoff valves are corroded, dripping, or frozen in place, stop and fix them before continuing. Good valves make the whole project safer.
Frequently Asked Questions
Can a Beginner Install a Kitchen Sink?
Yes, a beginner can install a basic drop-in kitchen sink with careful planning and the right tools. The job becomes harder if the countertop needs cutting, the plumbing is damaged, or the sink is very heavy. Work slowly, follow the sink instructions, and test every water connection before storing items under the cabinet again.
How Long Does It Take to Install a New Sink?
A simple replacement often takes two to four hours for a first-time installer. Removing the old sink, cleaning old sealant, fitting the new sink, and testing for leaks all take time. The project may take longer if drain parts do not line up, shutoff valves are stuck, or the countertop opening needs adjustment.
Do I Need Plumber’s Putty or Silicone Sealant?
You may need both, but they serve different jobs. Plumber’s putty often seals the sink flange or basket strainer at the drain opening. Silicone sealant usually seals the sink rim to the countertop. Always check the product instructions because some sink materials, drain parts, or stone surfaces may require a specific sealant.
What If My New Sink Does Not Fit the Countertop Cutout?
Stop before applying sealant or tightening clips. Measure the sink cutout and compare it with the sink template or product instructions. If the opening is too small, the countertop may need careful trimming. If it is too large, the sink rim may not seal safely, and you may need a different sink size.
Should I Replace the Faucet at the Same Time?
Replacing the faucet during sink installation often makes sense because access is easier before the sink is fully secured. It also lets you match faucet holes, supply lines, and accessories at the same time. If your current faucet is newer and fits the new sink, you can reuse it after checking the seals and hardware.
Conclusion
A new sink can refresh your kitchen, utility area, cabin, RV, or outdoor prep station without turning the project into a major remodel. The work comes down to a clear sequence: shut off the water, remove the old sink, clean the cutout, dry fit the new basin, install the faucet and drain parts, seal the rim, fasten the clips, and run a careful water test.
Take your time with the details that protect against leaks. A smooth countertop surface, steady silicone bead, straight supply lines, snug drain connections, and even mounting pressure all matter.
Now that you know how to install a new kitchen sink, you can approach the project with calm, practical confidence. Start with the right measurements, keep your workspace dry, and let the final water test confirm that your installation is ready for everyday use.

About
Nick Hall has spent the last seven years working at the intersection of kitchen design and home repair — first as a design assistant at a residential renovation studio, then as a freelance writer covering everything from cabinet layouts to leaky faucet fixes.
Her approach is simple: kitchens should look good and function well. That means she’s just as comfortable talking about color palettes and counter materials as she is walking readers through how to fix a wobbly cabinet hinge or troubleshoot a garbage disposal.
Nick has worked directly with homeowners on small-space kitchen makeovers, budget-conscious renovations, and the kind of everyday repairs that don’t need a contractor — just the right instructions. She writes from experience, not theory, and tests most of the fixes and tips she shares before publishing them.
When she’s not writing, Nick is usually hunting for mid-century kitchen finds at estate sales or helping friends plan their own renovations. She lives in Columbus, Ohio.