
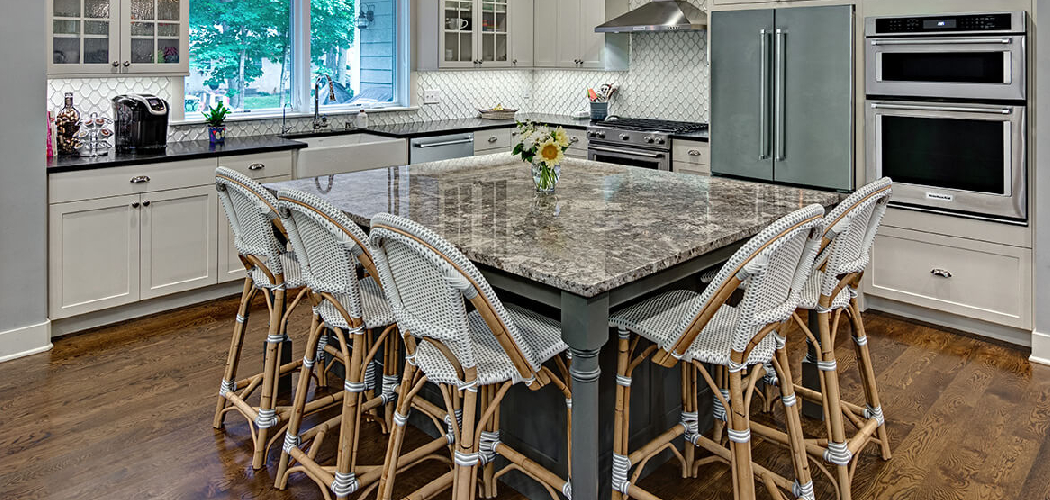
A worn kitchen table can make the whole room feel tired, even if everything else looks clean and updated. The good news is that you do not need advanced woodworking skills or a big budget to give it a fresh look. Learning how to paint a kitchen table is one of the most useful beginner DIY projects because it can transform a high-use piece of furniture in a weekend.

With the right prep, paint, and patience, you can create a finish that looks smooth, holds up to daily meals, and fits your style. This guide will walk you through each stage so you can paint your table with confidence and get lasting results.
Why Painting Your Table Matters
Painting your kitchen table does more than improve its color. It gives new life to a piece you already own, which often costs far less than buying a new table. If your current table is sturdy but scratched, faded, or outdated, paint can help it match your kitchen without a full remodel.
This project also gives you more control over the final look. You can choose a classic white finish, a bold black top, a soft farmhouse tone, or a modern two-tone design. Beyond style, repainting helps protect the surface from moisture, food spills, and everyday wear when you use the right primer, paint, and sealer. It is a practical DIY job that builds confidence and makes a real difference in a room you use every day.
Tools and Materials You’ll Need
Before you start, gather your supplies so the project moves smoothly from prep to final coat. Most of these items are easy to find at a hardware store or home center.
- Drop cloth or plastic sheeting
- Screwdriver for removing hardware or detached parts
- Degreasing cleaner or mild dish soap
- Microfiber cloths or lint-free rags
- Sandpaper in medium and fine grits, or a sanding sponge
- Tack cloth or vacuum with brush attachment
- Wood filler for dents or small cracks
- Stain-blocking or bonding primer
- Furniture paint, cabinet paint, or durable interior enamel
- High-quality angled brush
- Small foam roller for smooth, even coats
- Paint tray
- Protective topcoat such as polyurethane or polycrylic
- Gloves and a dust mask
Optional for convenience: a paint sprayer can speed up the job and create a very smooth finish if you already know how to use one.
Step-by-Step Guide on How to Paint a Kitchen Table
Step 1 – Choose the Right Paint System
Start by deciding what kind of finish you want and how much wear your table gets. A kitchen table deals with heat, moisture, crumbs, sticky fingers, and frequent wiping, so durability matters more than wall-paint color selection. Look for furniture paint, cabinet paint, or a hard-curing enamel designed for surfaces that get heavy use.
Also think about sheen. Satin and semi-gloss are popular because they wipe clean more easily than flat finishes and still hide minor flaws better than a high gloss. If your table has a very dark stain, glossy coating, or unknown old finish, plan to use a bonding primer first. Good results come from using products that work together, not from rushing to open the prettiest can of paint.
Step 2 – Set Up a Clean, Safe Work Area
Pick a space with good airflow, steady light, and enough room to move around all sides of the table. A garage, covered porch, or well-ventilated room works well if you can protect the floor. Lay down a drop cloth and make sure dust, pet hair, and debris are kept to a minimum.

If possible, remove chairs and other items nearby so you are not squeezed into a corner while painting. Take off any hardware or detachable leaves and label them if needed. This is also the stage where many beginners first think seriously about how to paint a kitchen table without making a mess, and the answer is simple: give yourself space, protect the area, and keep supplies within easy reach. A calm setup makes the rest of the project easier.
Step 3 – Clean Every Surface Thoroughly
Even a table that looks clean can hold grease, hand oils, food residue, and polish buildup. If you paint over that layer, the finish may separate, bead up, or peel later. Wash the table carefully with a degreasing cleaner or mild soap and warm water, especially around edges, legs, and the apron where grime tends to collect.
Use a cloth to scrub, then wipe again with clean water to remove leftover cleaner. Let the table dry fully before moving on. Pay attention to corners and decorative details, because trapped moisture can interfere with primer and paint adhesion. This step may feel basic, but it sets the tone for the whole project. A clean surface gives sanding and priming a real chance to do their job.
Step 4 – Sand for Better Adhesion
Sanding helps the new finish grip the old surface instead of sliding over it. You do not always need to strip the table down to bare wood, but you do need to dull any shiny topcoat and smooth out rough areas. Start with a medium grit if the finish is slick or damaged, then follow with a finer grit for a more even feel.
Run your hand across the tabletop as you work. You want it to feel lightly roughened, not deeply scratched. If the table has dents, gouges, or cracks, fill them after the first sanding and sand again once the filler dries. When you finish, remove all dust with a vacuum, tack cloth, or slightly damp rag. Paint laid over sanding dust often feels gritty and looks cloudy.
Step 5 – Prime the Table the Right Way
Primer is the layer that helps paint stick, blocks old stains, and creates a more even base color. It matters even more if your table has a glossy finish, strong wood tone, or past damage. Apply a thin, even coat with a brush for corners and detail areas, then use a foam roller on broad flat sections like the top.
Do not overload the roller. Thick primer can pool along edges and leave texture you will later need to sand down. Let the primer dry according to the product directions, then lightly sand it with fine grit paper for a smoother finish. Wipe away the dust before painting. This stage may not look exciting, but it is where your final finish starts to look more professional and less like a rushed weekend fix.
Step 6 – Apply the First Coat of Paint
Once the primer is dry and smooth, start your first paint coat with patience. Stir the paint well, but avoid shaking it if possible because trapped air can cause bubbles. Begin with the legs, edges, and detailed spots using a brush, then roll the tabletop and other wide areas in long, even passes.
Keep your coat thin. It is better to apply two or three light coats than one heavy coat that drips, streaks, or stays soft. Watch the surface as you work. Fresh paint should look wet and even, not thick and ridged. If you are learning how to paint a kitchen table for the first time, this is the moment to trust the process. The first coat often looks a little patchy, and that is normal. Coverage builds with each layer.
Step 7 – Sand Lightly and Add More Coats
After the first coat dries, inspect the table in good light. You may notice faint brush marks, raised grain, or a few tiny dust specks. A light sanding with fine grit paper smooths those issues without removing the paint. Use a gentle touch, then wipe the surface clean again before the next coat.
Apply the second coat just as carefully as the first, keeping your strokes and roller passes consistent. In many cases, two coats will be enough, but lighter colors over dark wood may need a third. Let each layer dry fully before adding another. This patience is what creates a finish that feels smooth under your hand and looks solid from every angle. Rushing between coats often leads to tackiness, dragging, or visible texture.

Step 8 – Seal and Cure for Daily Use
A kitchen table takes more abuse than many painted furniture pieces, so a protective topcoat is often worth the extra time. Choose a clear finish that works with your paint type, such as water-based polycrylic for lighter colors or polyurethane for stronger protection. Apply it in thin coats and follow the drying instructions closely.
The table may feel dry to the touch within hours, but curing takes longer. That means the finish is still hardening, even if it looks done. Avoid heavy use, hot dishes, and harsh cleaning products during this period. Set the table where air can circulate and let it rest as long as the label recommends. A little restraint now helps prevent dents, scratches, and sticking place mats later.
Common Kitchen Table Painting Mistakes
One of the most common mistakes is skipping prep because the table looks “good enough.” Paint does not hide grease, furniture polish, or glossy residue very well, and those layers can stop paint from bonding. Another frequent problem is under-sanding or not removing sanding dust. The result is often a rough surface that looks uneven once the light hits it.
Many beginners also apply coats that are too thick. Heavy paint can drip along edges, dry with visible texture, and stay soft longer than expected. Thin, controlled coats almost always produce a stronger and smoother finish. A related issue is not waiting long enough between coats. When paint has not dried properly, the next layer can drag, clump, or peel.
Using the wrong products causes trouble too. Wall paint alone is usually not durable enough for a kitchen table, and some topcoats can yellow or react poorly with certain paints. Finally, people often forget about cure time. A table may look finished in a day, but if you start using it too soon, plates, placemats, and cleaning cloths can mark the surface before it fully hardens.
Expert Tips
For the smoothest finish, work in a clean space during mild weather. High humidity, strong wind, or extreme heat can affect drying time and surface texture. If you notice brush marks, switch to a better-quality brush or use a foam roller on flat areas to level the paint.
Test your full paint system on the underside of the table or a hidden spot first. That small step can save you from color surprises or adhesion issues. If your table gets heavy daily use, choose a slightly darker color or a mid-tone finish because it tends to hide crumbs, scuffs, and minor wear better than bright white. Most of all, slow down. The best painted tables usually come from careful prep and dry time, not from advanced skill.
Frequently Asked Questions
Do I have to sand a kitchen table before painting it?
Yes, in most cases you should sand before painting. Sanding helps dull the old finish so primer and paint can grip the surface better. You do not always need to strip the wood completely, but you should remove shine and smooth damaged spots. Even when using bonding products, light sanding usually leads to better adhesion and a more even final result.
What kind of paint works best on a kitchen table?
A durable furniture paint, cabinet paint, or interior enamel made for high-use surfaces works best. These paints cure harder than standard wall paint and stand up better to wiping, spills, and daily wear. Satin and semi-gloss are popular because they clean easily and resist moisture better than flat finishes while still looking soft and attractive.
Should I use a brush or roller to paint the table?
Use both if you want the best balance of control and smooth coverage. A brush works well for corners, turned legs, and detailed edges. A small foam roller is great for the tabletop because it helps spread paint evenly and reduces brush marks. If you work carefully, this combination creates a cleaner, more professional-looking finish.
Do I need a topcoat after painting?
In many cases, yes. A kitchen table is a hard-working piece of furniture, so a clear protective topcoat adds durability. It helps resist scratches, water rings, food spills, and frequent cleaning. If your paint already has a strong built-in finish, check the label first, but many painted tables last longer and look better with a compatible sealer on top.
How long should I wait before using the table again?
You can often touch the surface within hours, but full use should wait until the paint and topcoat have cured. That can take several days or even longer depending on the product, temperature, and humidity. During that time, avoid heavy dishes, hot pans, and scrubbing. Waiting a little longer helps protect the finish from dents, peeling, and surface marks.
Conclusion
Painting a kitchen table is one of those projects that feels simple on the surface but rewards careful work at every stage. When you clean thoroughly, sand properly, use the right primer and paint, and allow enough drying and curing time, you can turn an old table into a durable centerpiece that looks fresh and custom-made. The process is beginner-friendly, but the result can look surprisingly polished.
If you have been putting off this project because you were unsure how to paint a kitchen table, start with the basics and take it one step at a time. Focus on prep, apply thin coats, and do not rush the finish. A table that once looked scratched, dull, or outdated can become one of the best-looking pieces in your kitchen. Gather your supplies, clear your workspace, and give your table a second life with confidence.

About
Nick Hall has spent the last seven years working at the intersection of kitchen design and home repair — first as a design assistant at a residential renovation studio, then as a freelance writer covering everything from cabinet layouts to leaky faucet fixes.
Her approach is simple: kitchens should look good and function well. That means she’s just as comfortable talking about color palettes and counter materials as she is walking readers through how to fix a wobbly cabinet hinge or troubleshoot a garbage disposal.
Nick has worked directly with homeowners on small-space kitchen makeovers, budget-conscious renovations, and the kind of everyday repairs that don’t need a contractor — just the right instructions. She writes from experience, not theory, and tests most of the fixes and tips she shares before publishing them.
When she’s not writing, Nick is usually hunting for mid-century kitchen finds at estate sales or helping friends plan their own renovations. She lives in Columbus, Ohio.